SonixTouch Q+ Service Manual 00.053.204, Revision A Chapter 7: Field Service Components
7-17
7.3 REPLACING THE MODULO
Modulo Servicing has been divided into two separate sections.
This, the first section deals with the modulo as a discreet entity.
The second section (7.4) enables qualified service personnel to deal with Front Block/Ultrasound Module Servicing.
For details on removing the modulo, refer to 7.3.1.
7.3.1 Removing the Modulo
Although not all service tasks necessitate the removal of the modulo, there are times when removal is required.
Equipment/Tools Required:
• 10mm socket wrench
• 7mm socket wrench
• #2 Phillips screwdriver
• 4mm Allen key.
To Remove the Modulo:
1. Ensure the system is powered down, unplugged and all transducers have been disconnected.
2. Remove both side shrouds (7.2.5).
3. Undo all modulo cables/connections on the System Case Connectivity Panel, cutting cable ties only as needed.
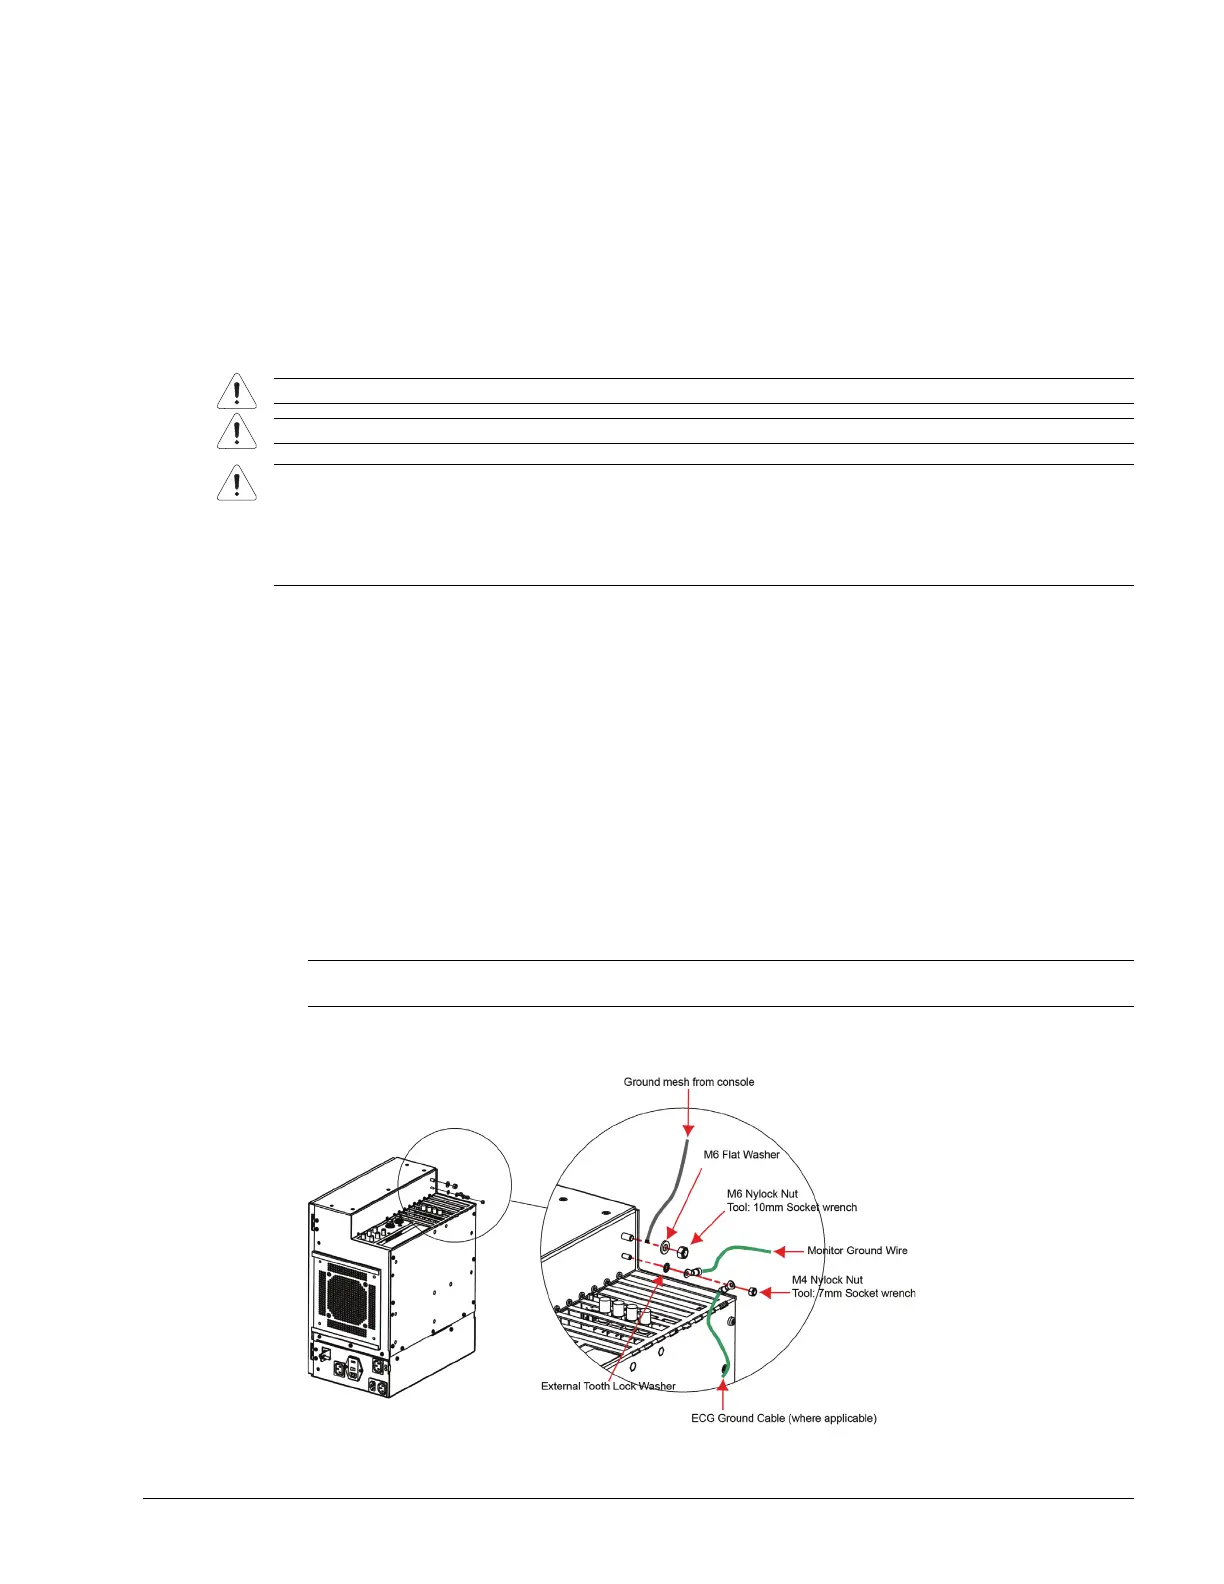
4. Using the 10mm socket wrench, undo the nut and washer securing the grounding mesh from the modulo to the
console.
5. Using the 7mm wrench, undo the nut and washer securing the ground wire from the modulo to the LCD display
and, if applicable, to the ECG (refer to image in step 4).
Warning: Do not perform any internal system maintenance if the UPS breakers are turned on.
Caution: Always wear a grounding strap when opening and working inside the modulo.
Cautions:
Before removing the modulo, ensure that User Data and Patient/Exam data have been exported (7.1.1 and 7.1.3)
or backed up (7.1.5).
If the modulo is to be removed from the customer site, ensure the hard drive is dealt with properly in order to
preserve Patient/Exam data privacy.
Note: Due to the number of connections involved in this and the next few steps, Ultrasonix recommends
marking the location of all unlabeled wires/cables by labeling them with masking tape.