HP10E / HP12E / HP15E / HP20E - Dairy design 8. Maintenance
8-9© VEMAG 2013
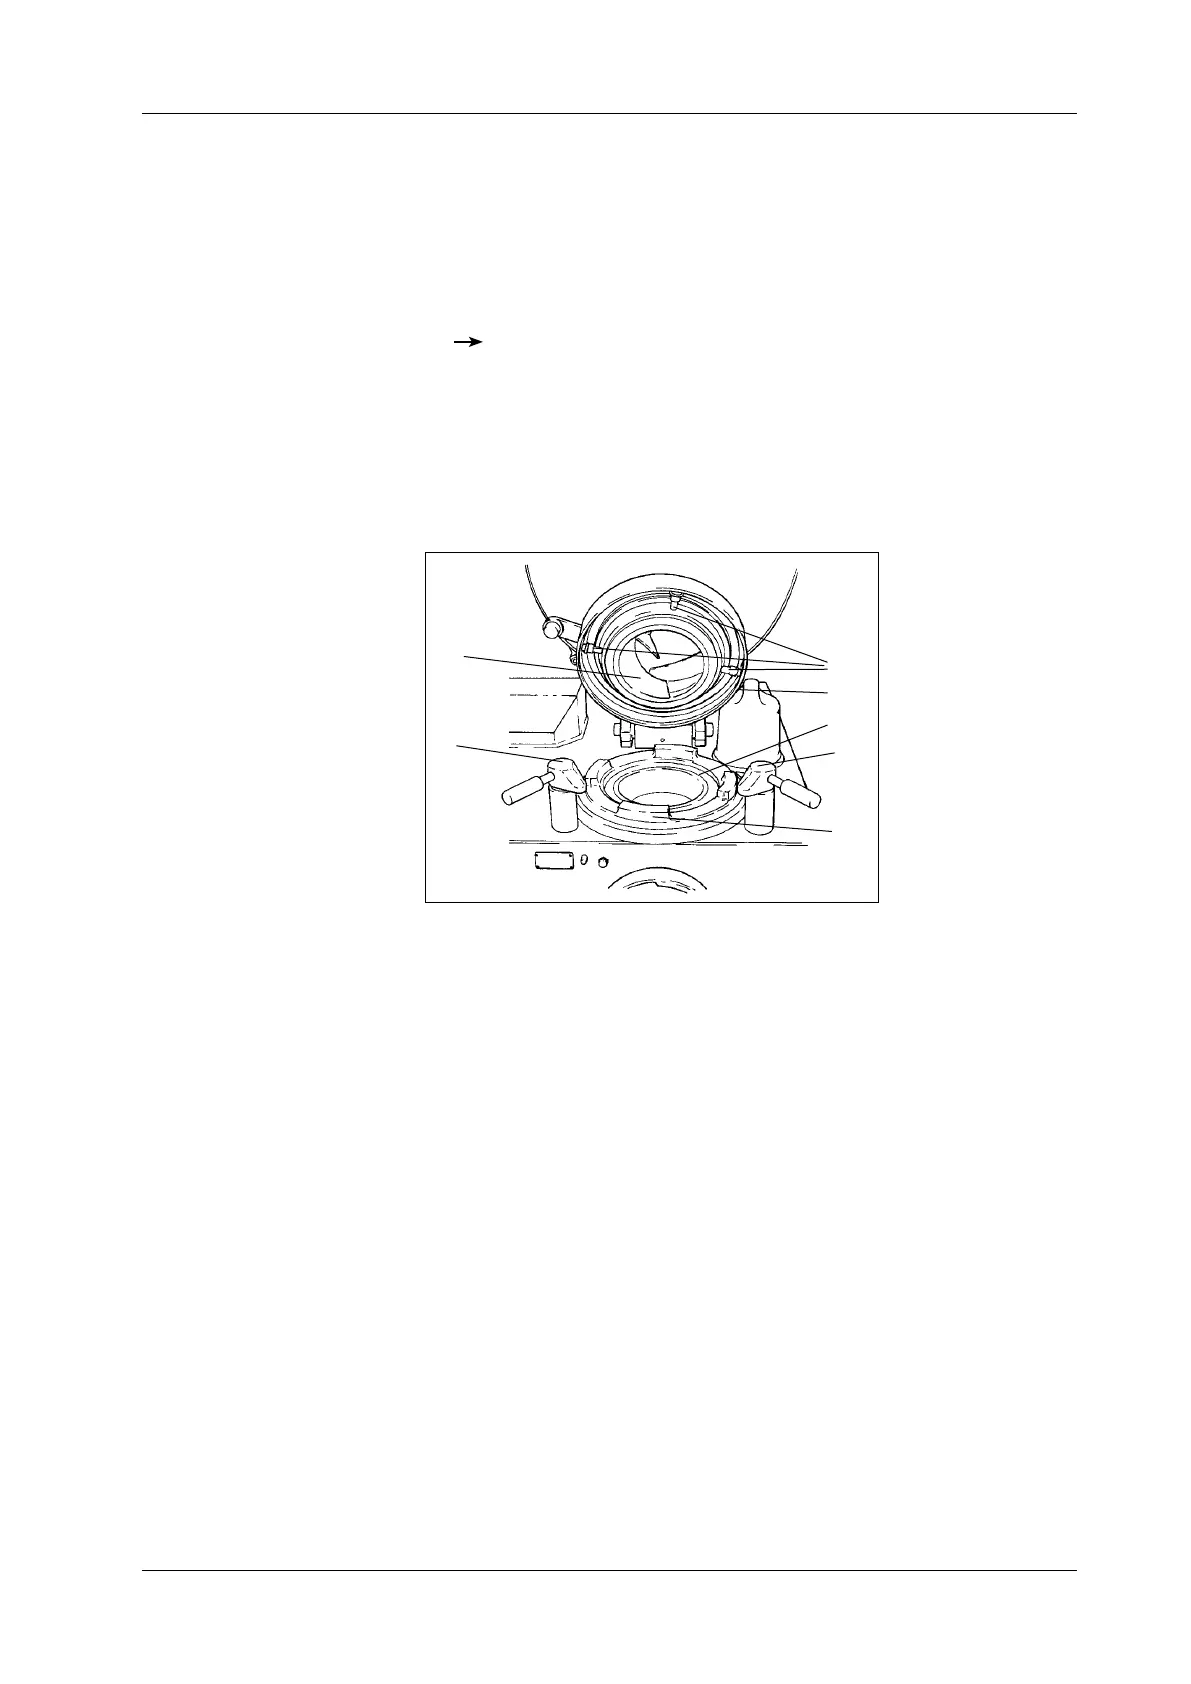
• Guide the feed screw (1) into the hopper in such a way that the three
sliding sleeves (2) are located behind the shoulder (3) of the hopper
ange.
• Push the sliding sleeves outwards so that they engage behind the
shoulder, holding the feed screw steady with the other hand.
• Carefully press the sealing ring into the appropriate groove in the hop-
per insert. Fit the sealing ring without greasing it.
Section 7.2.6
• Lubricate the sealing ring (4) in the hopper insert by hand.
• Turn the feed screw so that the sliding sleeves can engage in the
recesses of the catch ring (5).
• Close the hopper and lock the two locking levers (6) on the hopper
housing.
1 Feed screw
2 Sliding sleeves
3 Shoulder
4 Sealing ring
5 Catch ring
6 Locking levers
Fig. 8-8
Lubricating the feed unit
seals
6
6
2
1
3
5
4