Maintenance3303−4/A2
Winterthur Gas & Diesel Ltd.
4/ 6
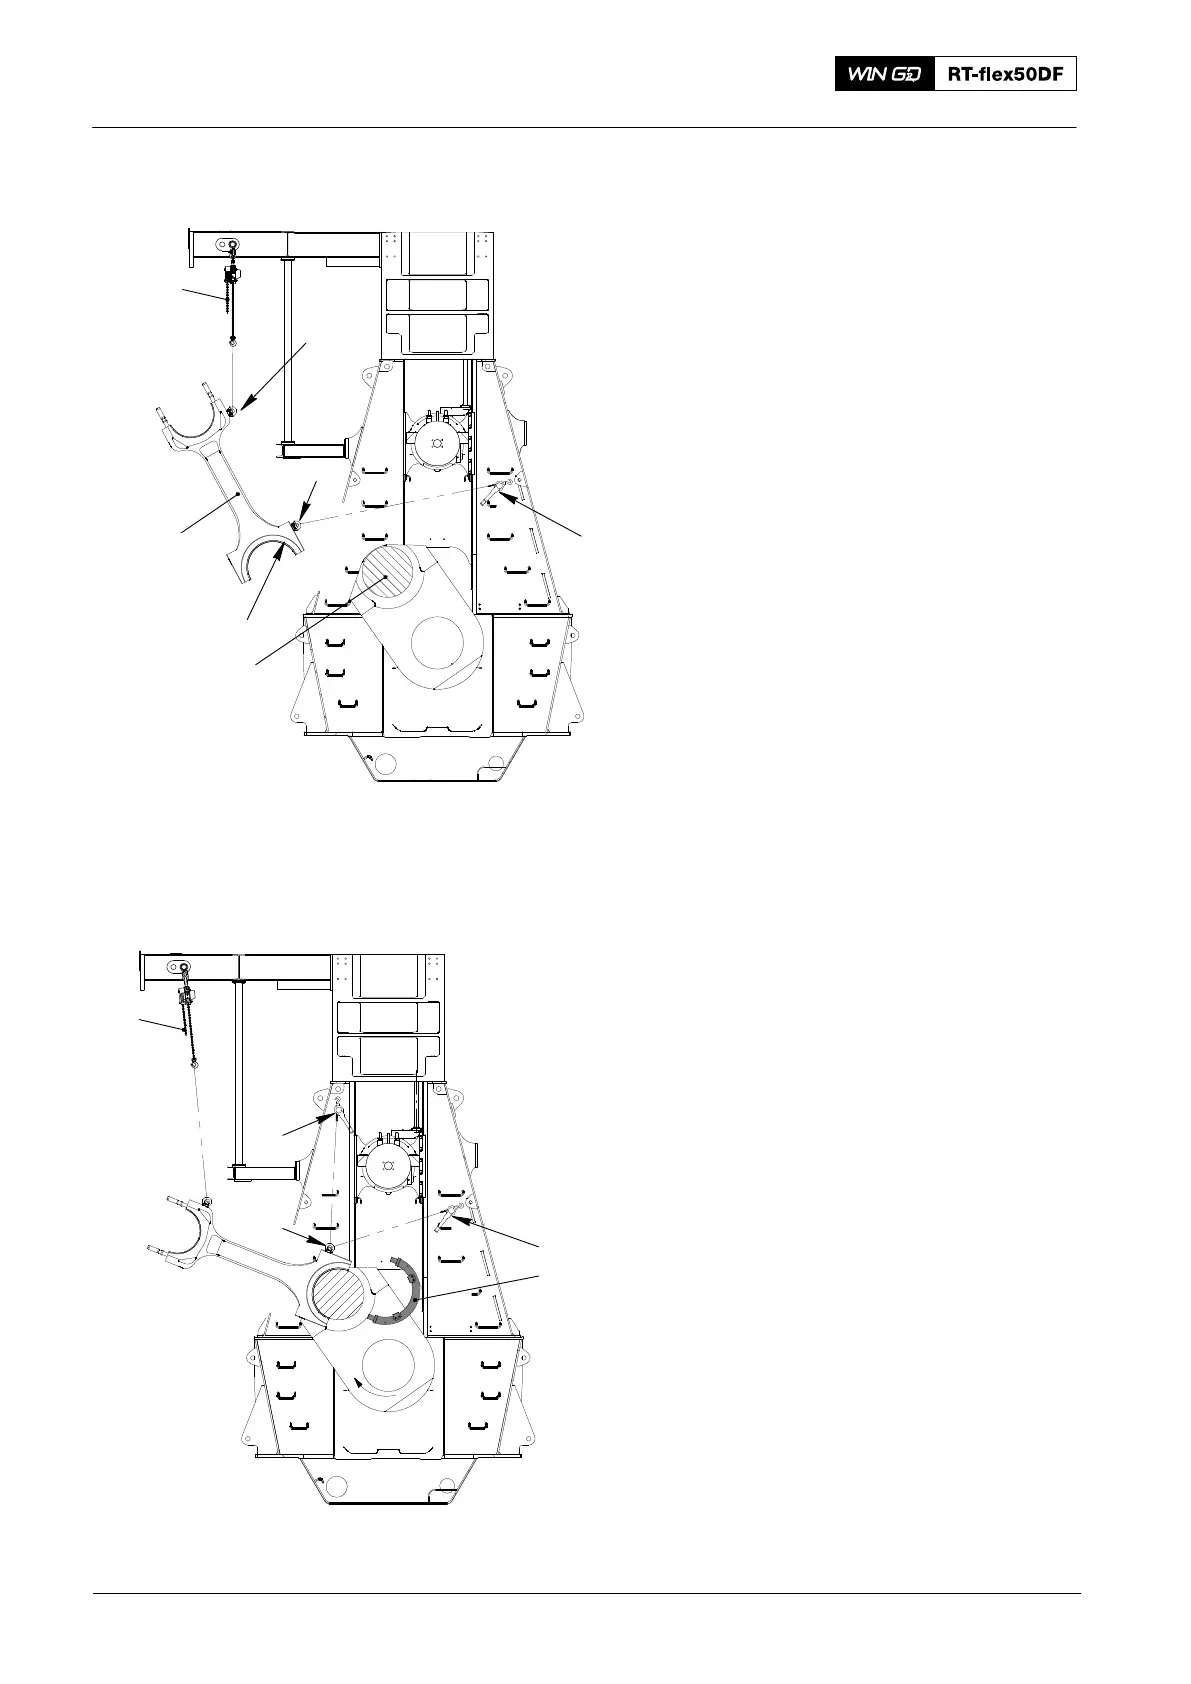
4. Installation
1) Make sure that the mark FUEL SIDE
on the connecting rod (3, Fig. 6) points
to the fuel side of the engine.
2) Put oil on the bearing shell (2) and the
crank pin (1).
3) Attach the chain block (H5) to the eye
bolt (EB2)
4) Attach the manual ratchet (H2) to the
eye bolt (EB3).
Note: When you do step 5), make sure
that you do not cause damage to
the bearing shell or the crank pin.
5) Operate carefully the chain block (H5,
Fig. 7) and the manual ratchet (H2) to
move the connecting rod (3) to the
crank pin (1).
6) Attach the manual ratchet (H1) to the
eye bolt (EB3).
7) Attach the holder (94331) to the
connecting rod.
2016
Fig. 6
H2
H5
Fig. 7
H2
94331
EB3
H1
013.037/05a
013.037/05a
2
1
3
EB2
FUEL SIDE
H5
EB3