Maintenance3403−1/A1
Winterthur Gas & Diesel Ltd.
4/ 9
14) Before you move the crank to TDC,
make sure that:
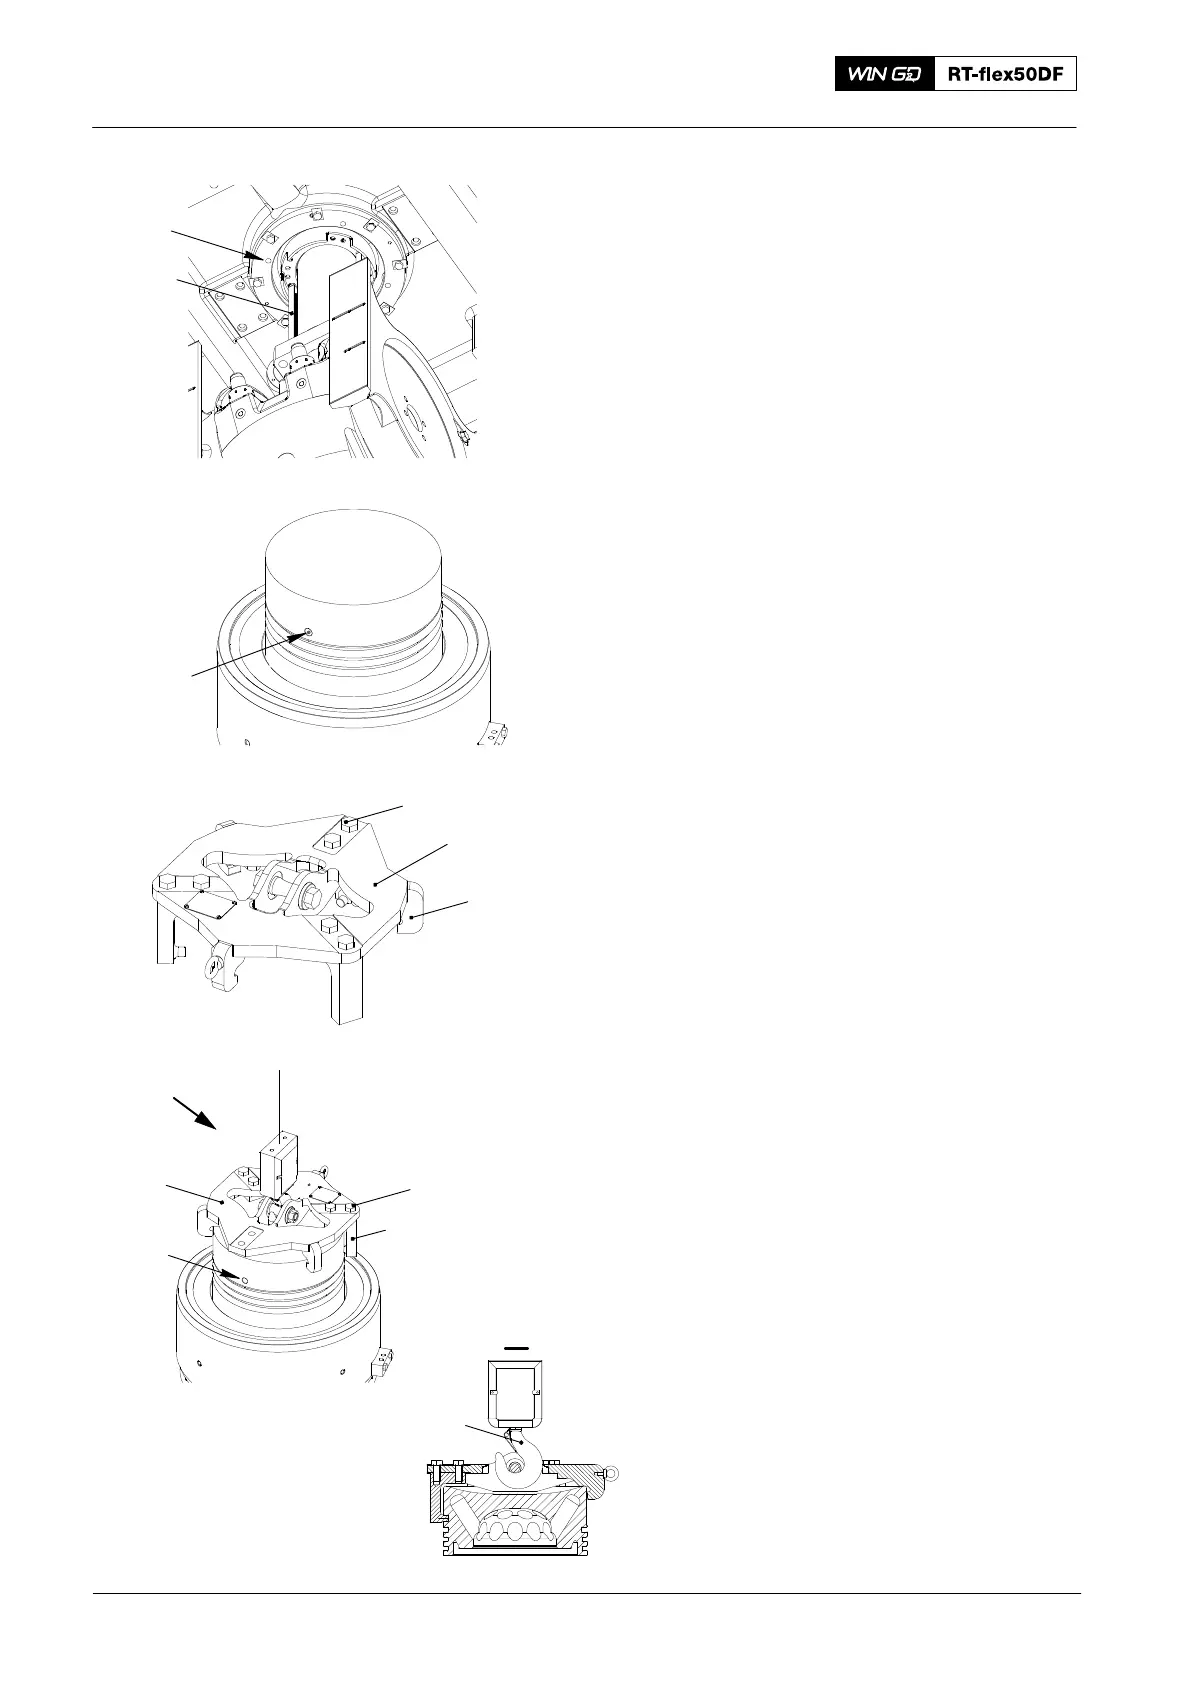
D The four inner bolts (1, Fig. 8) are
removed.
D The distance pieces (94345) are in
line with the gland box.
Note: When you do step 15), the piston
moves up and the the distance
pieces (94230) move the gland box
up.
15) Operate the turning gear to carefully
move the piston to TDC.
16) Clean the three holes (1, Fig. 9) in the
piston crown.
17) Make sure that the tool (94341, Fig. 10)
is clean.
18) Remove the six bolts (1) and the three
brackets (2).
19) Apply Molykote paste G−n to the
threads of the six bolts (1).
20) Attach the crane hook (4, Fig 11) to the
lifting tool (94341).
21) Carefully lower the tool (94341) on to
the piston crown. Make sure that the
grooves for the brackets (2) align with
the holes in the piston crown (3).
Note: To help you align the brackets (2),
first attach one bracket to the
tool (94341).
22) Attach the three brackets (2) to the
tool (94341) with the six bolts (1). Make
sure that the brackets fully engage in
the holes in the piston crown (3).
23) Torque the six screws (1) to 85 Nm.
Piston: Removal and Installation
2016
94345
Fig. 8
1
1
WCH03082
Fig. 9
Fig. 10
1
2
94341
94341
1
I
WCH03299
Fig. 11
3
I
4
2