ENGINE
B2420, WSM
1-S49
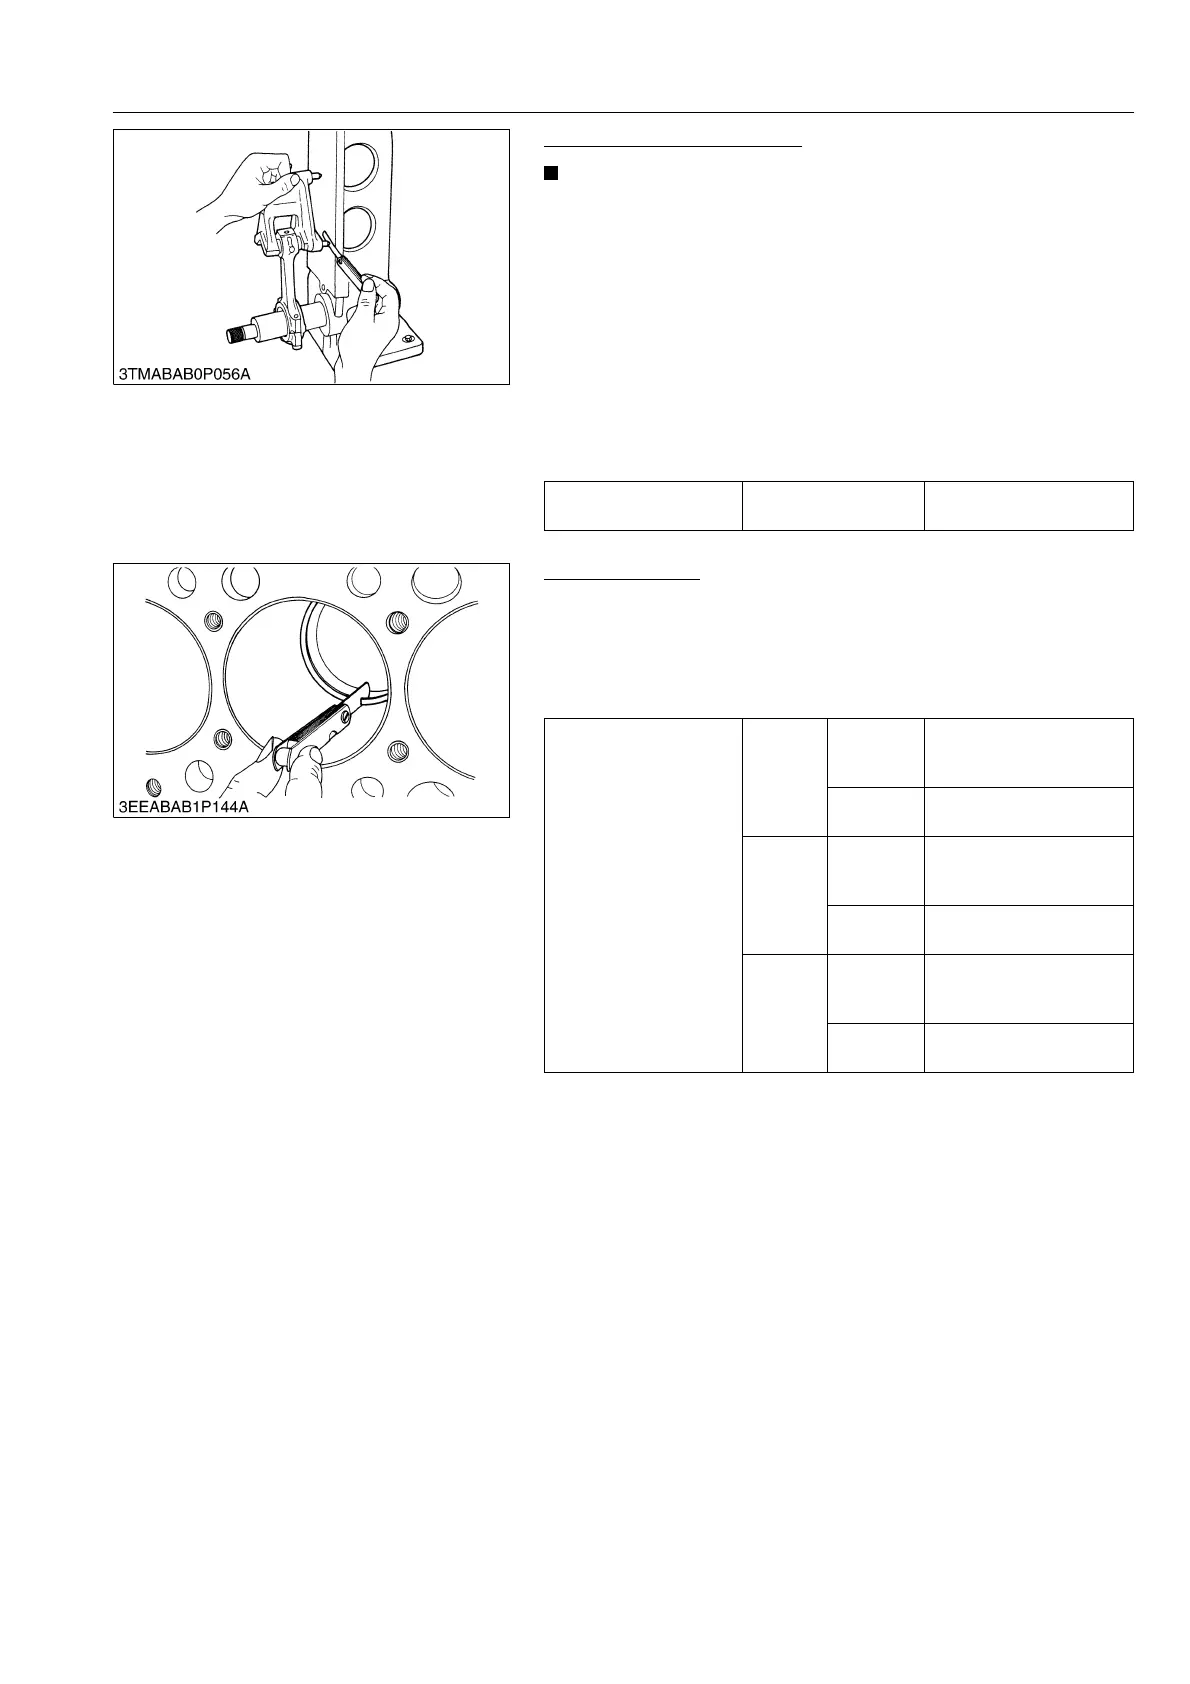
Connecting Rod Alignment
• Since the I.D. of the connecting rod small end bushing is
the basis of this check, check bushing for wear
beforehand.
1. Install the piston pin into the connecting rod.
2. Install the connecting rod on the connecting rod alignment tool.
3. Put a gauge over the piston pin, and move it against the face
plate.
4. If the gauge does not fit squarely against the face plate,
measure the space between the pin of the gauge and the face
plate.
5. If the measurement exceeds the allowable limit, replace the
connecting rod.
9Y1210436ENS0085US0
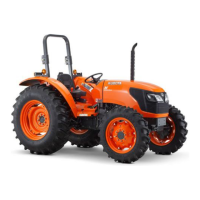
Piston Ring Gap
1. Insert the piston ring into the lower part of the cylinder (the least
worn out part) with a piston.
2. Measure the ring gap with a thickness gauge.
3. If the measurement exceeds the allowable limit, replace the
piston ring.
9Y1210436ENS0086US0
Connecting rod
alignment
Allowable limit
0.05 mm
0.002 in.
Piston ring gap
Top ring
Factory
specifica-
tion
0.30 to 0.45 mm
0.012 to 0.017 in.
Allowable
limit
1.25 mm
0.0492 in.
Second
ring
Factory
specifica-
tion
0.30 to 0.45 mm
0.012 to 0.017 in.
Allowable
limit
1.25 mm
0.0492 in.
Oil ring
Factory
specifica-
tion
0.25 to 0.40 mm
0.0099 to 0.015 in.
Allowable
limit
1.25 mm
0.0492 in.


 To Next Page