HYDRAULIC SYSTEM
B2420, WSM
8-S9
[2] PREPARATION
(1) Hydraulic Pump
• The hydraulic pump is precision machined and assembled: If disassemble once, it may be unable to
maintain its original performance. Therefore, when the hydraulic pump fails, replacement should be
carried out with the hydraulic pump assembled except when emergency repair is unavoidable.
• When repair is required, follow the disassembly and servicing procedures shown below with utmost care.
• Be sure to test the hydraulic pump with a flowmeter before disassembling.
• After reassembly, be sure to perform break-in operation and ensure that there is nothing abnormal with
the hydraulic pump.
9Y1210436STS0009US0
Removing Hydraulic Pump
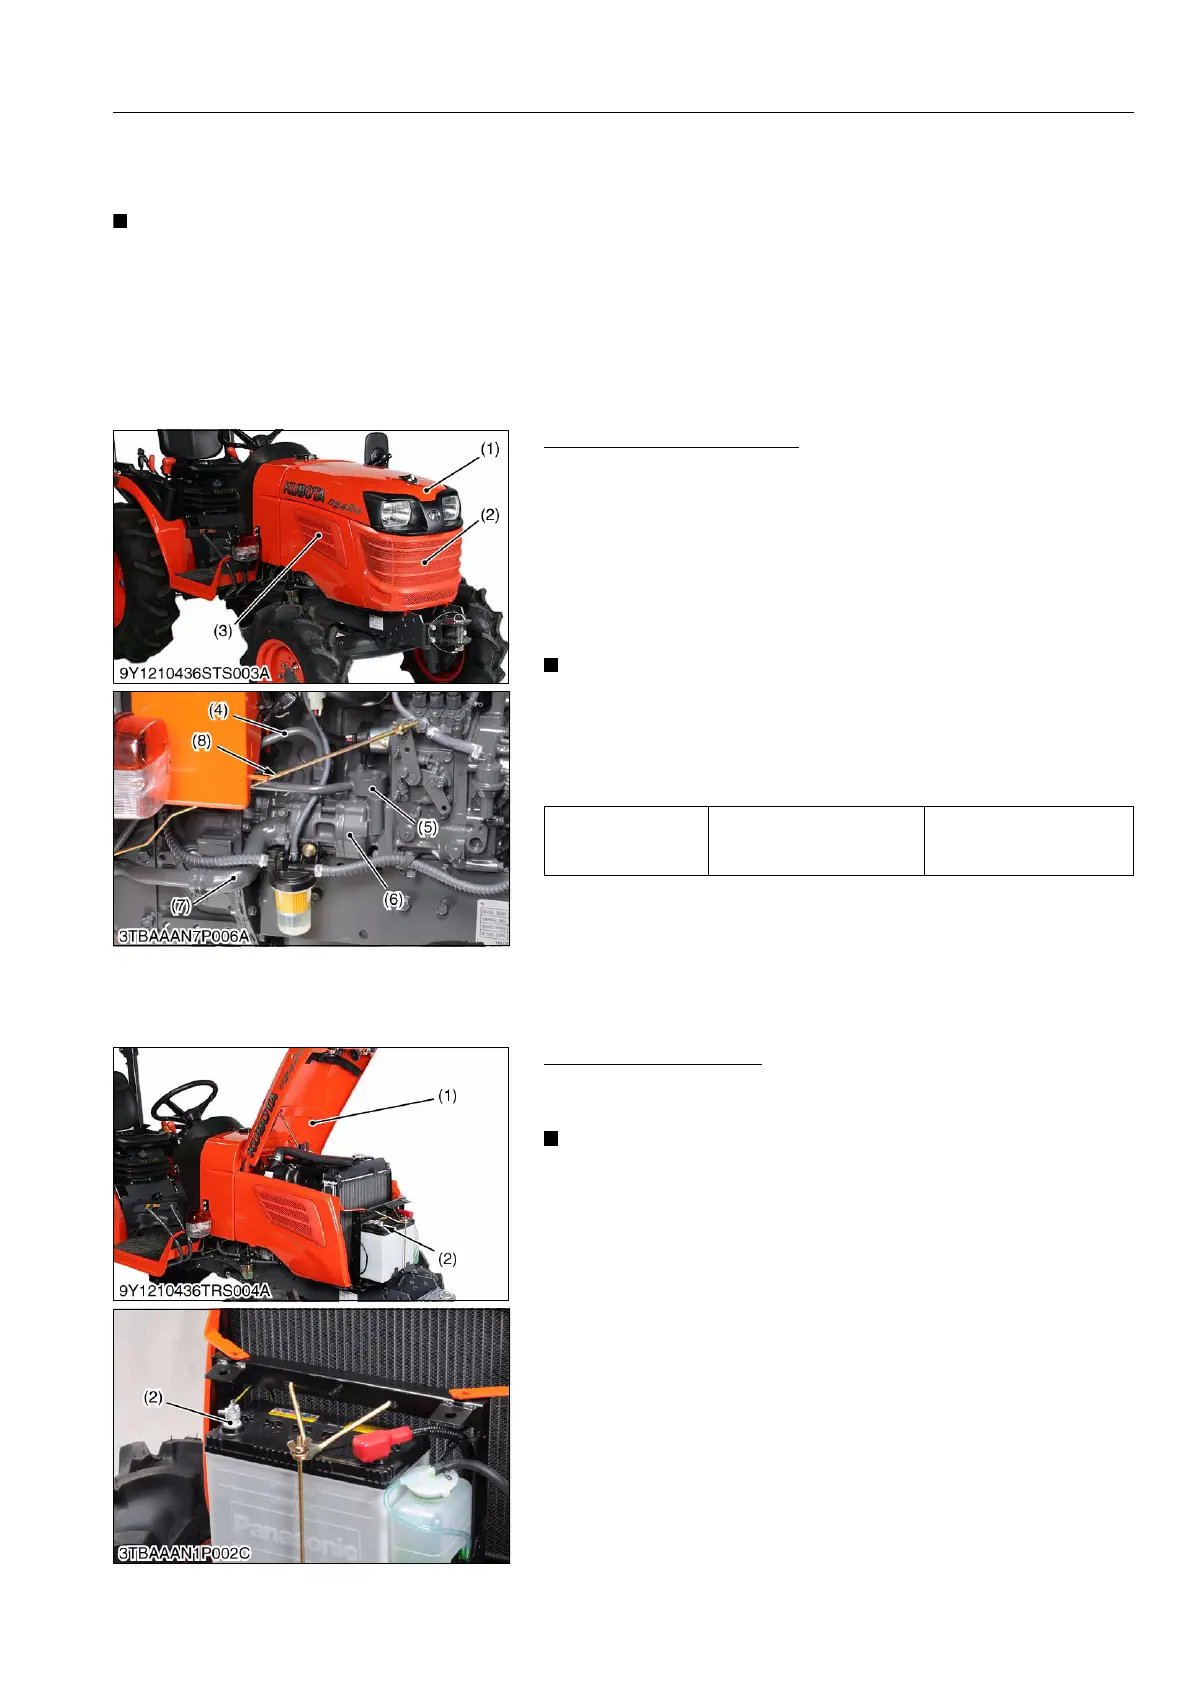
1. Open the bonnet (1) then remove the front grille (2), side cover
(R.H.) (3) and disconnect the battery negative cable.
2. Disconnect the accelerator rod (8).
3. Disconnect the power steering delivery pipe (4) and 3-point
hitch delivery pipe (5).
4. Disconnect the suction hose (7) and remove the hydraulic pump
(6).
(When reassembling)
• For fastening hydraulic pipe nut, use two wrenches. Hold
the fitting with a wrench, turn the pipe nut another wrench
to avoid damage at fitting installed part.
• When disconnecting battery cables, disconnect the
negative cable first. When connecting, positive cable first.
9Y1210436STS0010US0
(2) Hydraulic Cylinder and Control Valve
Battery Negative Cable
1. Open the bonnet (1) and remove the front grille.
2. Disconnect the battery negative cable (2).
• When disconnecting the battery cables, disconnect the
negative cable (2) first. When connecting, the positive
cable first.
9Y1210436TRS0009US0
Tightening torque
Power steering delivery
pipe nut
65 to 75 N·m
6.7 to 7.6 kgf·m
48 to 55 lbf·ft
(1) Bonnet
(2) Front Grille
(3) Side Cover (R.H.)
(4) Power Steering Delivery Pipe
(5) 3-Point Hitch Delivery Pipe
(6) Hydraulic Pump
(7) Suction Hose
(8) Accelerator Rod
(1) Bonnet (2) Battery Negative Cable


 To Next Page