CHAPTER FIVE
5-16
Selecting a Project
The instrument defaults to Proj 1 until a project is downloaded
or manually entered. When using multiple projects, you must
select the correct location before measuring a sample. The auto
standard function does not recognize standards across multiple
projects.
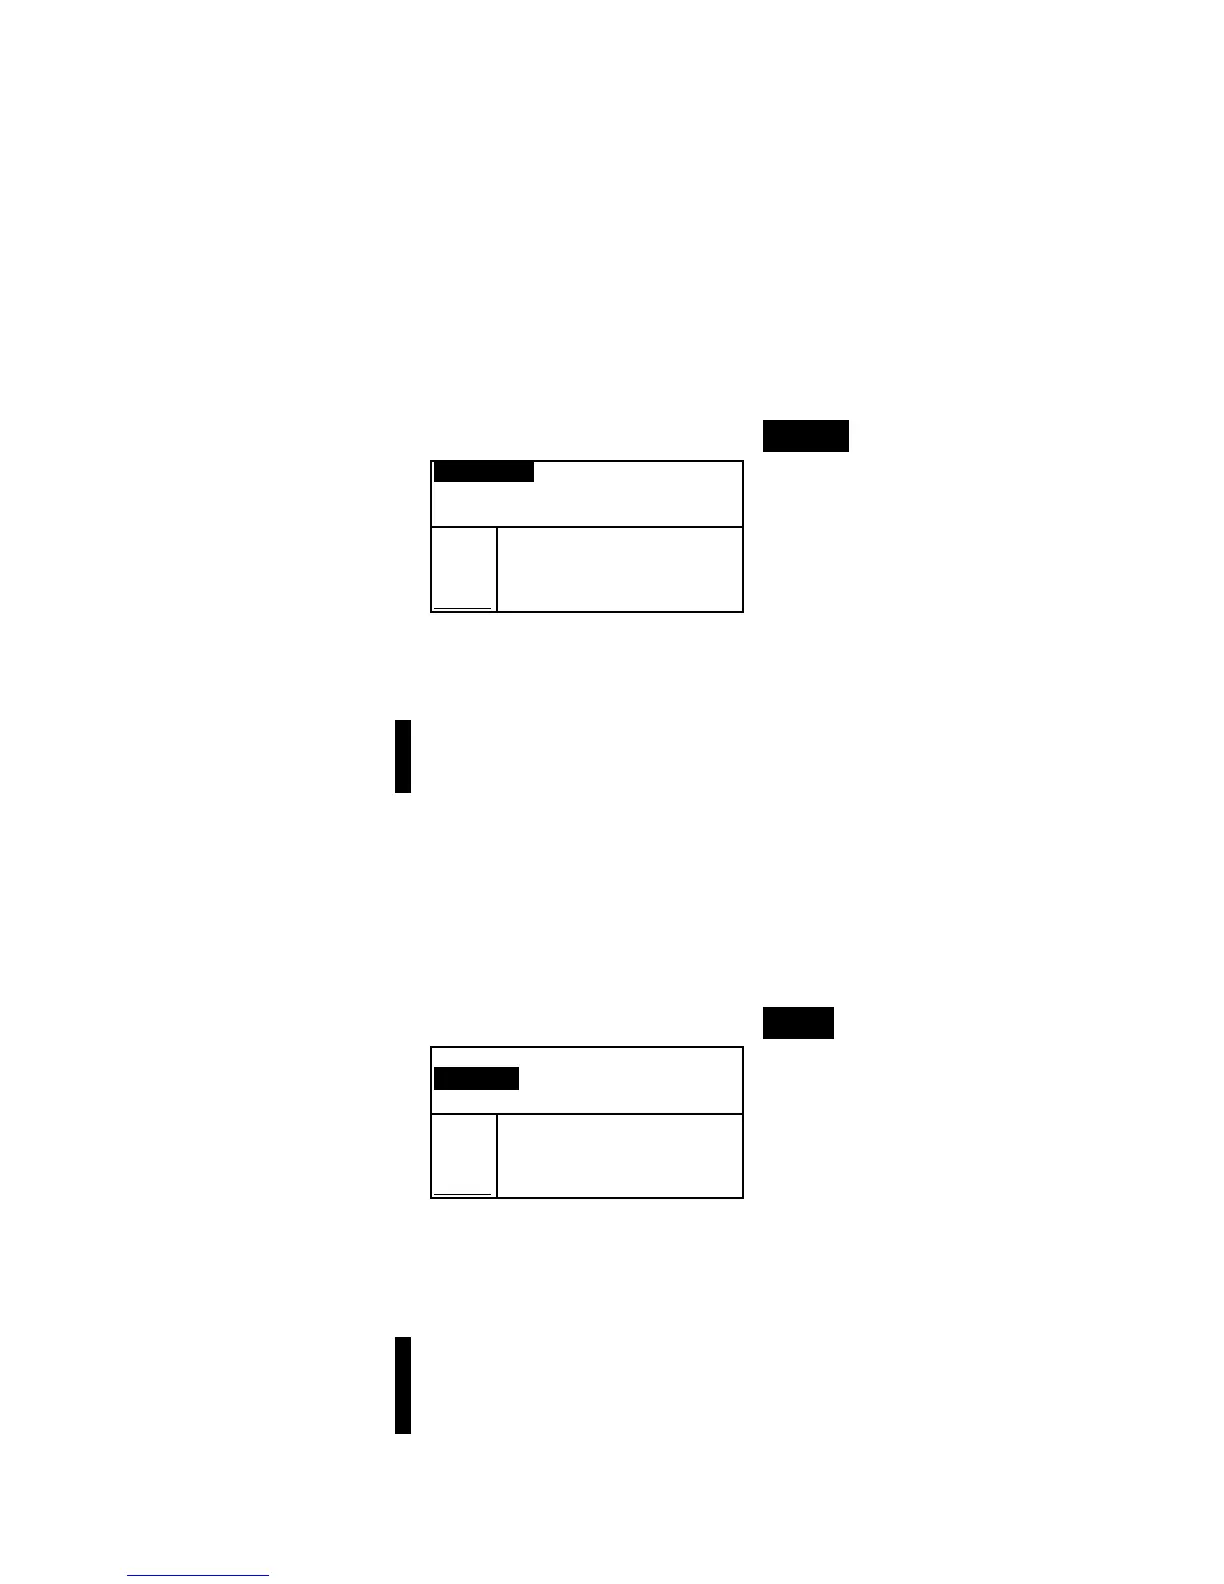
To select a project:
1. Use the Tab keys $@ to highlight Proj #.
Proj 1: PROJECT A
Std 1: STANDARD A
Sample: < Empty>
L*a*b*
D65/10
.
.
..
.
.
.
...
2. Continually press the Enter key # to page through the
available projects, or hold down the Enter key # and select
a specific project from the editor.
NOTE: Highlighting the project name and pressing the Enter key #
accesses the View Project menu. Refer to Projects Mode covered
earlier in this section for information on this mode.
Selecting a Standard
A standard must be manually selected when the Auto Std
option is turned off in the configuration menu. Only standards
assigned to the selected project appear in this field. If no
projects are used, any standard in the database can be selected.
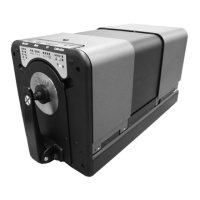
To select a standard:
1. Use the Tab keys $@ to highlight Std #
Proj 1: PROJECT A
Std 1: STANDARD A
Sample: < Empty>
L*a*b*
D65/10
.
.
..
.
.
.
...
2. Continually press the Enter key # to page through the
available standards, or hold down the Enter key # and
select a specific standard from the editor. A “flag” icon
appears next to standards that have manually entered data.
NOTE: Highlighting the standard name and pressing the Enter key #
accesses the View Standard menu. Standard information can only be
viewed from this menu. Refer to Standards Mode covered earlier in
this section for information on this mode.