Configuring Basic Features
241
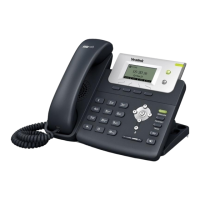
4. Enter the domain name or IP address in the Primary Server and Secondary Server field
respectively.
5. Enter the desired time interval in the Update Interval (15~86400s) field.
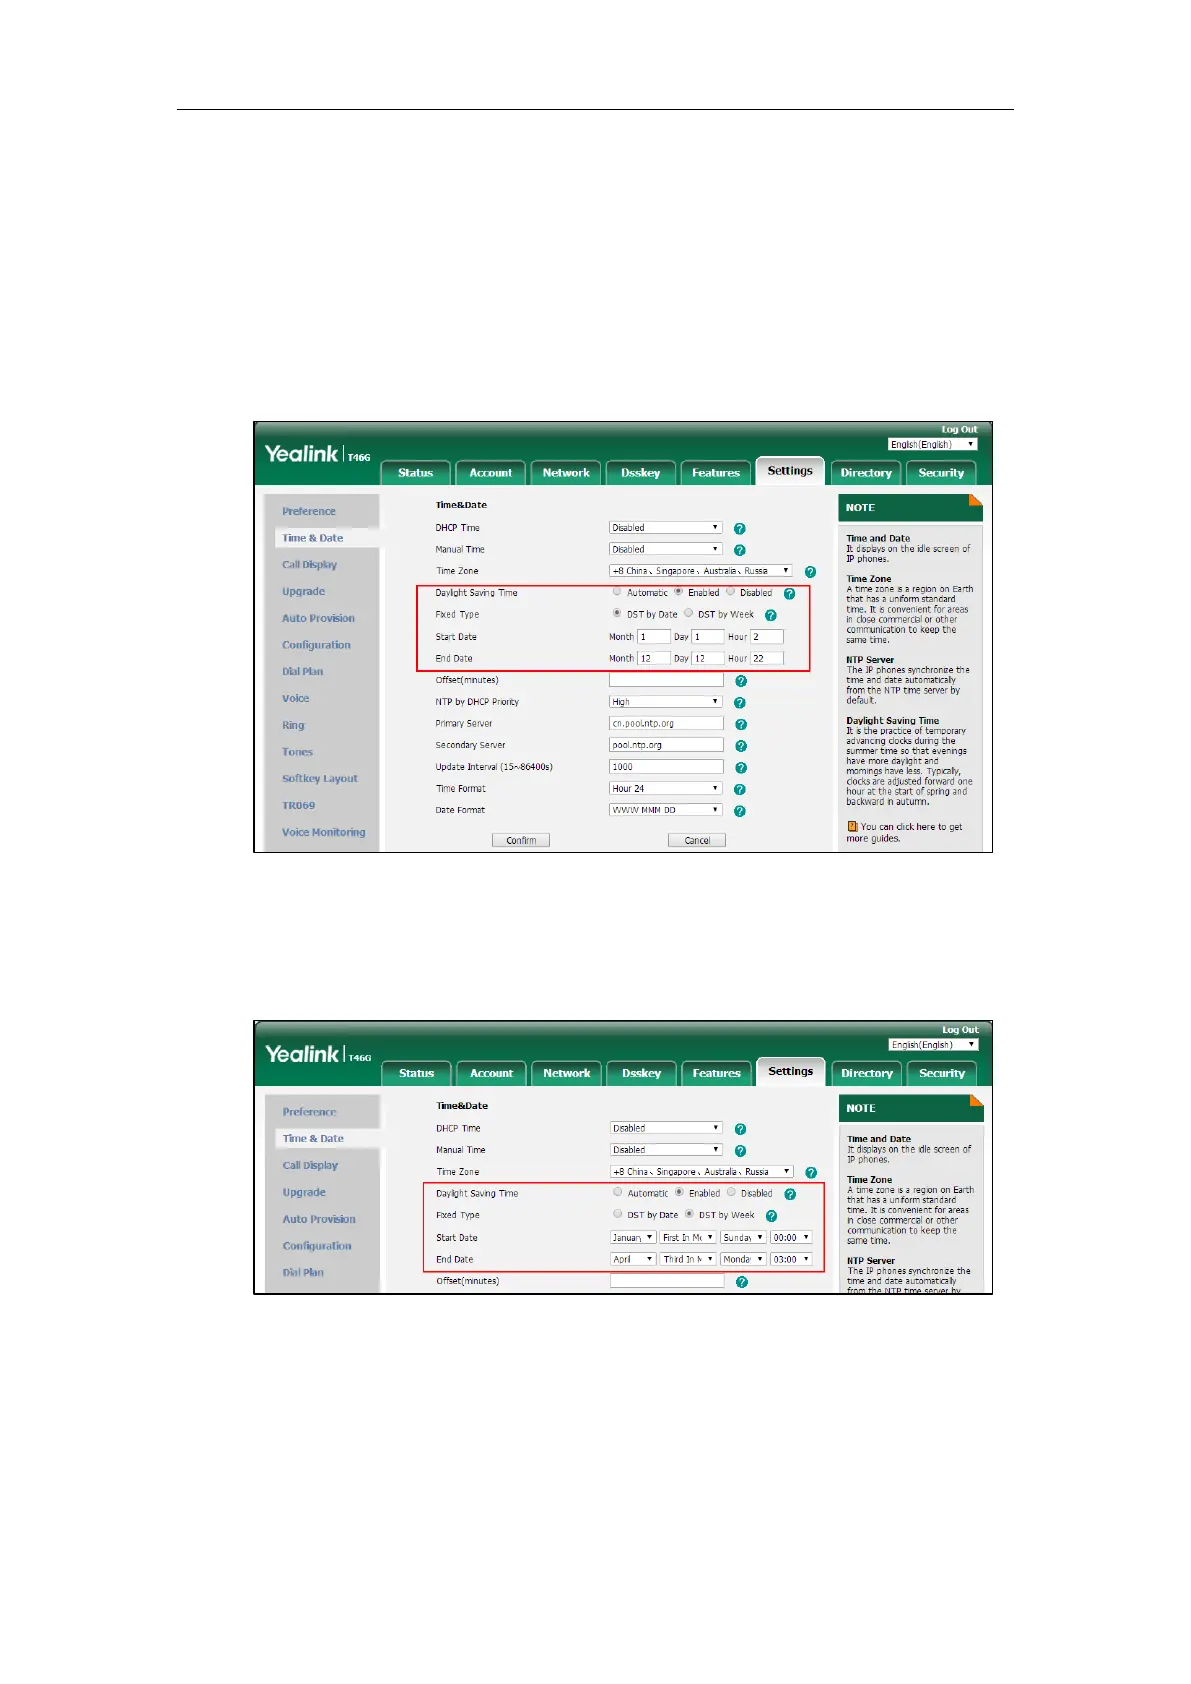
6. Mark the Enabled radio box in the Daylight Saving Time field.
- Mark the DST by Date radio box in the Fixed Type field.
Enter the starting time in the Start Date field.
Enter the ending time in the End Date field.
- Mark the DST by Week radio box in the Fixed Type field.
Select the desired values of DST Start Month, DST Start Week of Month, DST Start Day
of Week, Start Hour of Day; DST Stop Month, DST Stop Week of Month, DST Stop Day
of Week and End Hour of Day from the pull-down lists.
7. Enter the desired offset time in the Offset(minutes) field.
8. Click Confirm to accept the change.
Customizing an AutoDST Template File
The time zone and corresponding DST pre-configurations exist in the AutoDST file. If the DST is
set to Automatic, the IP phone obtains the DST configuration from the AutoDST file. You can

 Loading...