7 - 5
IM 4H3B1-01E
7.1 How to Set Input Range and Recording Span
7. BASIC SETTINGS
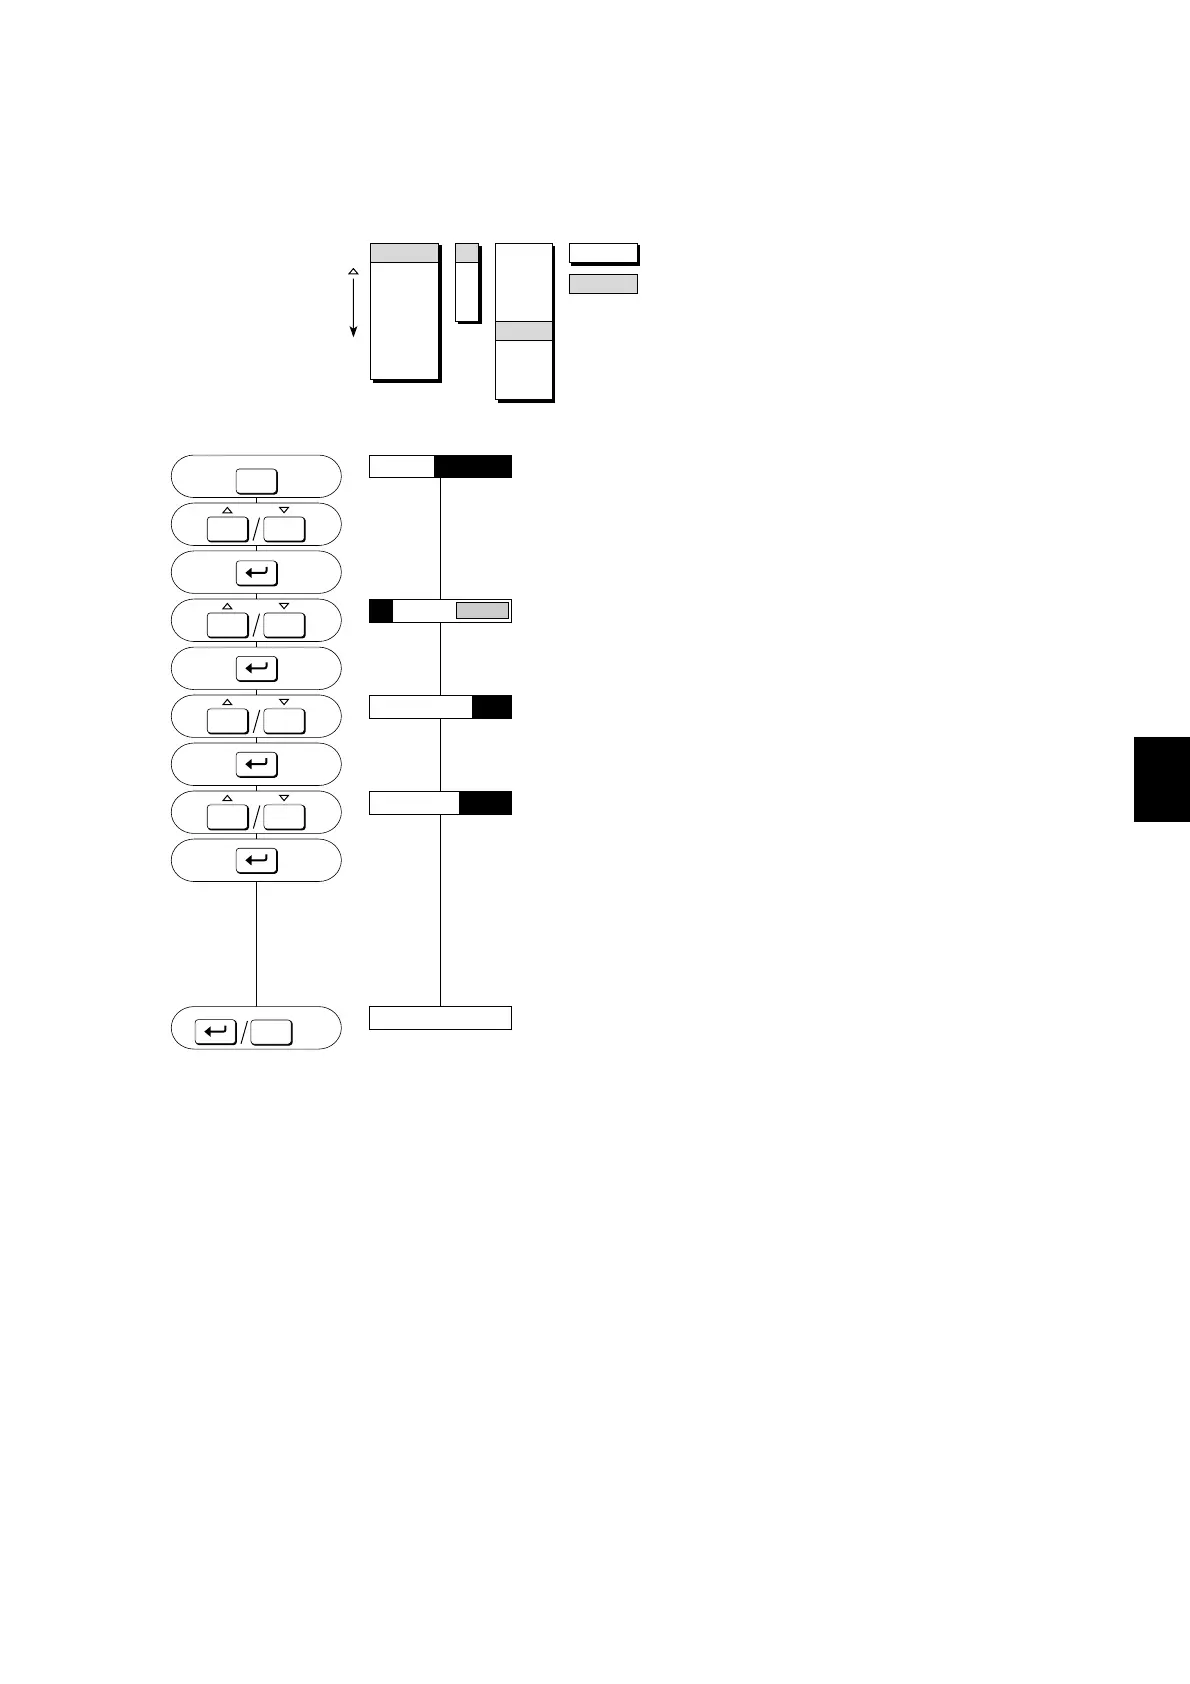
7.1.4 Digital Input Setting (DI Setting)
If a Digital Input (contact input/voltage level input) is being used, the setting can be
done as follows:
MENU:
SETTING PROCEDURE:
Press the MENU-key for three seconds to enter the SET mode.
Select the ‘SET=RANGE’ display by using the UP/DOWN-keys.
Then press the ENT-key.
Use the UP/DOWN-keys to select the desired channel.
Press the ENT-key.
Use the UP/DOWN-keys to select ‘DI’.
Press the ENT-key.
There are two types, namely LEVEL and CONTACT.
LEVL: (VOLT) Records ON/OFF status of a voltage input (0
to 2.4V is OFF (0), 2.4V and higher is ON
(1)).
CONT: (Contact) Records ON/OFF status of a contact (close is
ON (1), open is OFF (0)).
Select the desired type using the UP/DOWN-keys and press the
ENT-key.
The setting is completed.
Press the ENT-key to return to the ‘01:MODE=DI’ display; or
press the ESC-key to go to the ‘SET=RANGE’ display; or press
the MENU-key for three seconds to return to the Operation mode.
NOTE The above mentioned selections will result in a recording trace from 0mm to 180mm
between the contact statuses OFF and ON, which is from the extreme left side of the
chart to the extreme right side. If desired, a zone for the ON/OFF recording can be set.
See 8.1.2.
TYPE
LEVL
RANGE
ALARM
UNIT
CHART
CLOCK
COPY
AUX
01
02
03
04
SKIP
VOLT
TC
RTD
DI
DELT
SCL
SQRT
01:MODE=
SET=RANGE
MENU
ESC
PRINT
ALARM
ACK
PRINT
ALARM
ACK
PRINT
ALARM
ACK
01:MODE=DI
01:TYPE=LEVL
SET OK
**
MENU
ESC
3sec
3sec
PRINT
ALARM
ACK

 Loading...