7 - 11
IM 4H3B1-01E
7. BASIC SETTINGS
ON
TYPE
H
VALUE
2.000
01
02
03
04
LEVEL
1
ALARM ON/OFF
ON
RELAY No.
I01
RELAY ON/OFFRANGE
ALARM
UNIT
CHART
CLOCK
COPY
AUX
The initial value is ‘OFF’ for all channels and all levels.
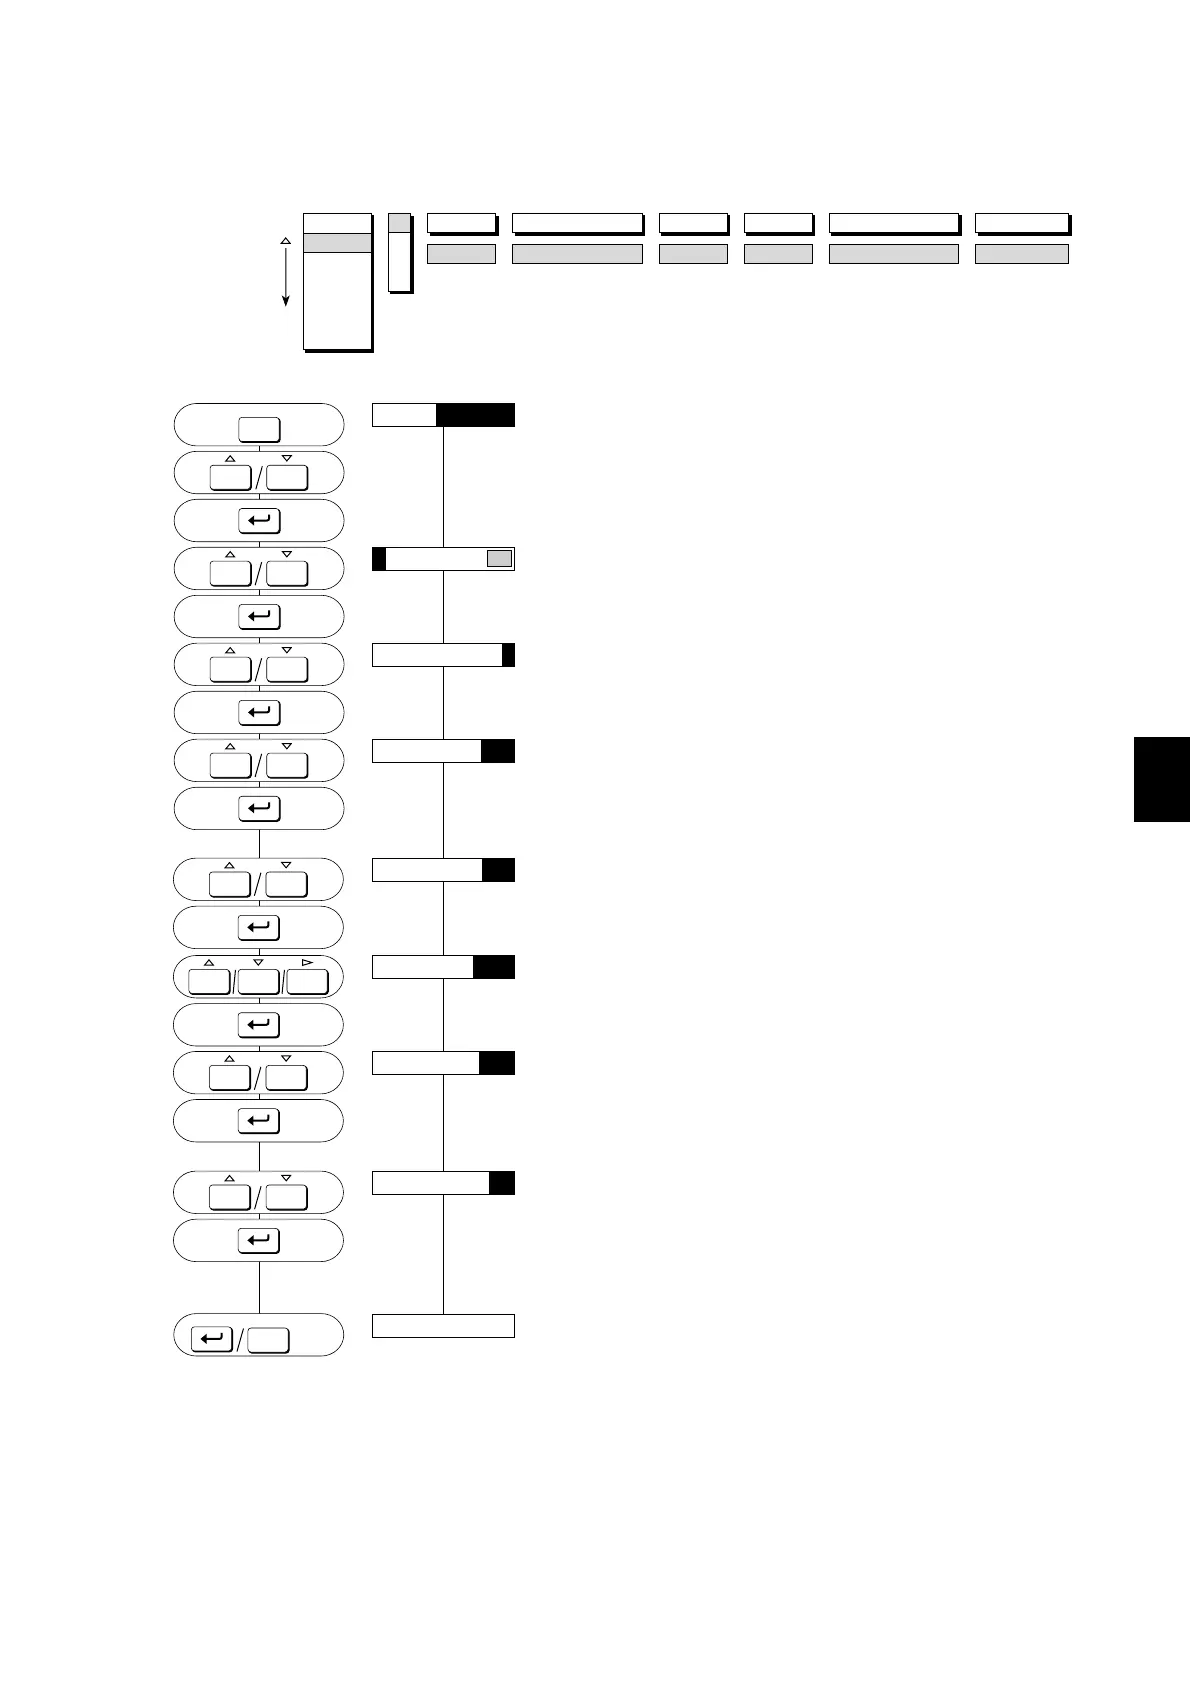
To set an alarm, proceed as follows:
MENU:
SETTING PROCEDURE:
Press the MENU-key for three seconds to enter the SET mode.
Select the ‘SET=ALARM’ display by using the UP/DOWN-keys.
Then press the ENT-key.
Use the UP/DOWN-keys to select the desired channel.
Press the ENT-key.
Use the UP/DOWN-keys to select the desired level of the alarm.
Up to four levels can be set. Then press the ENT-key.
Select the status of the alarm (ON or OFF) using the UP/DOWN-
keys. Initially all are set to OFF. Then press the ENT-key.
When OFF is selected, setting is completed. Alarms cannot be set
for a SKIP or DI channel.
Enter the type of alarm using the UP/DOWN-keys. Six types are
available. After selection, press the ENT-key. h, l will appear only
if the corresponding channel is of the DELT-type.
Enter the alarm value using the UP/DOWN and RIGHT-keys.
After setting, press the ENT-key.
Specify whether an output relay should be activated (ON) or not
(OFF) using the UP/DOWN-keys. Note that output relays are
optional (/A1, 2 or 3). If the option is not installed, data entry will
be ignored. After selection, press the ENT-key.
Specify the output relay number using the UP/DOWN-keys. Up to
24 output relays I01 to I24 can be specified, depending on the
option. Note that when you specify a relay, with which your
µR1800 is not equipped, data entry will be ignored.
Then press the ENT-key.
The setting is completed.
Press the ENT-key to return to the ‘01:ALARM LEVEL=1’
display; or press the ESC-key to go to the ‘SET=ALARM’
display; or press the MENU-key for three seconds to return to the
Operation mode.
NOTE Provided that your µR1800 is equipped with the Remote Control /R1 option and the
/A1, 2 or 3 option, the chart speed can be changed when an alarms occurs. See 8.3.
The alarm relay can be of 2 types, the ‘HOLD’ type and ‘NON-HOLD’ type. See 9.1.4.
7.2 How to Set Alarms
SET=ALARM
MENU
ESC
PRINT
ALARM
ACK
PRINT
ALARM
ACK
PRINT
ALARM
ACK
PRINT
ALARM
ACK
01:ALARM LEVEL=
01/1:ALARM=ON
01:ALARM LEVEL=1
01/1:TYPE=H
01/1: VALUE=2.000
01/1:RELAY=ON
SET OK
**
3sec
MENU
ESC
3sec
PRINT
ALARM
ACK
PRINT
ALARM
ACK
PRINT
ALARM
ACK
FEED
PRINT
ALARM
ACK
01/1:RELAY No.=I01

 Loading...