ZEISS OPERATION Axio Imager 2
Operating the motorized microscope via the touchscreen of the TFT display
136 430000-7544-001 01/2016
The parcentricity function is activated or deactivated by means of the On and Off buttons. Stored values
remain in the memory of the device after deactivation. When active, this function ensures that the same
spot always appears in the center of the field of view when changing objectives.
Use the Adjustment button to set up the parcentricity alignment. On pressing this button, a wizard
appears to guide you through the procedure. During the parcentricity alignment a parfocality alignment
is also always performed. Therefore, it is important that the reference point is always focused on
regardless of the magnification.
After the alignment, the functionality must be activated by pressing the On button.
The Silent Mode function is used to display (check box activated) or not to display (check box
deactivated) the offset in x and y coordinates when changing objectives.
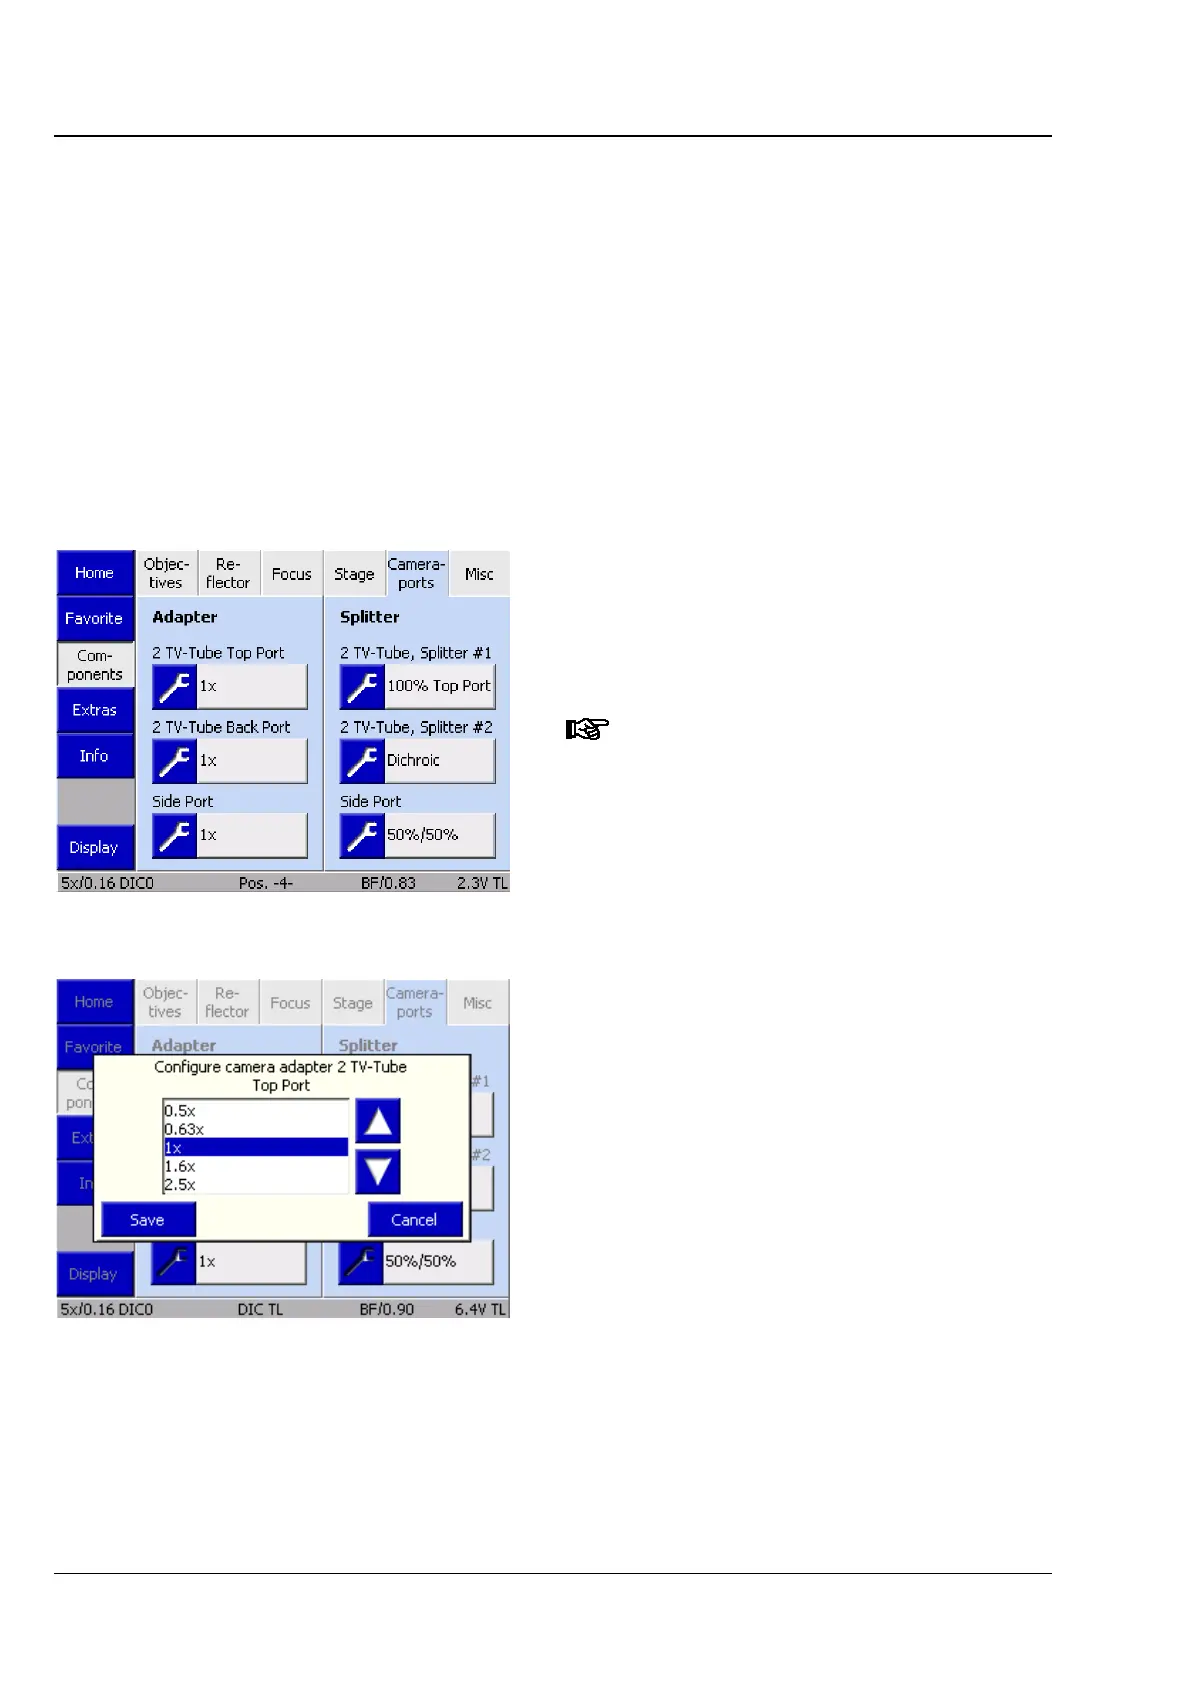
(5) Camera ports tab
This tab allows you to configure the adapters and
beam splitters (beam-splitting mirrors / reflecting
mirrors) for the camera ports (Top Port / Back Port /
Side Port).
Before attaching/removing the camera
path deflection, left (Side Port) or
before any tube change, switch off the
microscope to ensure that the system
detects the correct port status during
the next initialization process.
Adapter
Up to three buttons are displayed here depending
on the equipment of the camera path deflection
and the tube used. The status of the ports is
detected by the system during initialization (and on
opening the Settings - Components page).
• To assign an adapter to a button, press the gray
button.
The Configure Camera Adapter (Fig. 147) list
opens.
• Choose the appropriate adapter from the list
using the ▲ ▼ buttons.
• Press the Save button to assign the selected
adapter to the port. Press the Cancel button to
close the window without any selection.
The button is now labeled with the magnification
factor. Proceed in the same way for the other
ports.
Fig. 146 Microscope -> Config ->
Components -> Camera ports
Fig. 147 Selecting the camera adapter