E. Web Interface Configuration Utility
159
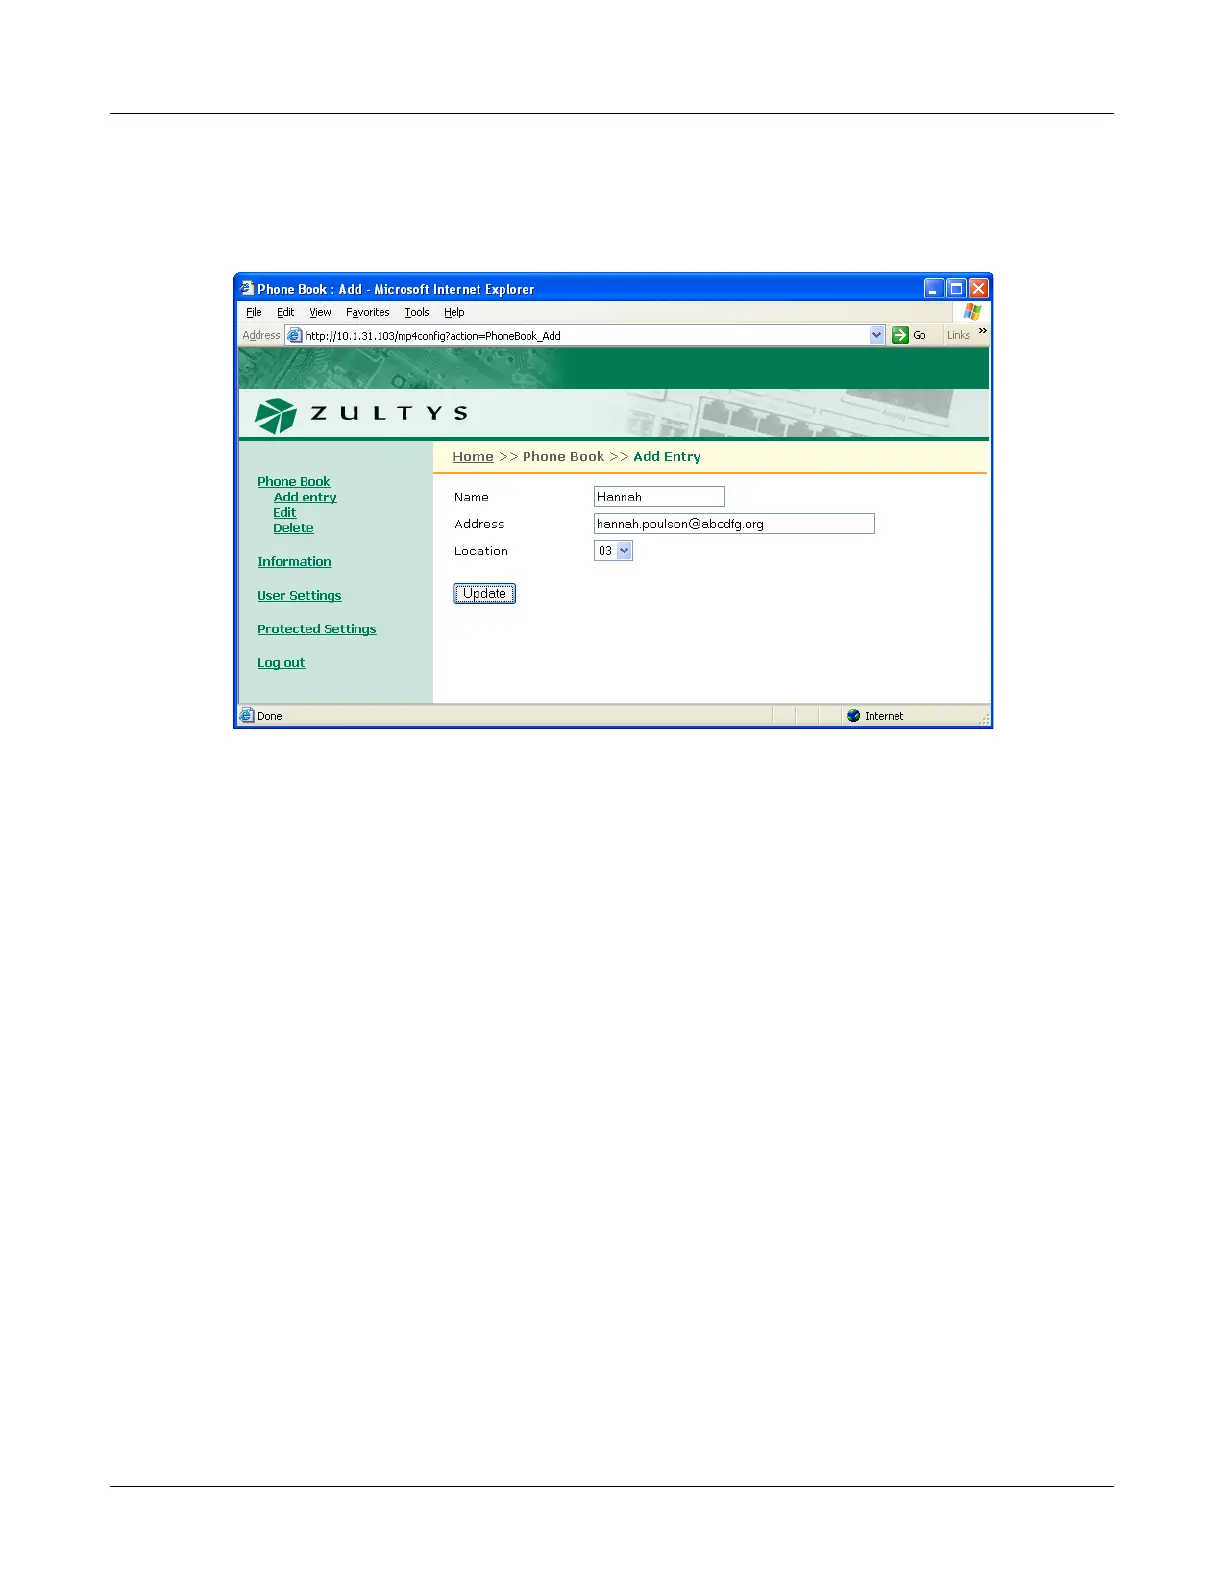
E.3.1 Add Entry panel
The Add Entry panel, shown in figure E-3, adds contacts into empty phone book memory
locations. To access the Add Entry panel, select Phone Book | Add Entry from the menu.
To add an contact into your phone book:
1. Enter the contact’s name in the Name data entry box.
2. Enter the contact’s SIP address or phone number in the Address data entry box. The phone
ignores punctuation characters when dialling phone numbers.
3. Press the Update button.
E.3.2 Edit panel
The Edit panel, shown in figure E-4, displays the contents of your phone book and allows you to
edit any filled memory location. To access the Edit panel, select Phone Book | Edit from the
interface menu.
To edit a contact, press that contact’s Edit button on the right side of the panel. After editing the
contents of the desired phone book locations, press the Update button to save your changes to
the phone.
E.3.3 Delete panel
The Delete panel, as shown in figure E-5, displays the contents of your phone book. To remove a
contact from the phone book, place a check mark to the left that contact, then press the Update
button. To access the Delete panel, select Phone Book | Delete from the interface menu.
Figure E-3 Phone Book – Add Entry Panel