RECORDING (CAPTURING) LIVE DATA
For technical questions, please call 1-888-866-5797.
23
- Press POWER/LINK to continue.
n If Live Data is not supported by the vehicle under test, an advisory
message displays. Choose Relink to try again, or, choose
System Menu to return to the System Menu.
n If custom Live Data was previously configured, the Select PIDs to
Use screen displays.
- To use the existing custom Live Data selections, select Use
existing PIDs, then press ENTER . Proceed to step 5.
- To configure new custom Live
Data, select Select new PIDs,
then press ENTER . The
Custom Live Data menu displays.
Proceed to step 2.
n If custom Live Data was not
previously selected, the Custom Live
Data menu displays. Proceed to step
2.
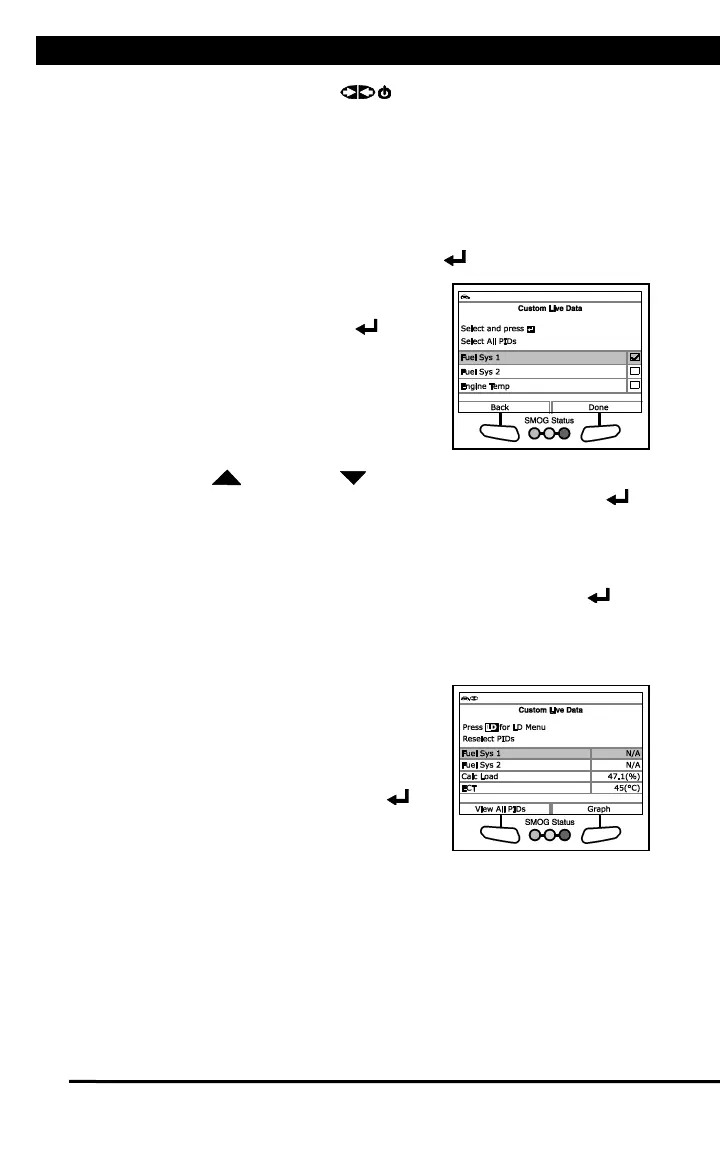
2. Press UP and DOWN to scroll through the available PIDs.
When a PID you wish to display is highlighted, press ENTER (a
"checkmark" shows to confirm your selection). Repeat until only the
PIDs you want to display are selected.
n To select all PIDs, choose Select All PIDs.
n To deselect a PID, highlight the PID, then press ENTER . The
checkmark is removed.
3. When you are finished making your selection(s), choose Done to
continue.
4. The Scan Tool is now in "Custom Live
Data" mode. Only the PIDs you selected
are shown.
n To change the current custom Live
Data selections, select Reselect
PIDs, then press ENTER to
return to the Custom Live Data
menu. Repeat step 2.
5. To exit the "Custom Live Data" mode, press M to return to the Live
Data Menu.
RECORDING (CAPTURING) LIVE DATA
You can record and save several frames of Live Data information for each
PID supported by the vehicle in the Scan Tool's memory.
There are two ways that the Scan Tool can record Live Data:
n Record by DTC Trigger
 Loading...