142 Installation, Operation, and Maintenance
Part 3, Maintenance and Troubleshooting
8 Maintenance
7 Move the plunger carrier loop up and down. If the syringe plunger does not
move along with the carrier, repeat the previous steps. Be sure the plunger
screw is tight.
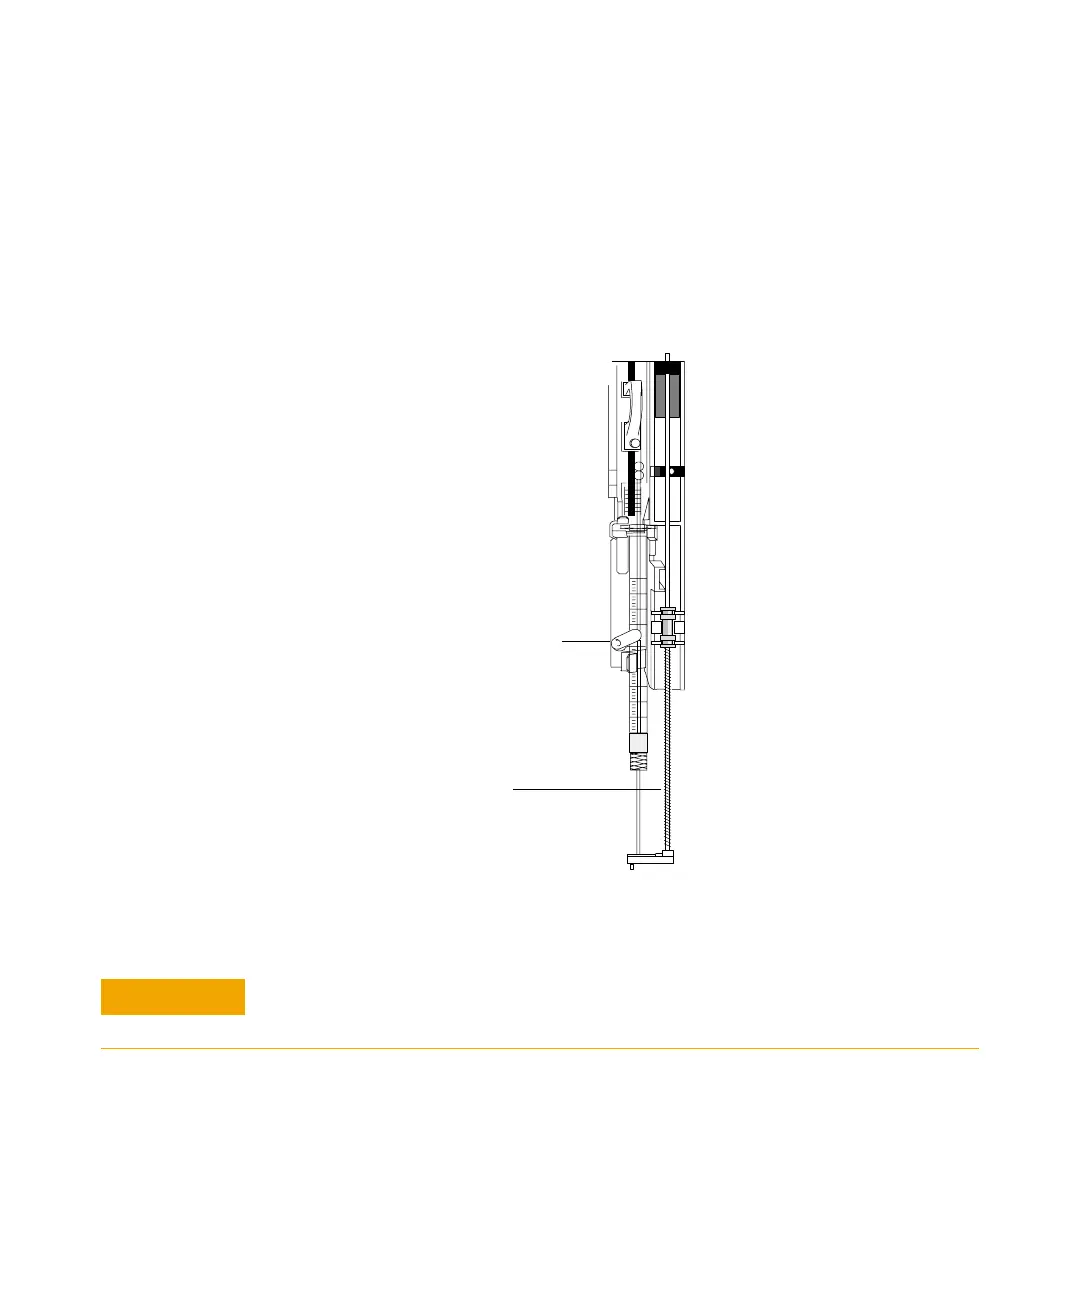
8 Check that the needle is aligned with the needle guide in the foot by moving
the slide up and down. The needle should slide smoothly in the needle
guide. See Figure 57.
9 Pull down the syringe carriage until the needle support guide tip is near the
top of the inlet septum nut.
Figure 57 Syringe carriage and needle support with syringe installed
Syringe latch (closed)
Needle support
CAUTION
Do not operate the injector without a syringe in place because the syringe latch may
interfere with the motor if it is allowed to swing freely.
 Loading...