34 Installation, Operation, and Maintenance
Part 1, Installation
2 Installation
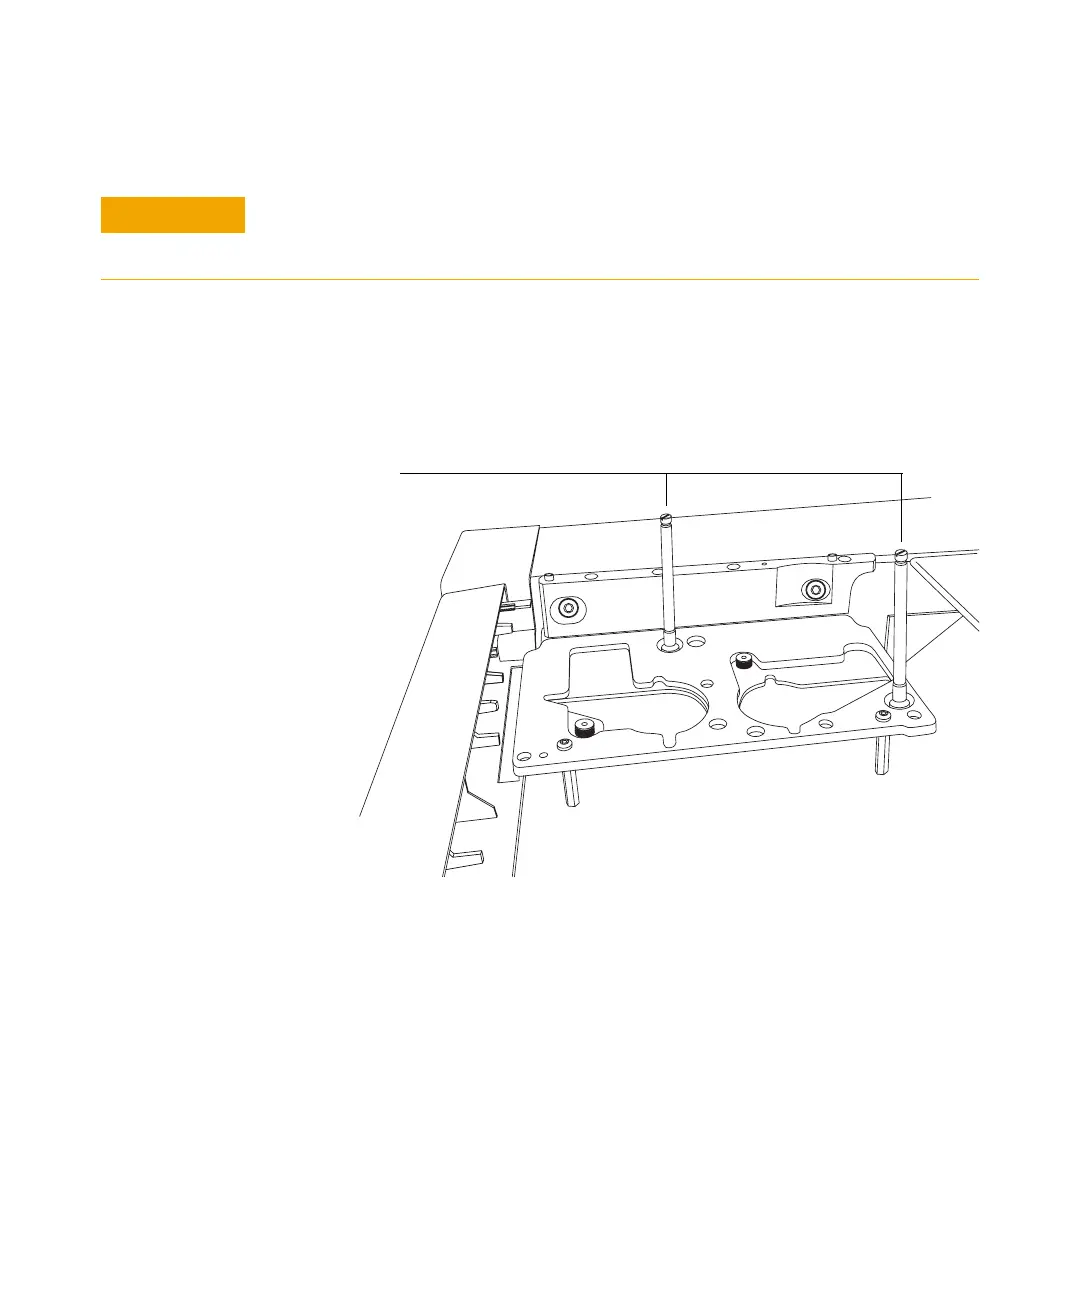
9 Install the injector mounting posts from the kit (Figure 7). Use a flat blade
screwdriver that fits the slot in the top of the posts. Be careful not to
damage the tops of the posts by using an undersized screwdriver. The post
must be firmly tightened to the bracket to prevent injector movement.
Check your work
✔ If the GC has a packed or split/splitless inlet, check the inlet nut.
✔ If the GC has an on-column inlet, be sure that you have removed the cooling
tower from the septum nut base assembly.
✔ All inlet wiring and gas lines are routed under the bracket.
✔ All the screws, bushings, and mounting posts are in place.
CAUTION
In the following step, use a flat blade screwdriver that snugly fits the slot in the top of
the posts. An undersized blade can damage the post top and prevent the injector from
mounting properly,
Figure 7 Installing the mounting posts
Mounting posts
 Loading...