2 Setting up the Bravo Platform
Setting teachpoints
38 Bravo Platform User Guide
c To achieve paper-thin z-axis clearance, slide a sheet of paper between the tip
and the platepad. Set the z-axis increment to 0.05 mm increments. Jog the
head down until the paper is barely pinched, and then jog up by 0.05 mm.
7 When the tip is in the correct position (directly over the crosshair mark with paper-
thin clearance), click Teach.
Verify the information in the message box before you click OK.
Figure
Pipette tip A1 position over the platepad crosshair mark
8 To save the teachpoint, click the Profiles tab and click Update this profile.
Setting other teachpoints based on one teachpoint
After setting the first teachpoint, you can have the VWorks software calculate the other
eight teachpoints based on the selected teachpoint. Typically, this is done upon initial
setup of a new liquid-handling head.
For optimal performance, teach each of the nine locations independently using the
procedure, “Setting the first teachpoint” on page 36.
To set the other eight teachpoints:
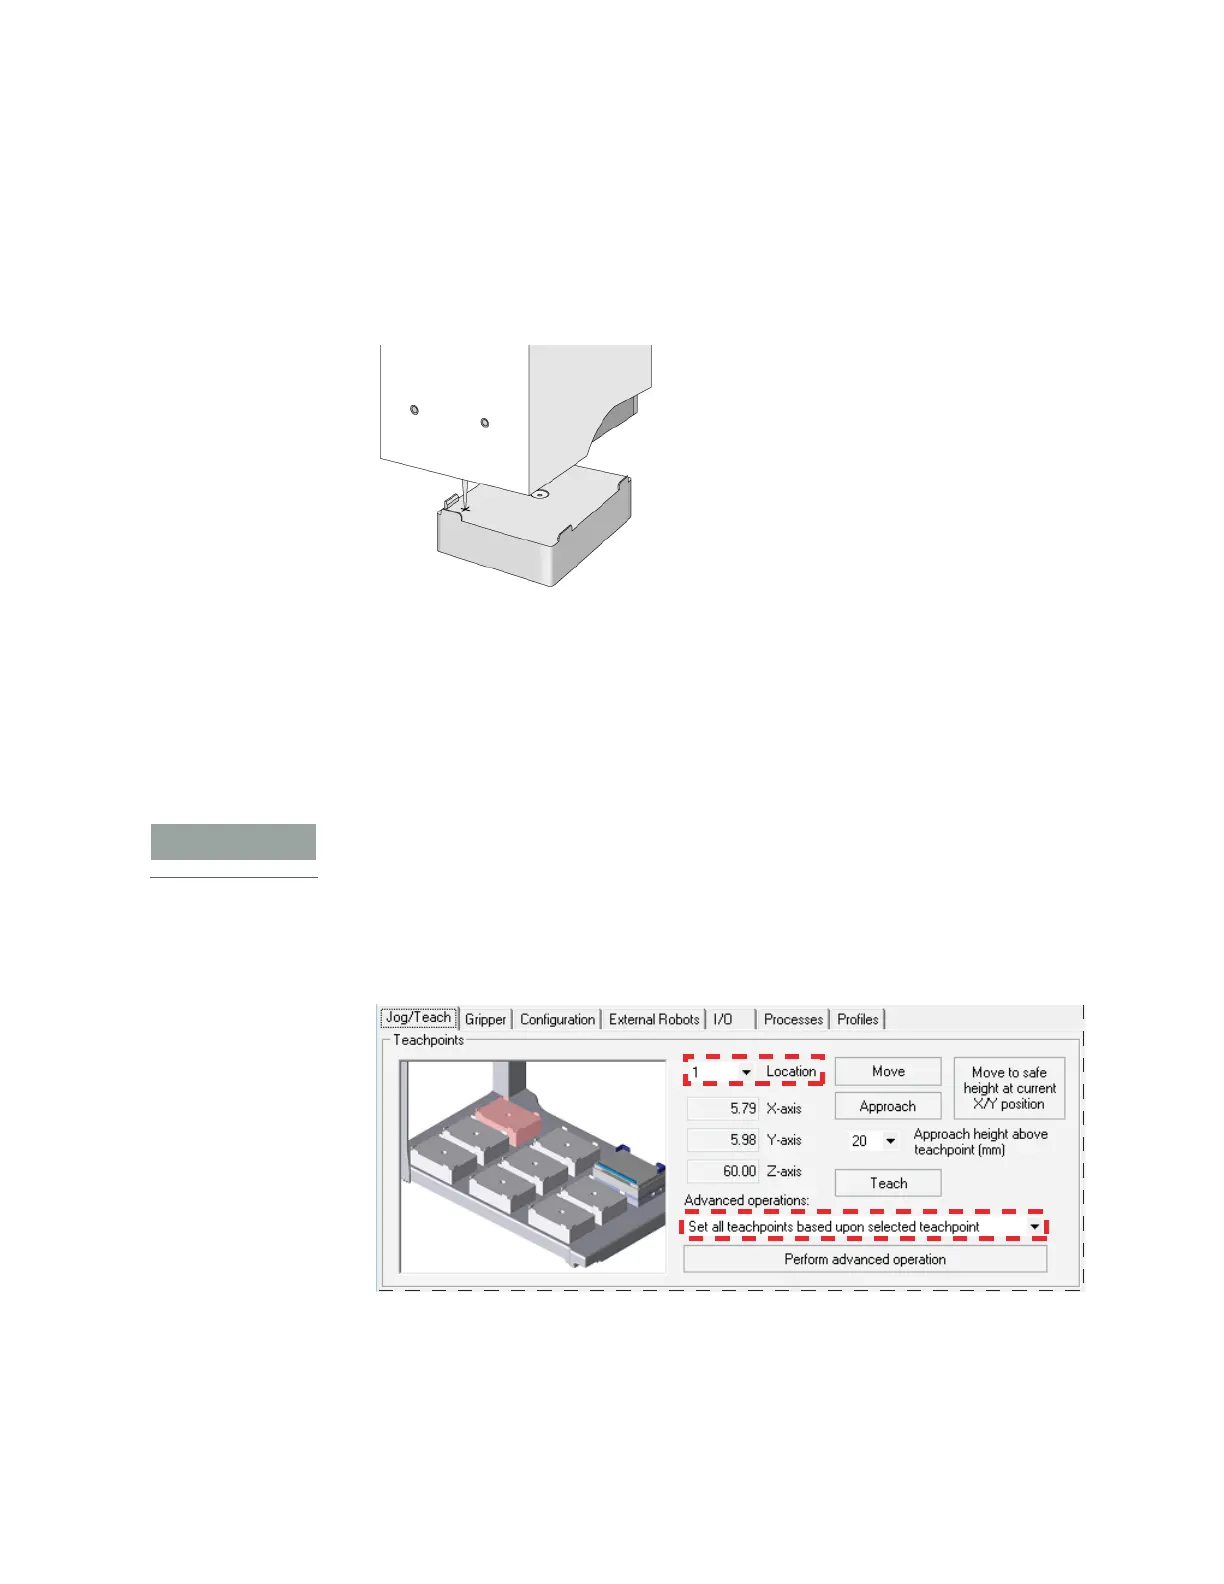
1 In the Jog/Teach tab, verify that the teachpoint you just taught (“Setting the first
teachpoint” on page 36) is set in the Location list.
The teachpoint for the other locations will be set based on this one.
2 In the Advanced operations list, select Set all teachpoints based upon selected
teachpoint.
3 Click Perform advanced operation.