Preliminary Technical Data UG-1828
Rev. PrB | Page 103 of 277
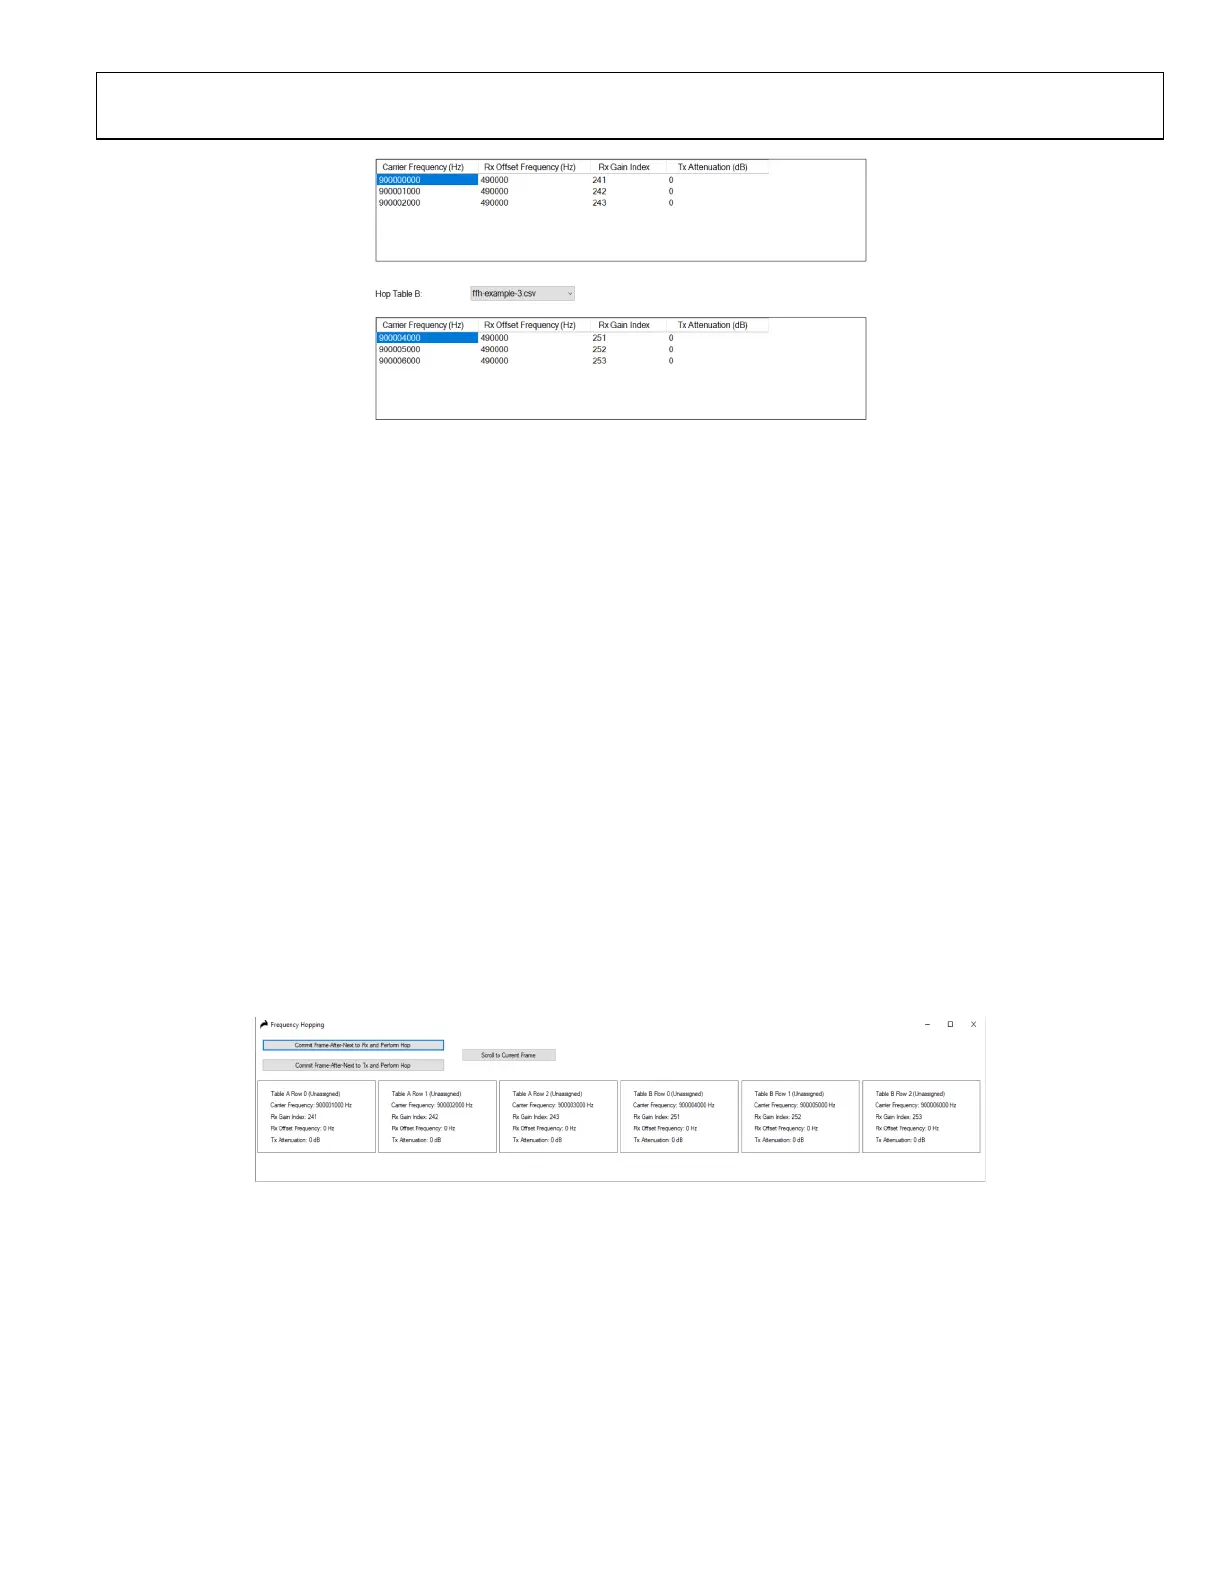
Figure 106. Frequency Hopping Tables
8. Click Program.
9. Upon successful programming, go to Transmit tab and click play, a window should pop up and indicates to the user frequency
hopping is working in manual mode.
a. Commit Frame-After-Next to Rx/Tx and Perform Hop button will “commit” the “Frame-after-Next” to Rx/Tx. Notice
this is not the same as next frame, it’s the one after.
b. Scroll to Current Frame button will locate the current frame to show to the user. This is very useful if the user has a
large set of frequencies in the frequency table.
c. Each rectangle box under it shows a frequency entry in a frequency table. This includes:
i. Table being used (table A or table B)
ii. Carrier frequency
iii. Rx Gain index
iv. Rx offset frequency
v. Tx attenuation
Frequency, gain and attenuation values should match those in the tables loaded.
Tx Only
10. Change the Tx Data Source Single Tone and put 0 Hz under Tone 1 Frequency.
11. Click “Commit Frame-After-Next to Tx and Perform Hop”.
a. You should see figure
Figure 107.
b. This indicates
vi. All entries of frequencies are shown, both in table A and table B.
vii. All entries should display Unassigned.
viii. The upcoming frame is not assigned.
ix. There should not be any signal coming out of Tx.
12. Click on “Commit Frame-After-Next to Tx and Perform Hop.”
 Loading...