UG-1828 Preliminary Technical Data
Rev. PrC | Page 328 of 338
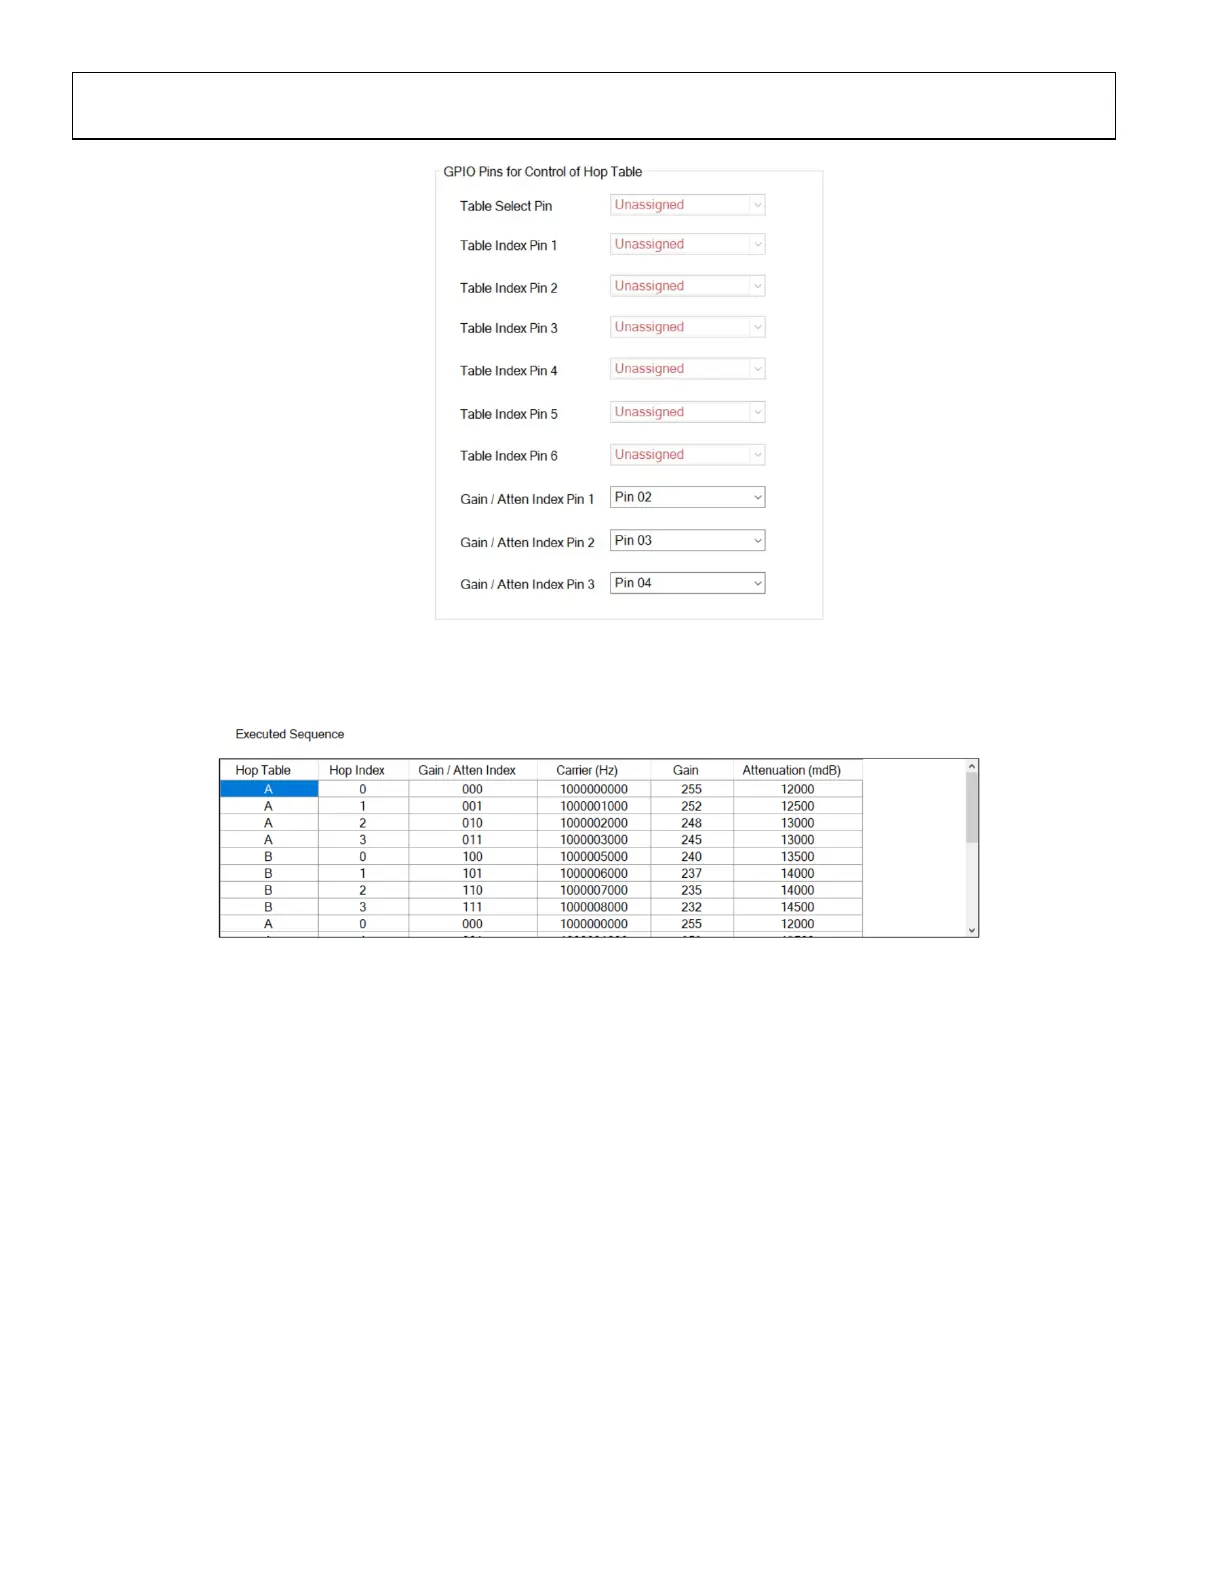
Figure 318. GPIO Pins for Control of Hop Table
3. The Executed Sequence table gets automatically updated with the gain and attenuation settings as indicated by the sequence
table loaded in step 2.
Figure 319. Executed Sequence Table (GPIO settings)
4. As per Example 1 when the user programs the part and clicks play in the Receive tab they will be shown the Frequency Hopping
window and can commit frames to Rx or Tx. In this example the user will notice that the signal is now being attenuated at the
rate described in the gain and attenuation tables.
Example 3: Automated TDD with Frequency Hopping
Unlike the previous mode, in this mode user will have to specify TDD timing. User also will not have the frequency hopping window to
advance frames manually, instead the frames will be played automatically.
To achieve this,
1. Follow the steps above before programming
2. In Automated TDD tab, click Enable Automated TDD State Machine for FPGA
3. ADRV9001 TES includes several pre-defined examples in the /Examples folder.
Rx Only
1. Select the pre-defined json file DMR_24K_RX_ONLY_FH.json
2. Hop Pin should be set automatically.
3. Go to Receive tab, set the capture length to longer value. Here we set it to 65536.
4. Click play
You should see the signal being played for multiple frequencies.
 Loading...