Disassembly and Replacement Procedures
108
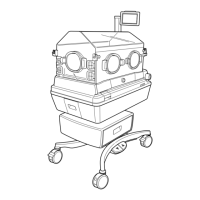
(4) Remove the steam gate.
Open the humidity chamber cover and remove the
steam gate.
Steam gate
(5) Remove the upper section of the main body.
Remove the four hole plugs and then remove the
four hexagon socket head cap screws (M6 x 15) with
a hexagon wrench (distance between the opposite
sides: 5mm).
(The picture shows one side only.)
Hexagon socket head
cap screw (M6x15)
(6) Reassembly: Reassemble in the reverse order of dis-
assembly.
6-3-2. Replacing the Heater
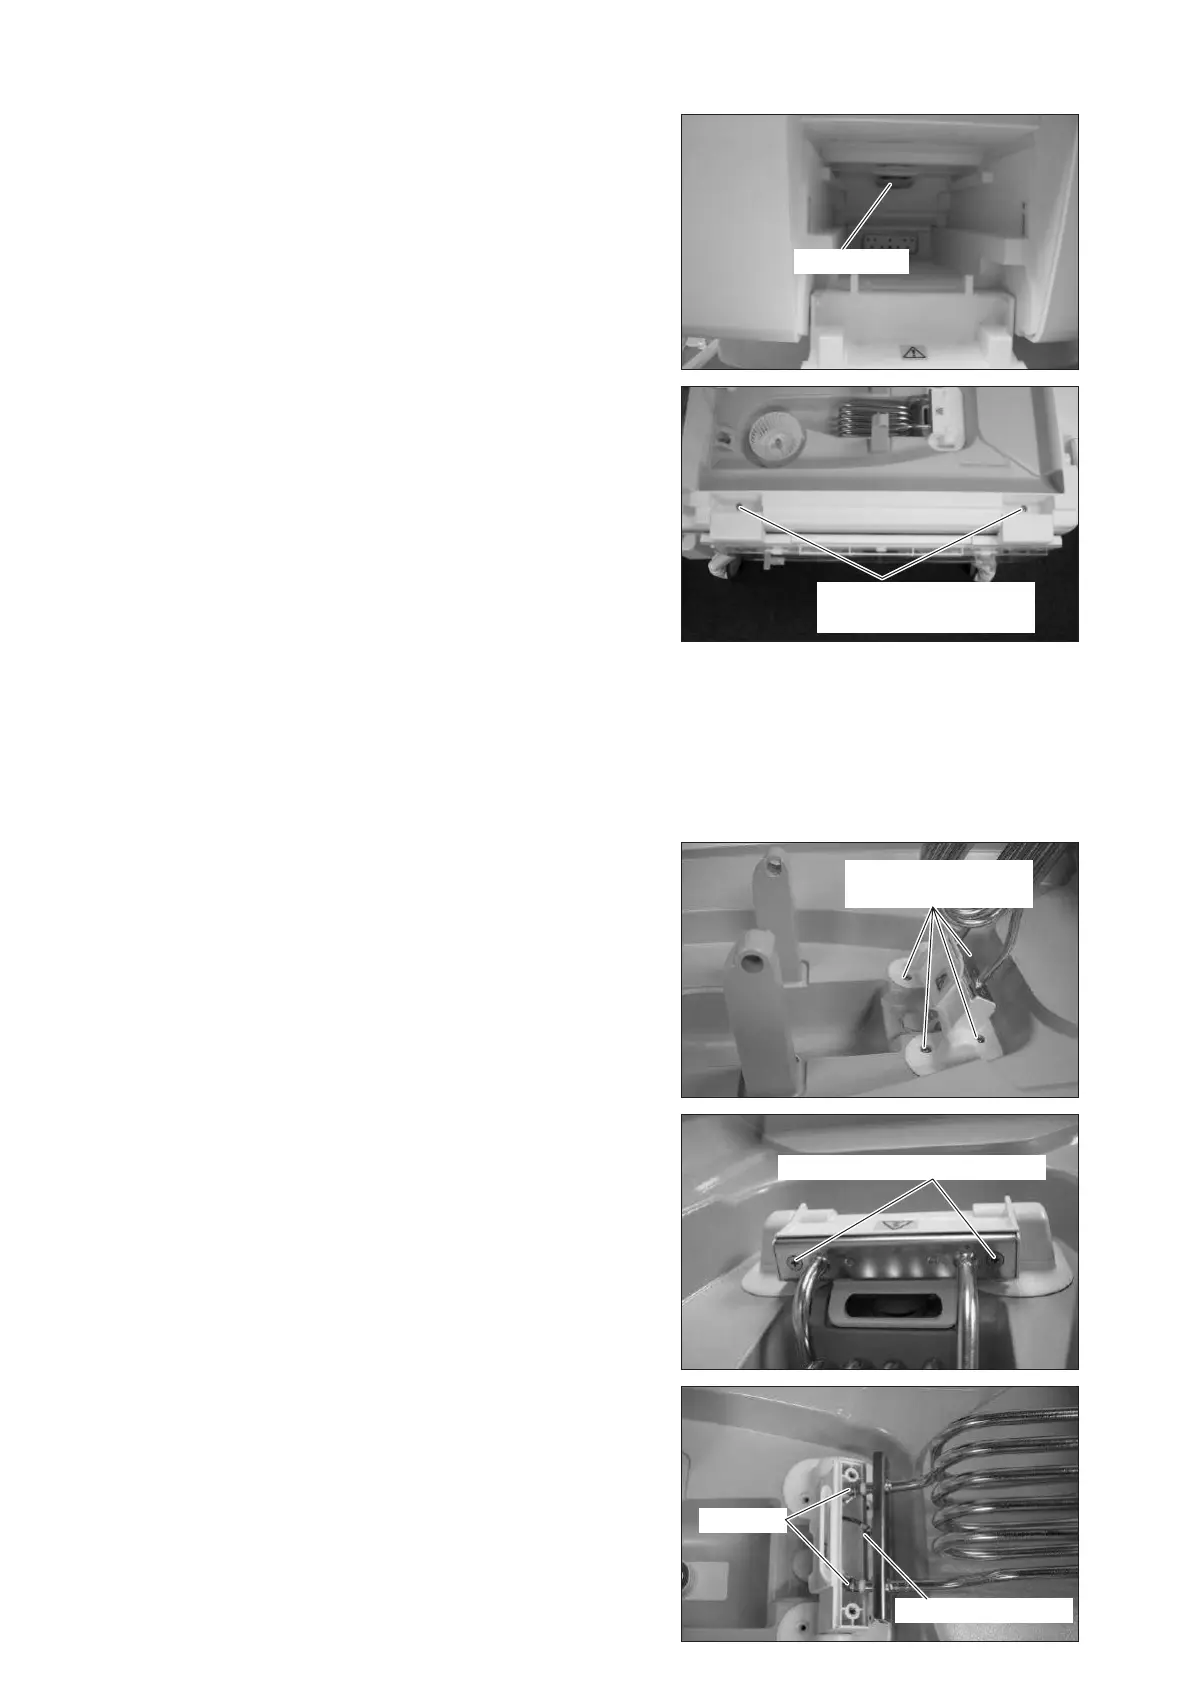
(1) Remove the screws fixing the heater.
Remove the four protective stickers and then remove
the four double sems screws (M4 x 10) with a
Phillips screwdriver.
Double sems screw
(M4x10)
(2) Remove the heater from the heater cover.
Remove the two flat head machine screws (M4 x
10) with a Phillips screwdriver.
Flat head machine screw (M4x10)
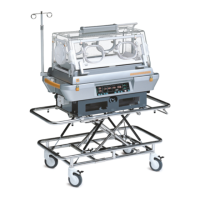
(3) Remove the heater cable and the ground wire.
Remove the sems screw (M4 x 8) with a Phillips
screwdriver and then remove the two nuts (M4) with
a box wrench (distance between the opposite sides:
7mm).
Nut (M4)
Sems screw (M4x8)