Disassembly and Replacement Procedures
122
6-4. Power Unit
6-4-1. Replacing the Control Board (for the Dual Incu
i
)
(1) Pull out the power box.
See (1) ~ (5) in “6-1-1. Removing the Main Body
from the HL Stand.”
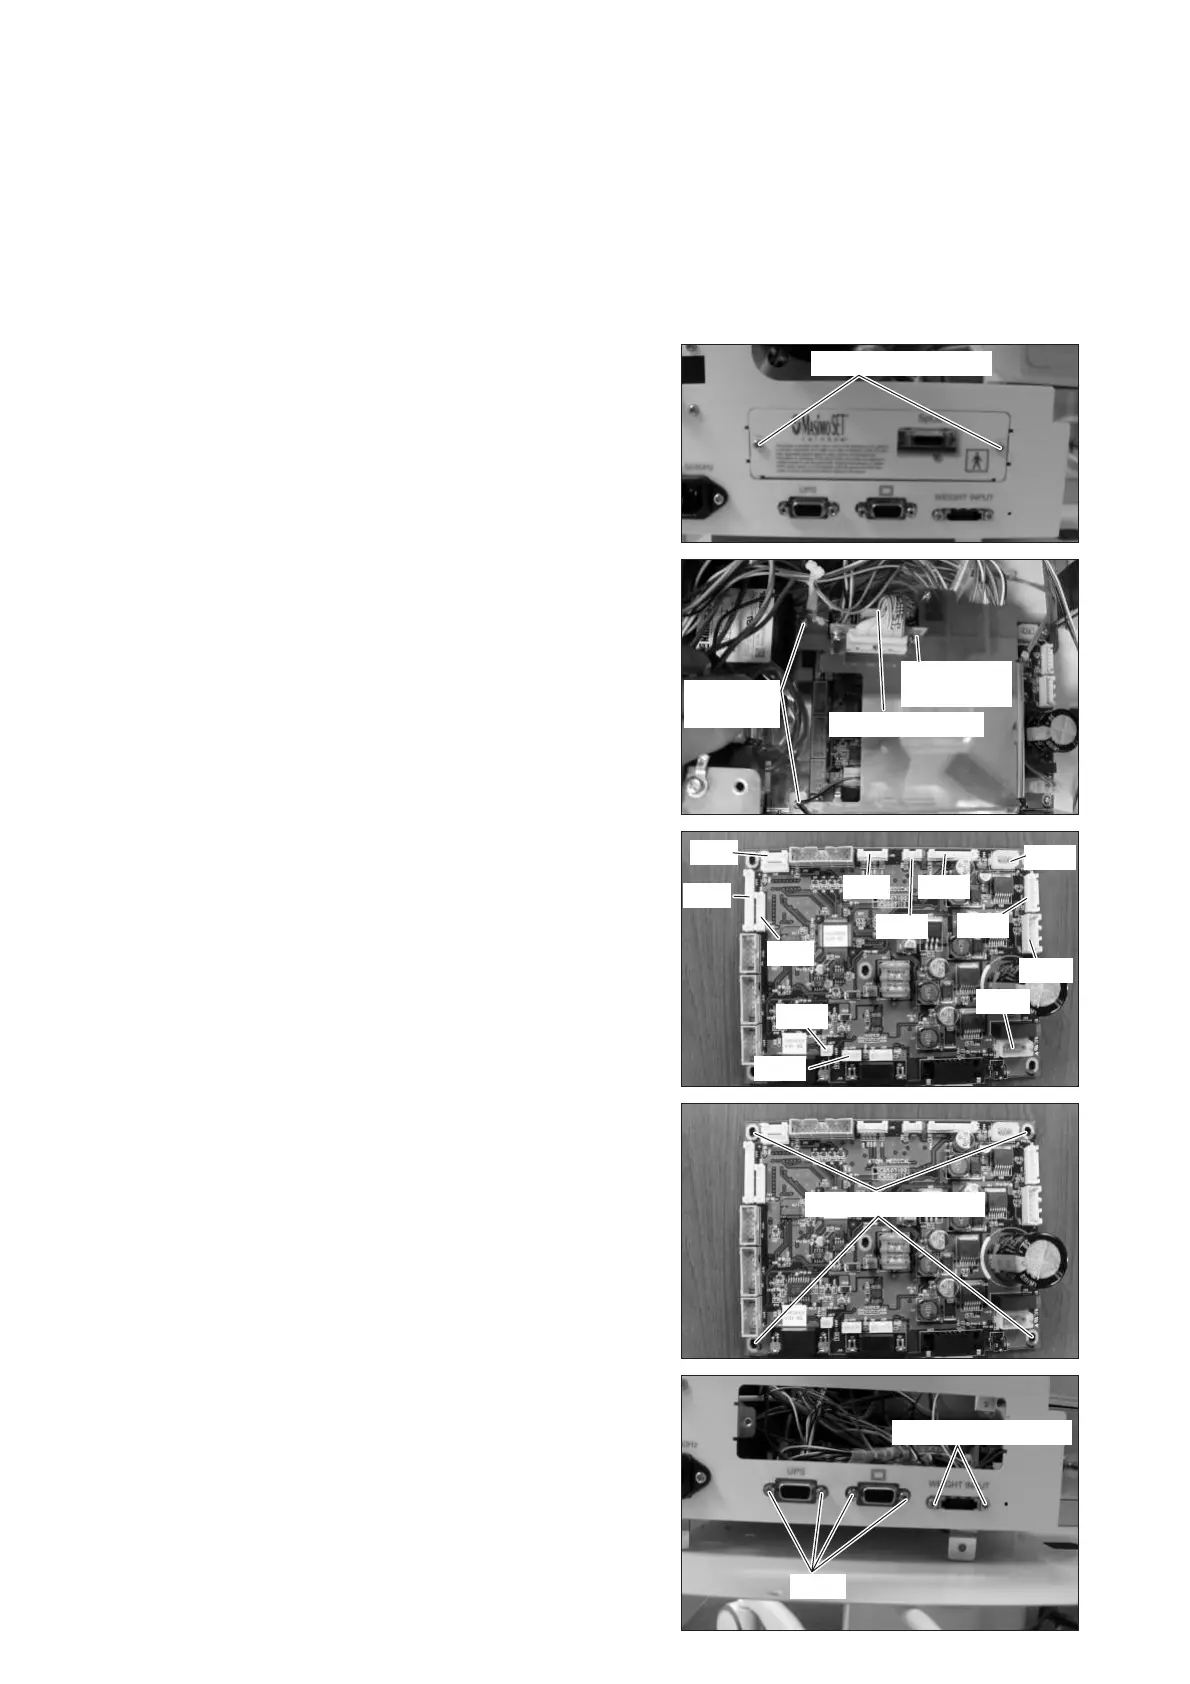
(2) Remove the SpO2 unit.
Remove the two sems screws (M3 x 8) with a Phillips
screwdriver.
Sems screw (M3x8)
(3) Remove the SpO2 slide plate.
Remove the connector (JA2) from the control board
(for the Dual Incu i).
Remove the three sems screws (M3 x 8) with a
Phillips screwdriver.
Sems screw
(M3x8)
Sems screw
(M3x8)
Connector (JA2)
(4) Remove the connectors (JA3, JA4, JA5, JA8, JA9,
JA10, JA11, A16, JA17, JA19, JA21 and JA22) from
the control board (for the Dual Incu i).
For details, see “[8] Wiring Diagram.”
JA3
JA16
JA8
JA17
JA19
JA7
JA22
JA10
JA21
JA9
JA4
JA11
(5) Remove the control board (for the Dual Incu i).
Remove the four sems screws (M3 x 8) with a
Phillips screwdriver.
Remove the four studs on the connectors of the
Power Pack i (UPS) and the control panel with a
box wrench (distance between the opposite sides:
5mm) from the panel side. Remove the two sems
screws (M3 x 8) on the connector of the weight moni-
tor with a Phillips screwdriver.
(6) Reassembly: Reassemble in the reverse order of dis-
assembly.
Sems screw (M3x8)
Stud
Sems screw (M3x8)