CONTENTS
INTRODUCTION .................................................... 1
PLEASE READ WITHOUT FAIL
[1] Operating Precautions............................... 8
1-1. DANGER .................................................... 8
1-2.
WARNING .................................................. 9
1-3. CAUTION ................................................. 11
[2] Parts Identification ................................... 13
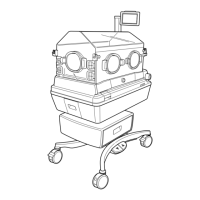
2-1. Main Body ..................................................... 13
2-2. Control Panel ................................................ 16
2-3. Display Screens ........................................... 17
2-3-1. General Description of
the Screens .......................................... 17
2-3-2. Screen Transition Diagram ................ 19
2-3-3. List of Operations Available
on Each Screen ................................... 20
2-3-4. Main screen .......................................... 20
2-3-5. Pulse Oximeter Screen ...................... 23
2-3-6. Weight Screen ..................................... 27
2-4. Service Menu (How to Operate
the Service Menu Screen) .......................... 35
2-4-1. How to Enter the Service Menu ........ 35
2-4-2. Operating the Service
Menu Screen ........................................ 36
MAINTENANCE
[3] Maintenance Inspection .......................... 41
3-1. Inspection before Use ................................. 42
3-1-1. Visual Inspection ................................. 42
3-1-2. Functional Inspection .......................... 43
3-1-3. Performance Inspection ..................... 46
3-1-4. Checking and Calibrating
the Weight Monitor .............................. 47
3-2. Quarterly Inspection..................................... 48
3-3. Inspection Checklist ..................................... 49
3-4. Periodical Replacement Parts and
How to Replace them .................................. 50
3-4-1. Replacing the Filter ............................. 51
3-4-2. Replacing the Oxygen Sensor .......... 52
2-3-7. Menu Screen ........................................ 29
2-3-8. Trend Screen ....................................... 33
[4] Cleaning and Disinfection ...................... 54
4-1. Hood Assembly............................................. 55
4-2. Mattress Platform and Parts Beneath ....... 57
4-3. Humidity Chamber ....................................... 59
4-5. Others ............................................................ 60
[5] Troubleshooting ........................................ 61
5-1. Alarms ............................................................ 61
5-2. Troubleshooting ............................................ 67
5-3. Troubleshooting Flowchart ......................... 69
5-3-1. Troubleshooting When the Unit
Cannot Be Controlled Properly ......... 69
5-3-2. Troubleshooting When the Unit
Does Not Function Properly .............. 71
4-5. Others ...................................................... 78
DISASSEMBY AND REPLACEMENT
[6] Disassembly and Replacement
Procedures ................................................. 95
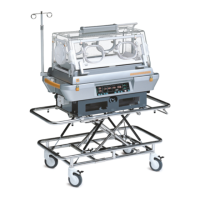
6-1. Stand .............................................................. 95
6-1-1. Removing the Main Body
from the HL Stand ............................... 95
6-1-2. Replacing the Actuator ....................... 97
6-1-3. Replacing the Foot Switch ................. 97
6-1-4. Replacing the Relay Board of the
Pedals for Height Adjustment ............ 99
6-1-5. Replacing the Caster .......................... 99
6-2. Hood ............................................................. 100
6-2-1. Replacing the Hood Assembly ........ 100
6-2-2. Replacing the Admittance
Panel Lock Holder ............................. 101
6-2-3. Replacing the Sensor Module
Holder .................................................. 101
6-2-4. Replacing the Snap-open
Access Port S/W................................ 102
6-2-5. Replacing the Admittance
Panel Assembly ................................. 102
6-2-6. Replacing the Admittance Panel
Hinge (with X-ray Cassette Tray
Door).................................................... 103
6-2-7. Replacing the Admittance Panel
Operating Lever R/L.......................... 104
6-2-8. Replacing the Admittance Panel
Operating Knob.................................. 104
6-2-9. Replacing the Inner Wall
Lever R/L ............................................ 105
6-2-10. Replacing the Inner Wall
(for the Incu
i
) ..................................... 105
6-2-11. Replacing the Inner Wall Bearing ... 106
6-2-12. Replacing the Inner Wall Shaft........ 106
6-3. Main Body ................................................... 107
6-3-1. Removing the Upper Section of the
Main Body from the Main Body ....... 107
6-3-2. Replacing the Heater ........................ 108
6-3-3. Replacing the Motor .......................... 109
6-3-4. Replacing the High Temperature
Sensor ................................................. 110
6-3-5. Replacing the Control Box Cover ... 111
6-3-6. Replacing the Power Switch ............ 111
6-3-7. Replacing the Detection Board ....... 112
6-3-8. Replacing the Tilting Unit ................. 113
6-3-9. Replacing the Position Detection
Board (for the Detection of the
Middle Board)..................................... 113
6-3-10. Replacing the Filter Joint.................. 114
6-3-11. Replacing the Humidity Chamber
Cover Packing A ................................ 115