Disassembly and Replacement Procedures
DISASSEMBL
Y
AND REPLACEMENT
95
[6] Disassembly and Replacement Procedures
Before disassembling and replacing the components of the unit, be sure to turn the power off, remove the
power cord from the power cord inlet, and allow the incubator and the heaters to cool down sufficiently.
After completing the following procedures, perform the functional inspection according to “3-3. Inspection
Checklist” provided in “[3] Maintenance Inspection.”
6-1. Stand
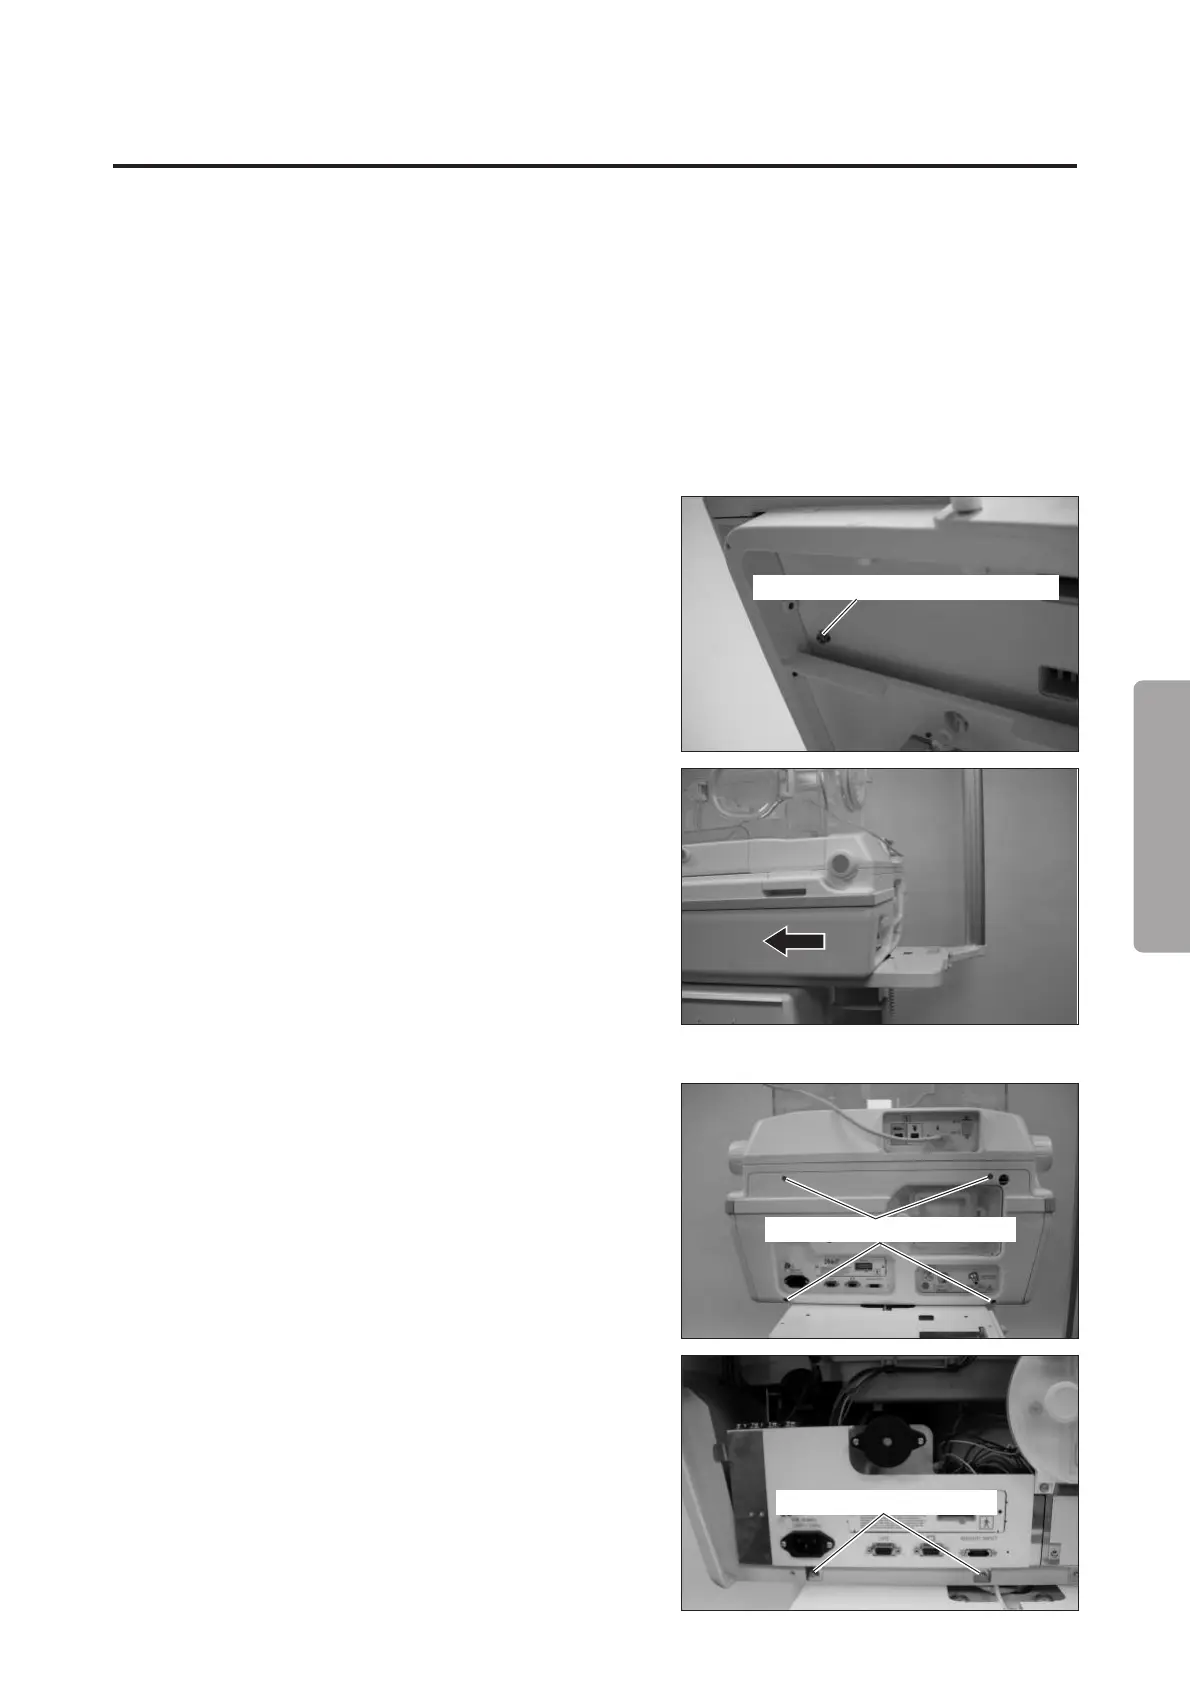
6-1-1. Removing the Main Body from the HL Stand
(1) Remove the screws fixing the main body to the HL
stand table.
Use a hexagon wrench (distance between the oppo-
site sides: 5mm) and remove the two hexagon socket
head cap screws (M6x15).
Hexagon socket head cap screw (M6x15)
(2) Slide the main body.
Slide the main body on the surface of the HL stand
table until it stops.
❋ To proceed with the work after sliding the main
body, fix the main body with the two hexagon
socket head cap screws (M6 x 15) in order to
prevent it from falling off. Use the same holes as
in (1) to fix the main body. (After sliding the main
body, you will find corresponding holes in the
table.)
(3) Remove the rear panel of the main body.
Remove the four double sems screws (M3 x 8) with
a Phillips screwdriver.
Double sems screw (M3x8)
(4) Remove the screws fixing the power box.
Remove the two double sems screws (M3 x 8) with
a Phillips screwdriver.
Double sems screw (M3x8)