Disassembly and Replacement Procedures
DISASSEMBL
Y
AND REPLACEMENT
117
6-3-15. Replacing the Connector of the Humidity Chamber
(1) Remove the humidity chamber cradle from the up-
per section of the main body.
See (1) ~ (3) in “6-3-12. Replacing the Humidity
Chamber Cradle.”
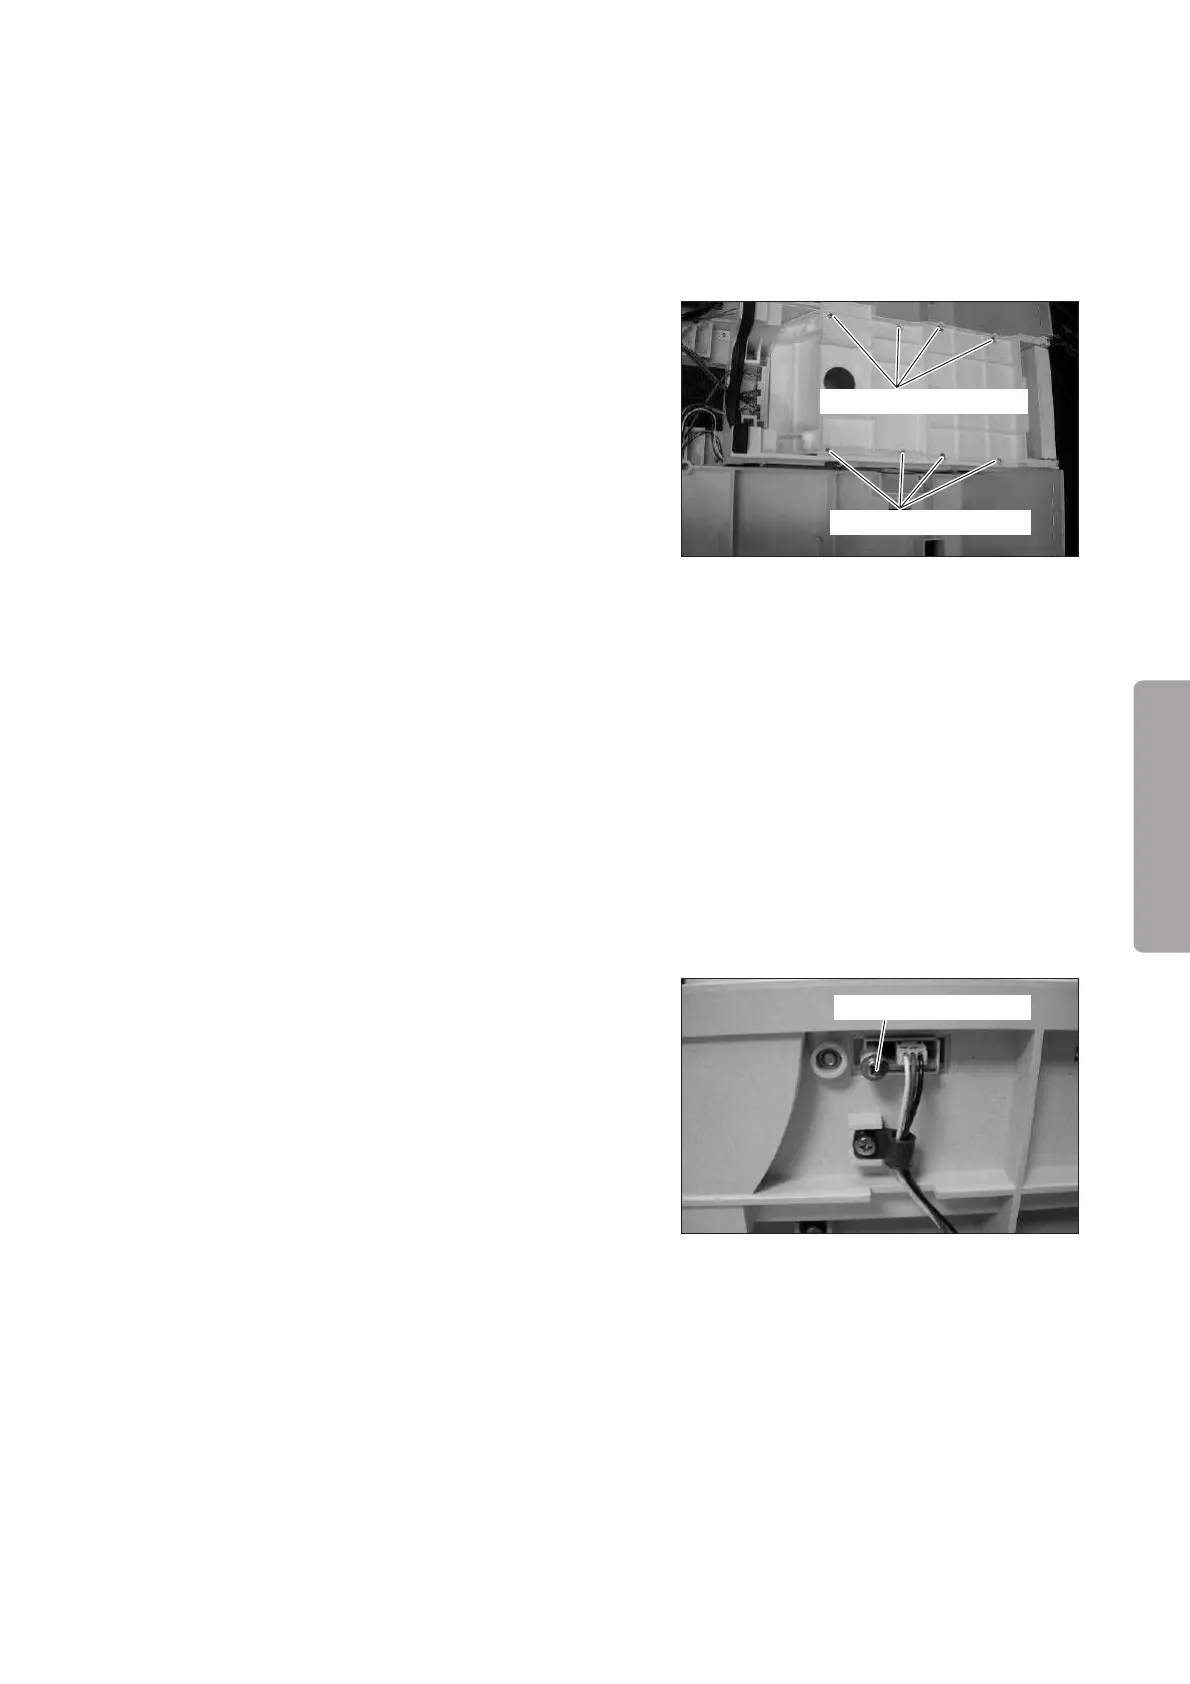
(2) Remove the humidity chamber cover.
Remove the eight tapping screws (M3 x 8) with a
Phillips screwdriver.
Tapping screw (M3x8)
Tapping screw (M3x8)
(3) Remove the humidity chamber cover packing C and
then remove the connector of the humidity cham-
ber.
(4) Reassembly: Reassemble in the reverse order of dis-
assembly.
6-3-16.
Replacing the Position Detection Board (for the Detection of the Boiler Cap)
(1) Remove the humidity chamber cradle from the up-
per section of the main body.
See (1) ~ (3) in “6-3-12. Replacing the Humidity
Chamber Cradle.”
(2) Remove the position detection board.
Remove the washer head (M3 x 8) with a Phillips
screwdriver and then remove the connector.
Washer head (M3x8)
(3) Reassembly: Reassemble in the reverse order of dis-
assembly.