Disassembly and Replacement Procedures
110
(4) Reassembly: Reassemble in the reverse order of dis-
assembly.
When reassembling the motor, be sure to attach the
connector of the motor in the correct orientation and
take care not to get the wires caught.
CAUTION
쎲 Be sure to attach a new packing when replacing
the motor assembly.
6-3-4. Replacing the High Temperature Sensor
(1) Remove the upper section of the main body from
the main body.
See (1) ~ (5) in “6-3-1. Removing the Upper Sec-
tion of the Main Body from the Main Body.”
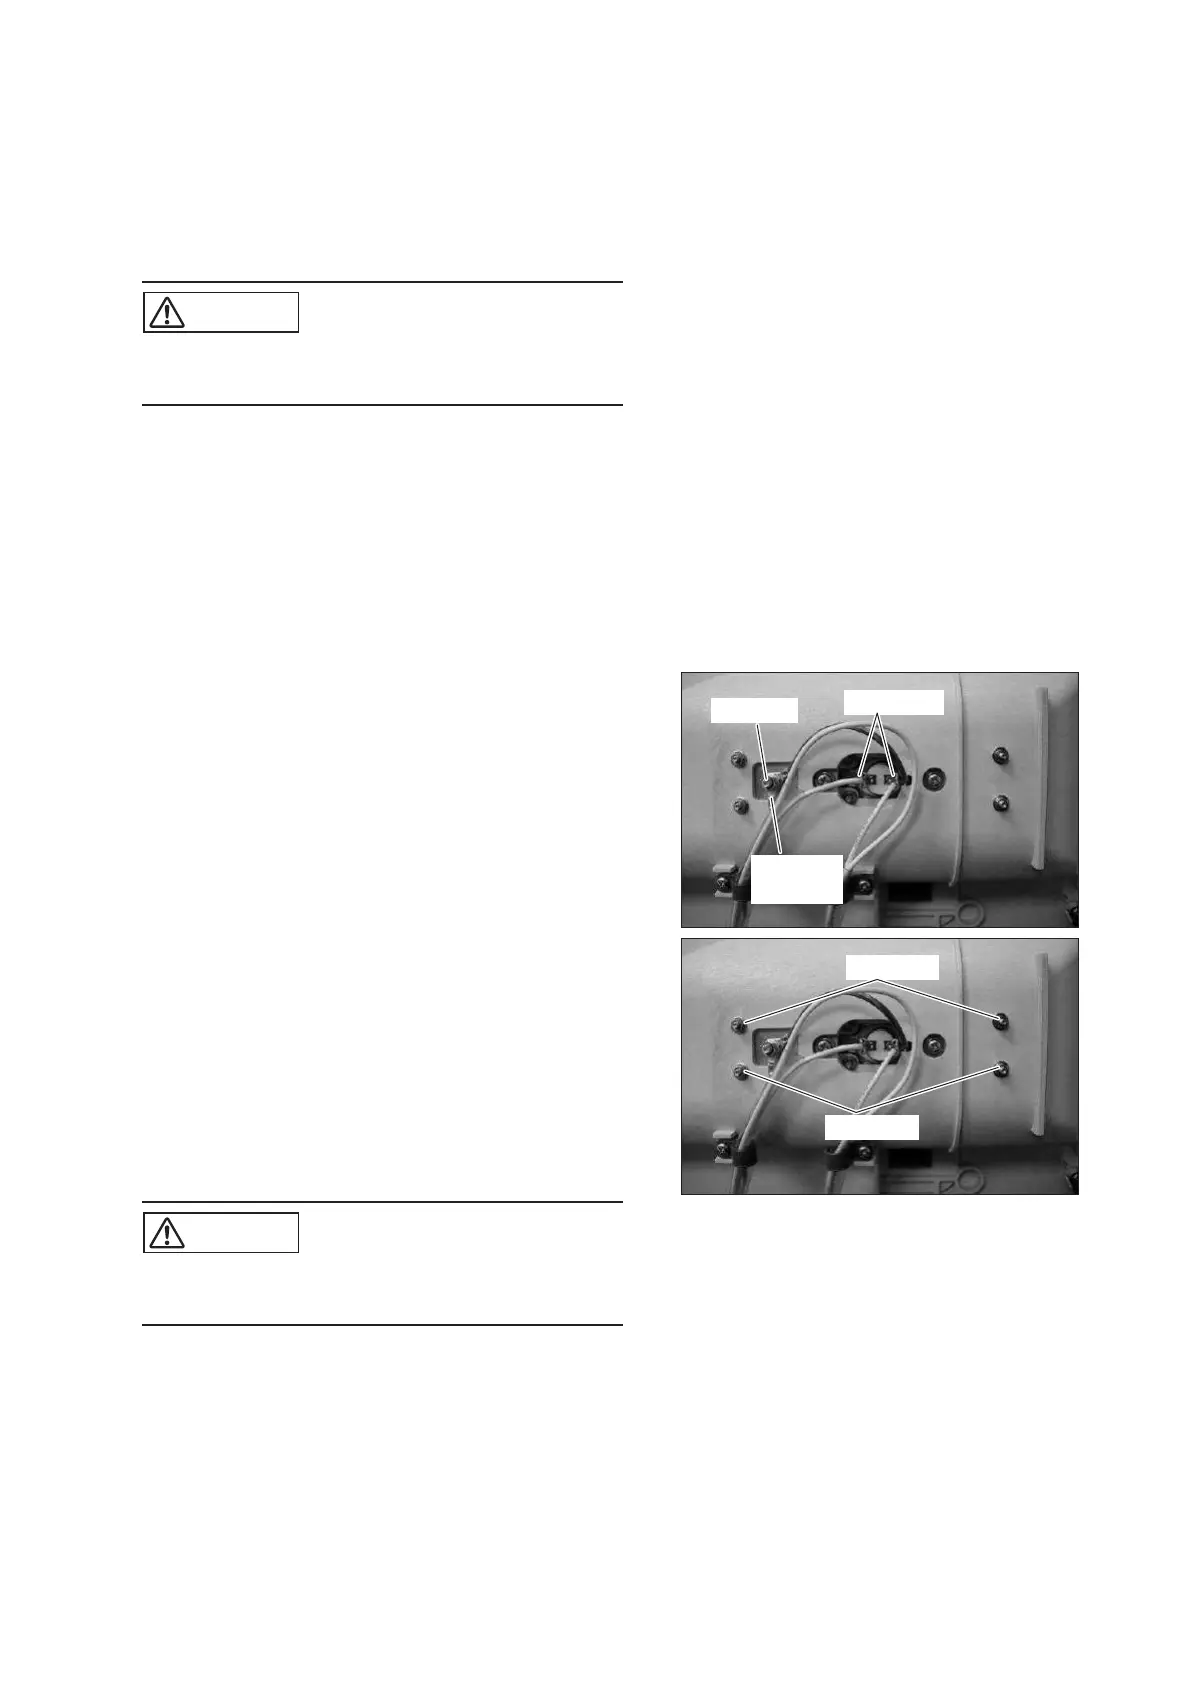
(2) Remove the terminals connected to the high tem-
perature sensor and the ground wire on the plate of
the high temperature sensor.
Remove the nut (M4) with a box wrench (distance
between the opposite sides: 7mm) and then remove
the ground wire.
Connector
Nut (M4)
Ground
wire
Nut (M3)
Nut (M3)
(3) Remove the screws fixing the high temperature as-
sembly.
Remove the four nuts (M3) with a box wrench (dis-
tance between the opposite sides: 5.5mm). Remove
the packing from the site where the high tempera-
ture sensor is attached on the main body.
(4) Reassembly: Reassemble in the reverse order of dis-
assembly.
CAUTION
쎲 Be sure to attach a new packing when replacing
the high temperature sensor assembly.