Cleaning and Disinfection
MAINTENANCE
59
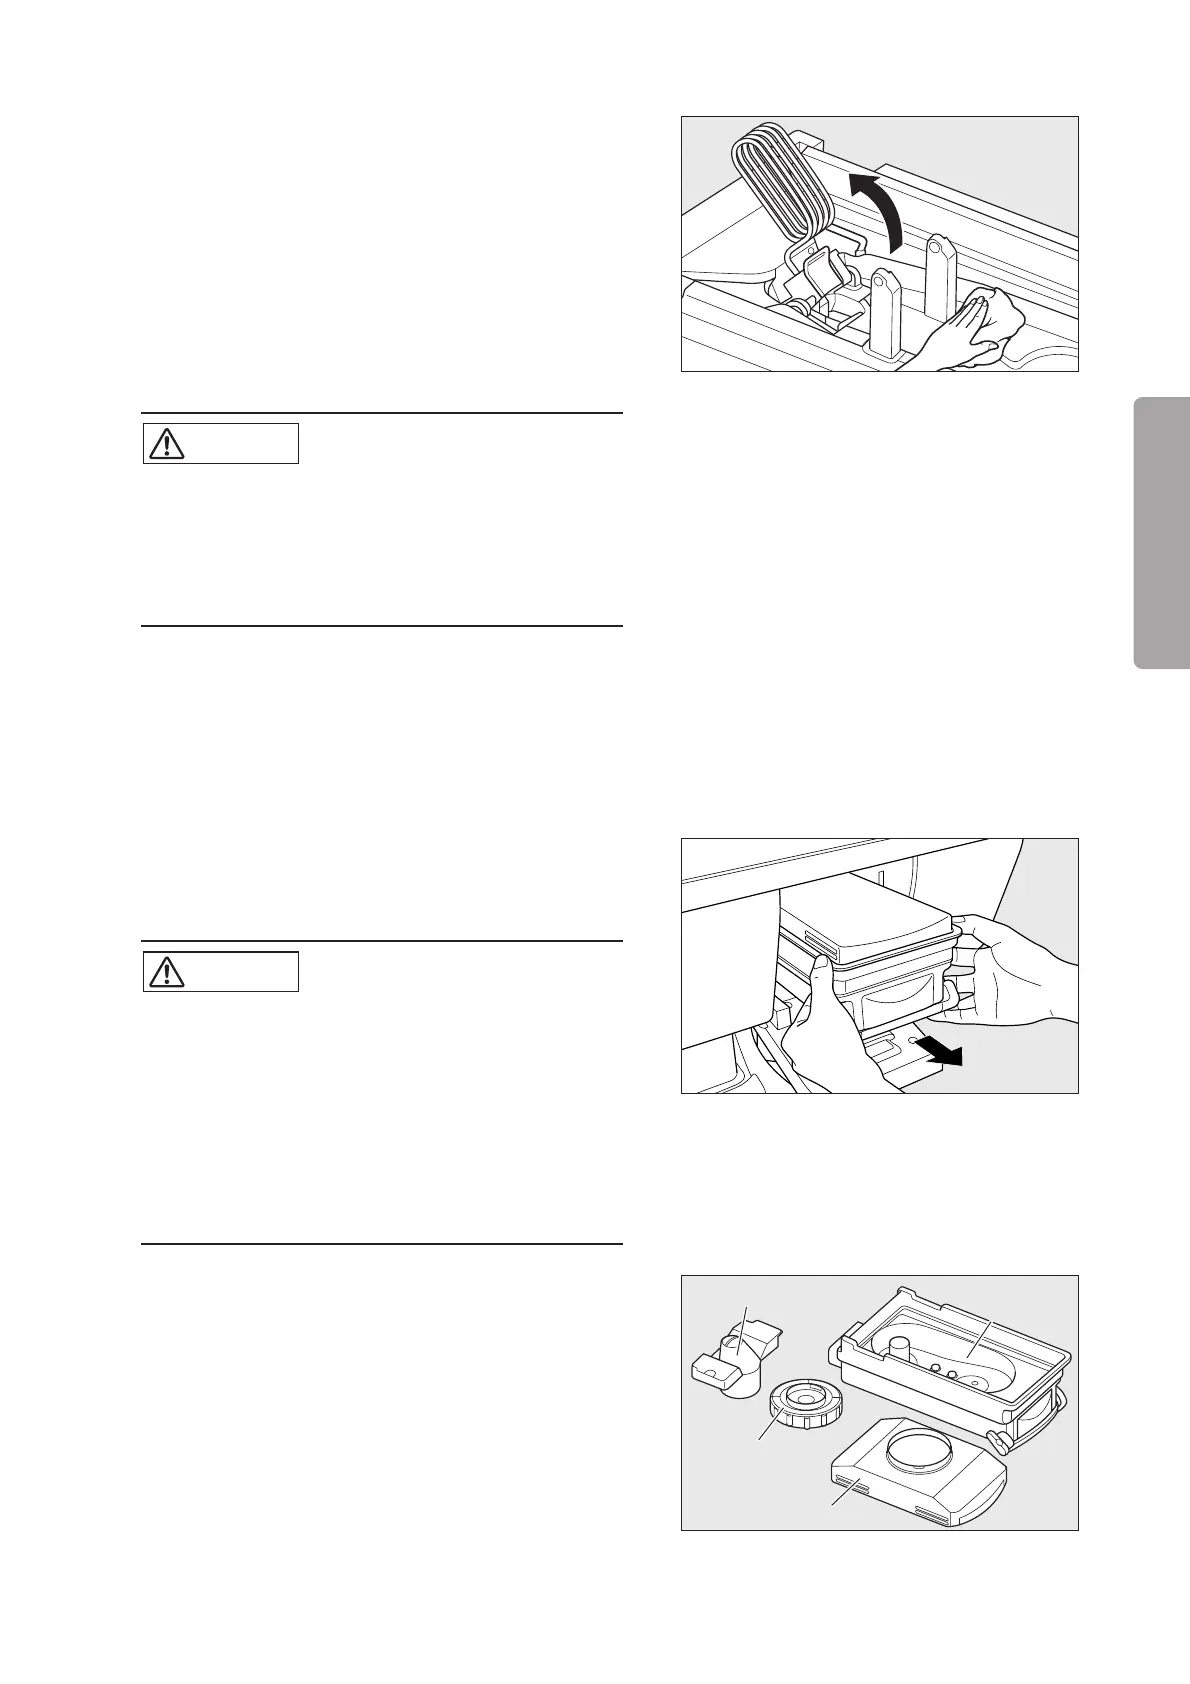
• Conditioning chamber
The conditioning chamber will become accessible when all
the components mentioned above have been removed. Pull
up the heater and clean the inside of the conditioning cham-
ber thoroughly with a soft cloth dampened with a disinfec-
tant solution.
❋ Replace all the removed components to their former posi-
tions in reverse order. Make sure that they are attached
correctly.
CAUTION
쎲 When cleaning the conditioning chamber with the
heater up, be careful not to get your fingers or
hand caught.
쎲 To replace the heater to its former position, push
it down gently.
4-3. Humidity Chamber
(1) Open the humidity chamber cover and draw out the
humidity chamber until it stops halfway. Lift up the
humidity chamber slightly and take it out.
CAUTION
쎲 Allow the humidity chamber and the water in it to
cool down sufficiently before removing the hu-
midity chamber. The temperature of the water will
have exceeded 70˚C, so that you may get
scalded.
Hold the humidity chamber with both hands be-
cause the humidity chamber filled with water is
heavy.
(2) Remove the cartridge tank, the tank cap and the
boiler cap from the humidity chamber. Immerse and
clean them in a disinfectant solution.
Cartridge tank
Tank cap
Humidity
chamber
Boiler cap