T ake-Up Spring R eplacement
After repeated adjustments, the take-up spring may begin to
show wear. Y ou may notice that adjusting the take-up spring no
longer corrects tension problems. In this case, you need to
replace the take-up spring.
R eplacing the T ake-Up Spr ing
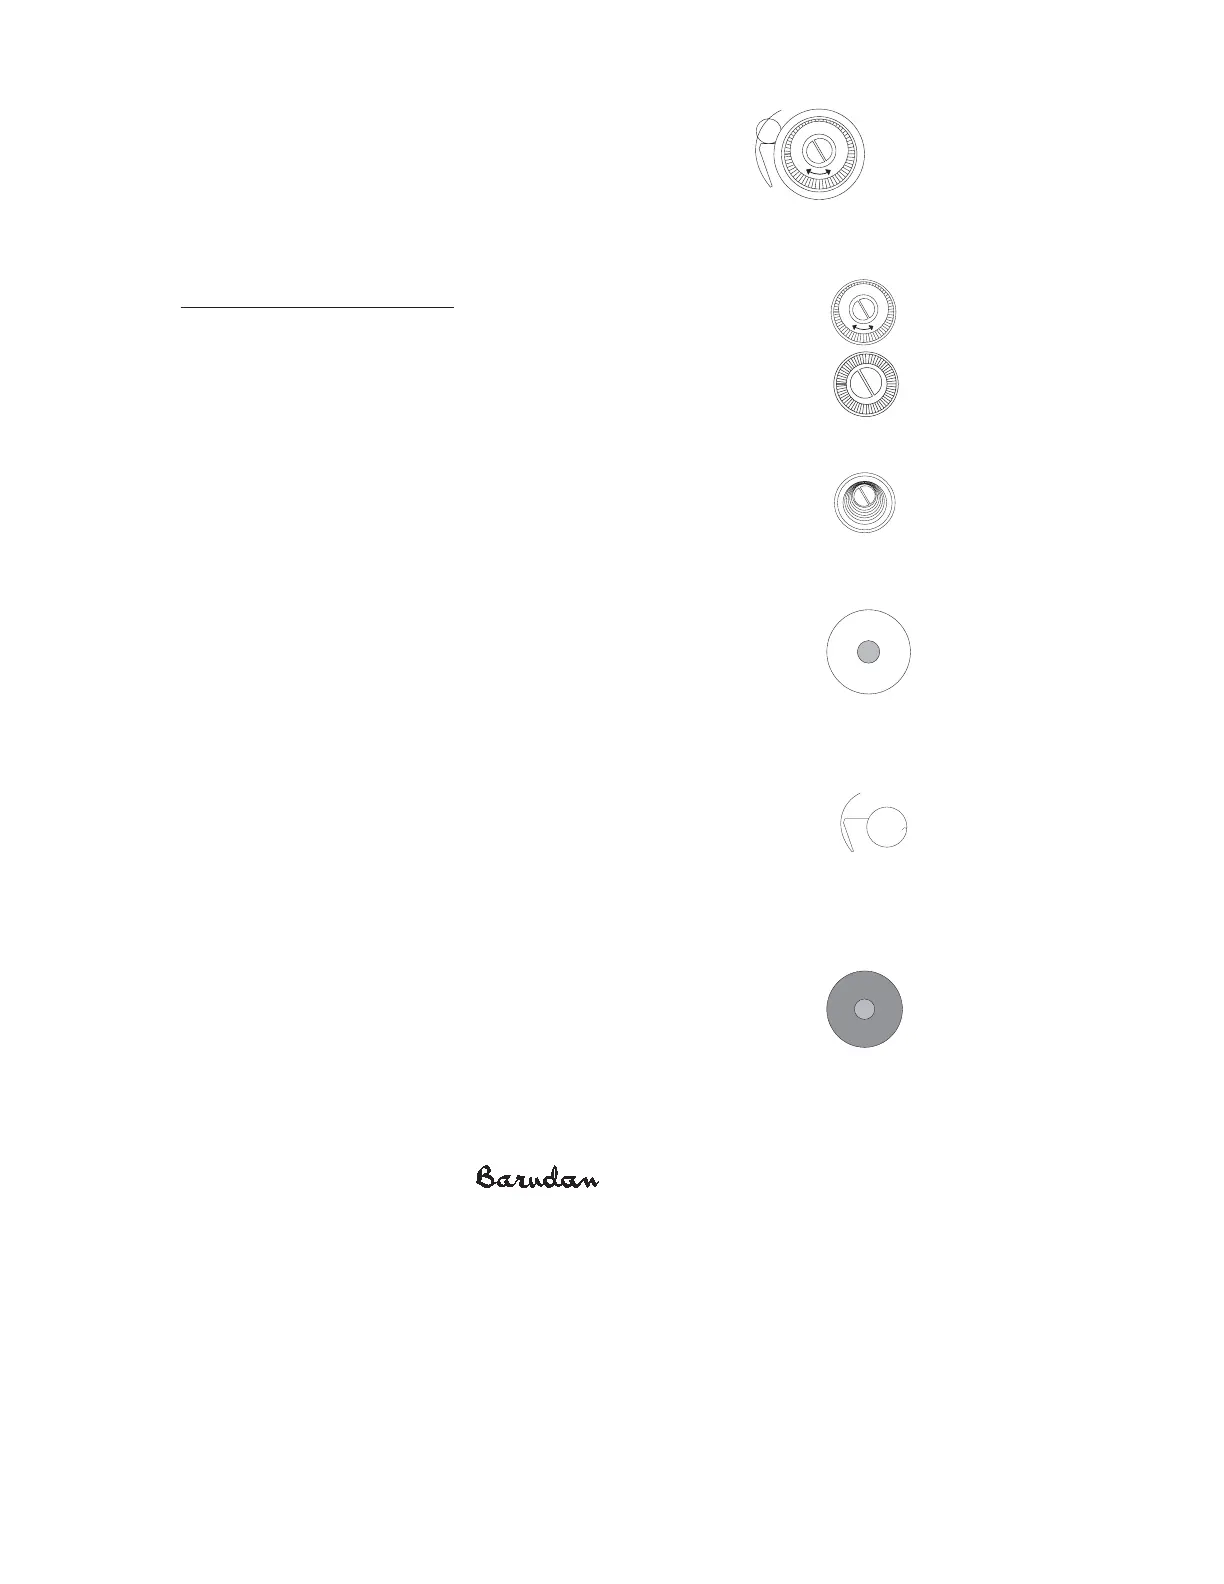
1. R emove the outer tension knob, turning it counter clockwise until it
comes off the tension assembly.
2. R emove the ratchet washer from the tension assembly post.
X Series Mechanical Guide 3-4
R atchet WasherR atchet Washer
-
+
Outer Tens ion KnobOuter Tens ion Knob
-
+
C omplete Tens ion Ass embly
C omplete Tens ion Ass embly
3. R emove the Tension Spring Cover, including the tension spring that
rests inside it.
4. R emove the outer white felt disk, then the R otary Disk wheel.
5. R emove the inner white felt disk.
6. R emove the green felt disk.
7. R emove the white plastic isolation plate. Y ou may need to carefully pull
up on it from behind with the blade of a flat screwdriver.
Notice the position of the take-up spring in reference to the assembly
post. T here is a groove in bottom of the post where the spring locks in
place.
8. R emove the worn take-up spring.
9. Insert the new spring, placing it in the same position as the old one.
Make sure the new spring rests against the take-up spring bracket.
10. R eplace the white plastic isolation plate with the flat side facing you.
Make sure it is firmly seated on top of the Take-Up Spring B racket (it
will partially cover the post) so the take-up spring cannot go around the post. T he
white plastic Isolation Plate traps the spring in place.
11. R eplace the green felt disc.
12. R eplace the inner white felt disk.
13. R eplace the R otary Disk Wheel, then the outer white felt disk.
14. R eplace the Tension Spring Cover, including the Tension spring inside
it.
Tens ion S pring C over
with S pring
Tens ion S pring C over
with
S pring
White P lastic
Isolation P late
White P lastic
Isolation
P late
Take-Up S pringTake-Up S pring
G reen F elt DiscG reen F elt Disc