Chapter 3 Troubleshooting
Quick Fixes
There are a number of problems that you may encounter while sewing that can be simply
remedied.
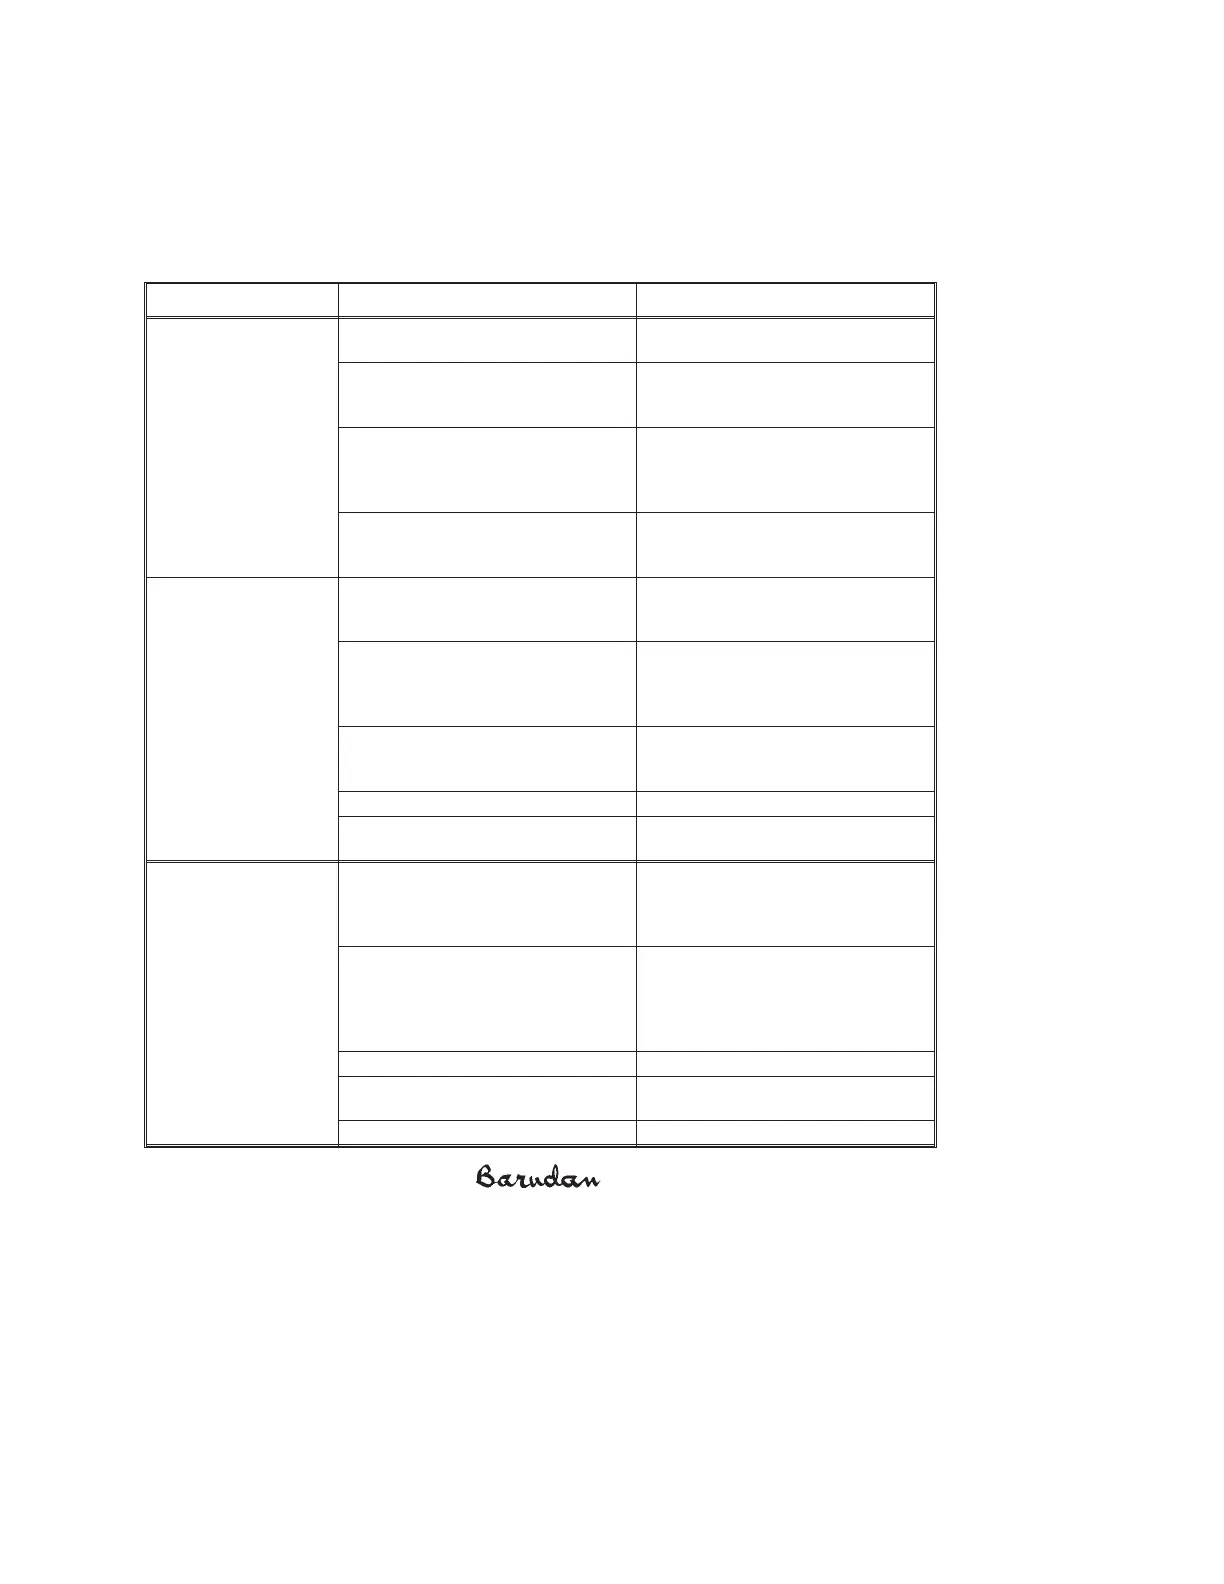
PROBLEM CAUSE SOLUTION
Fabric Puckering Garment hooped too loosely Rehoop the garment, making sure it is
taut.
No backing Backing helps stabilize most fabrics -
use the appropriate backing for the
application.
Improper use of backing Backing should be hooped along with
the garment. If more stability is
needed, backing or topping should be
bonded to the garment.
Improper tension Adjust the tensions so that only one
third bobbin thread shows on the un-
derside of the embroidery.
Machine Stops, Thread
Not Broken
Sewing head is turned off, but thread
break indicator switch is on
When heads are not in use, make sure
the thread break indicator switch is
off.
Improper threading Make sure thread goes through the
eyelet’s directly below the tension
knobs, the take-up lever eyelet and
the take-up spring.
Faulty take-up spring Make sure the take-up spring is
bouncing freely. If the problem con-
tinues, replace it.
Faulty ON/OFF switch Call Technical Support.
Faulty PCB Board (Thread Break In-
dicator Board)
Call Technical Support.
Needle Breaks Needle inserted improperly Make sure the needle is inserted all
the way into the needle bar and the
long groove is in the front. Make sure
the needle clamp screw is tight.
Flow of thread is obstructed Check the top tension by pulling the
thread through the eye of the needle.
If it is excessively tight, check all
threading points to make sure thread
is not caught anywhere.
Needle too close to hook Hook needs to be re-timed.
Needle hits hoop Make sure hoop is big enough for
work being done.
Needle is bent Replace needle.
X Series Mechanical Guide 3-1