4.
Rotate theMain Drive Pulley to wheretheindicatorpointto 24 degrees(Arm type
heads)25 degrees(Bridge typeheads). The pointof thehook shouldbe directly
behindthescarf of theneedleandabovetheneedleeye.
5. Check thehook-to-needleclearance.There should
be approximately½ of a needles-widthclearance
betweenthehook pointandtheback of theneedle.
Improperadjustmentwould causethehook pointto
miss thesmall loop andcreatea skippedstitch.
6. Replace thecovers.
Adjusting the Hook Timing
1. Clean any threaddebrisor lint from thehook area
with compressedair.
2. Loosen thethreescrews at therear baseof thehook.
This will allow you to advanceor retardthehook.
3. Locate themain drive pulley with degreeindicator.
X Series Mechanical Guide 3-6
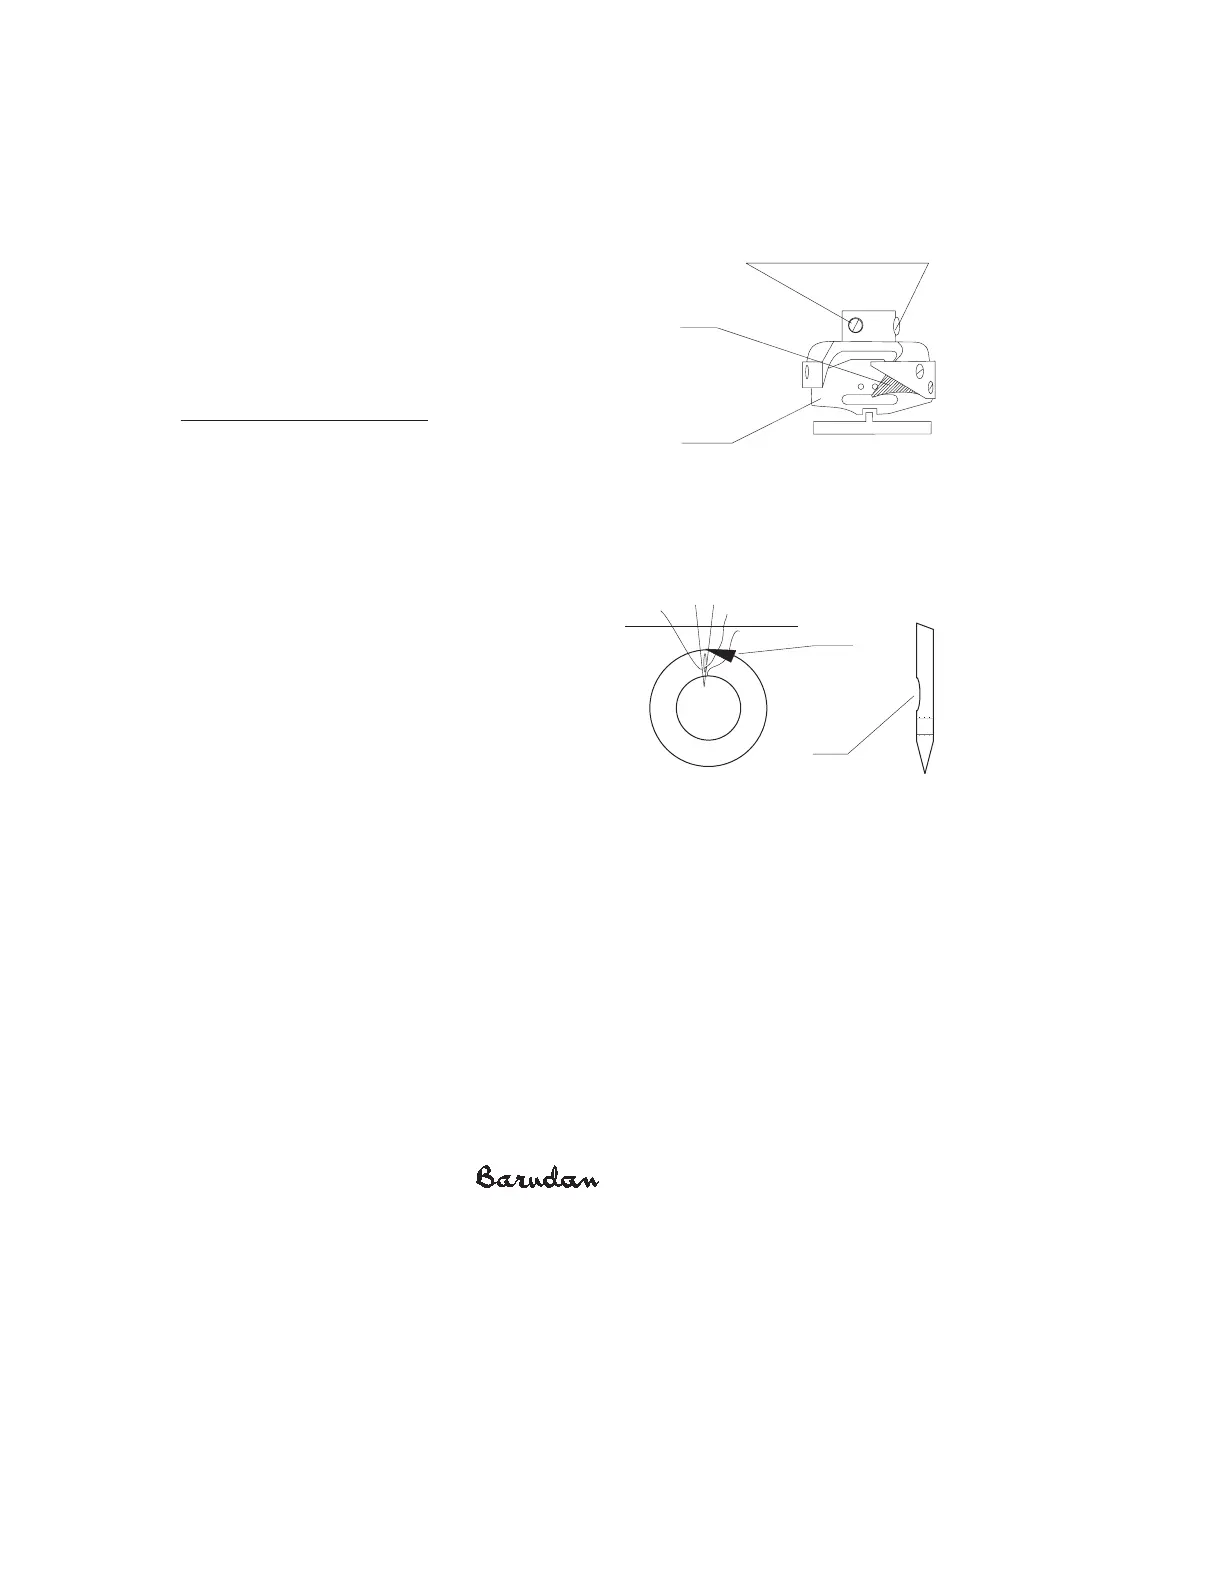
Basket
Hook AssemblyHook Assembly
Hook
Point
Adjustment Screws
(third screw not shown)
Adjustment Screws
(third screw not shown)
4. Rotate themain drive pulley to wherethe
indicatorpointsto thenecessarydegree.The
pointof thehook shouldbe directly behind
thescarf of theneedleandabovetheneedle
eye.
5. Check thehook-to-needleclearance.There
shouldbe approximately ½ a needles-width
clearancebetweenthehook pointandthe
back of theneedle.Improperadjustmentwould causethehook pointto miss the
small loop andcreatea skippedstitch.
6. When thecorrectpositionhas beenattained,tightenthethreescrews on thehook.
7. Adjust thePosition Finger Bracket (see thenext page).
• An H or I testis an excellentmannerof testingthehook timing
adjustments.Sew out theseletters(one for eachneedle)andcheck for any
irregularities in thesewingandstitch quality. Thread breaks, needle
breaksor skippedstitchescan occur whenthehook is notproperlytimed.
Hook
Point
Hook
Point
Scarf