4-1
4 QUICK REFERENCE GUIDE
This Section of the Manual is designed to provide you with a quick reference guide into the operation
of your Bendix/King unit; taking you step by step through the most common functions. If more detail is
required, please refer to the appropriate Sections in this Manual. The information contained within this
Section is equally applicable to the Tracker IIIC as it is to the Skymap IIIC. Where the Tracker IIIC
operation differs, the differences are explained in italic text after each paragraph.
Introduction
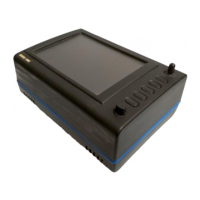
Your Bendix/King unit is operated via a joystick,
a series of 5 soft keys, and a rotary ON/OFF
switch. The joystick allows movement of the
pointer in MAP mode and is used for all forms
of data entry or selection. The appropriate key
labels for a particular page are configured in
software and drawn alongside the appropriate
black key. The rotary ON/OFF switch is used
for adjusting the brightness of your screen.
Before this screen is displayed, a warning shall
be given regarding the expiry date of the
Jeppesen
®
data. This must be acknowledged
before you may continue. Please refer to
Appendix 06 for details on obtaining data updates.
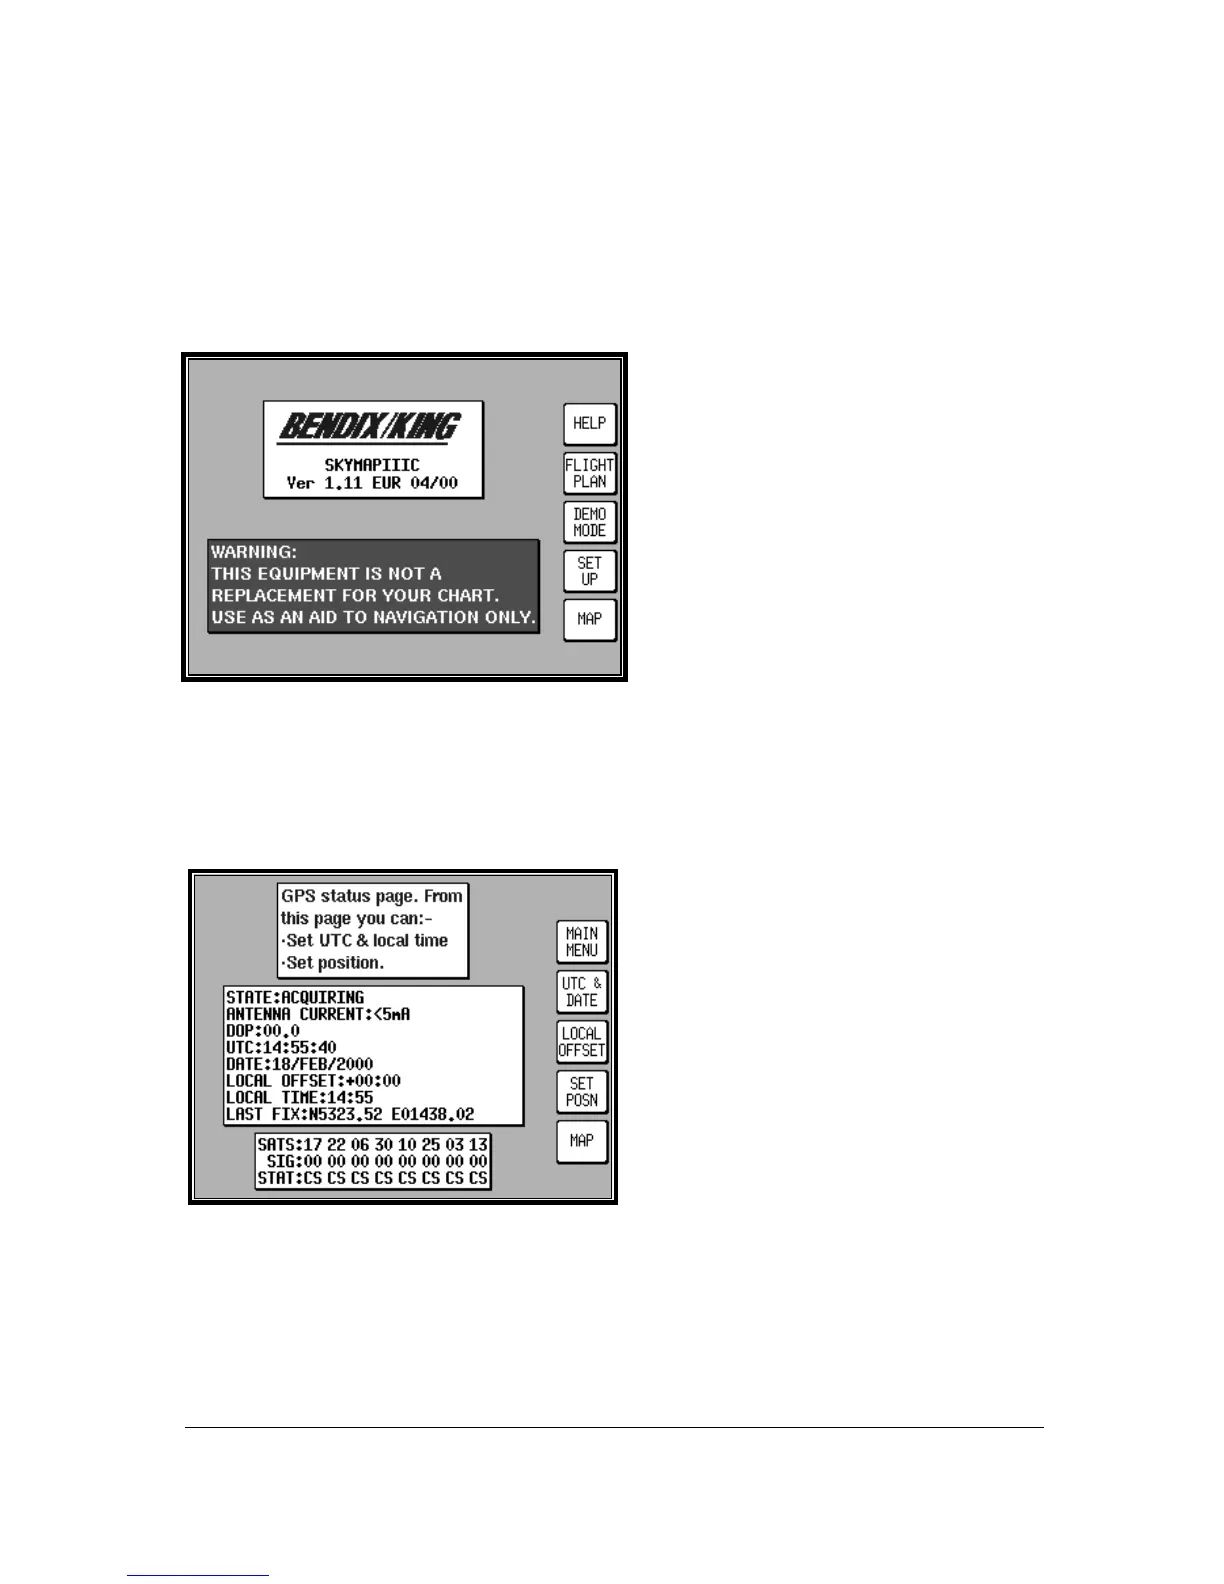
Initialising Your Unit
When an antenna is attached and has a good all round view of the sky, the unit will achieve a position
fix within 15 minutes. Ensuring that your GPS has rough UTC, date and position information can
significantly speed up this process. To check this switch on the unit, select the HELP key followed by
GPS STATUS.
Altering UTC & DATE: Select UTC & DATE,
followed by ADJUST UTC. Use the joystick to
adjust the time, then press SET. Now select
ADJUST DATE and use the joystick to adjust the
date, and then press SET followed by GPS
STATUS.
Altering Present Position: Select SET POSN,
and use the joystick to adjust the latitude and
longitude to your approximate position and then
press SET. Alternatively select SET POSN and
then VIEW MAP. Move the joystick on the map
to your approximate position (using the ZOOM
IN/ZOOM OUT keys where applicable). Once
there select SET POSN to change the position.
When connected to an appropriate GPS output a “Tracker” unit will self initialise.