8-5
Graphical User Waypoint Editing
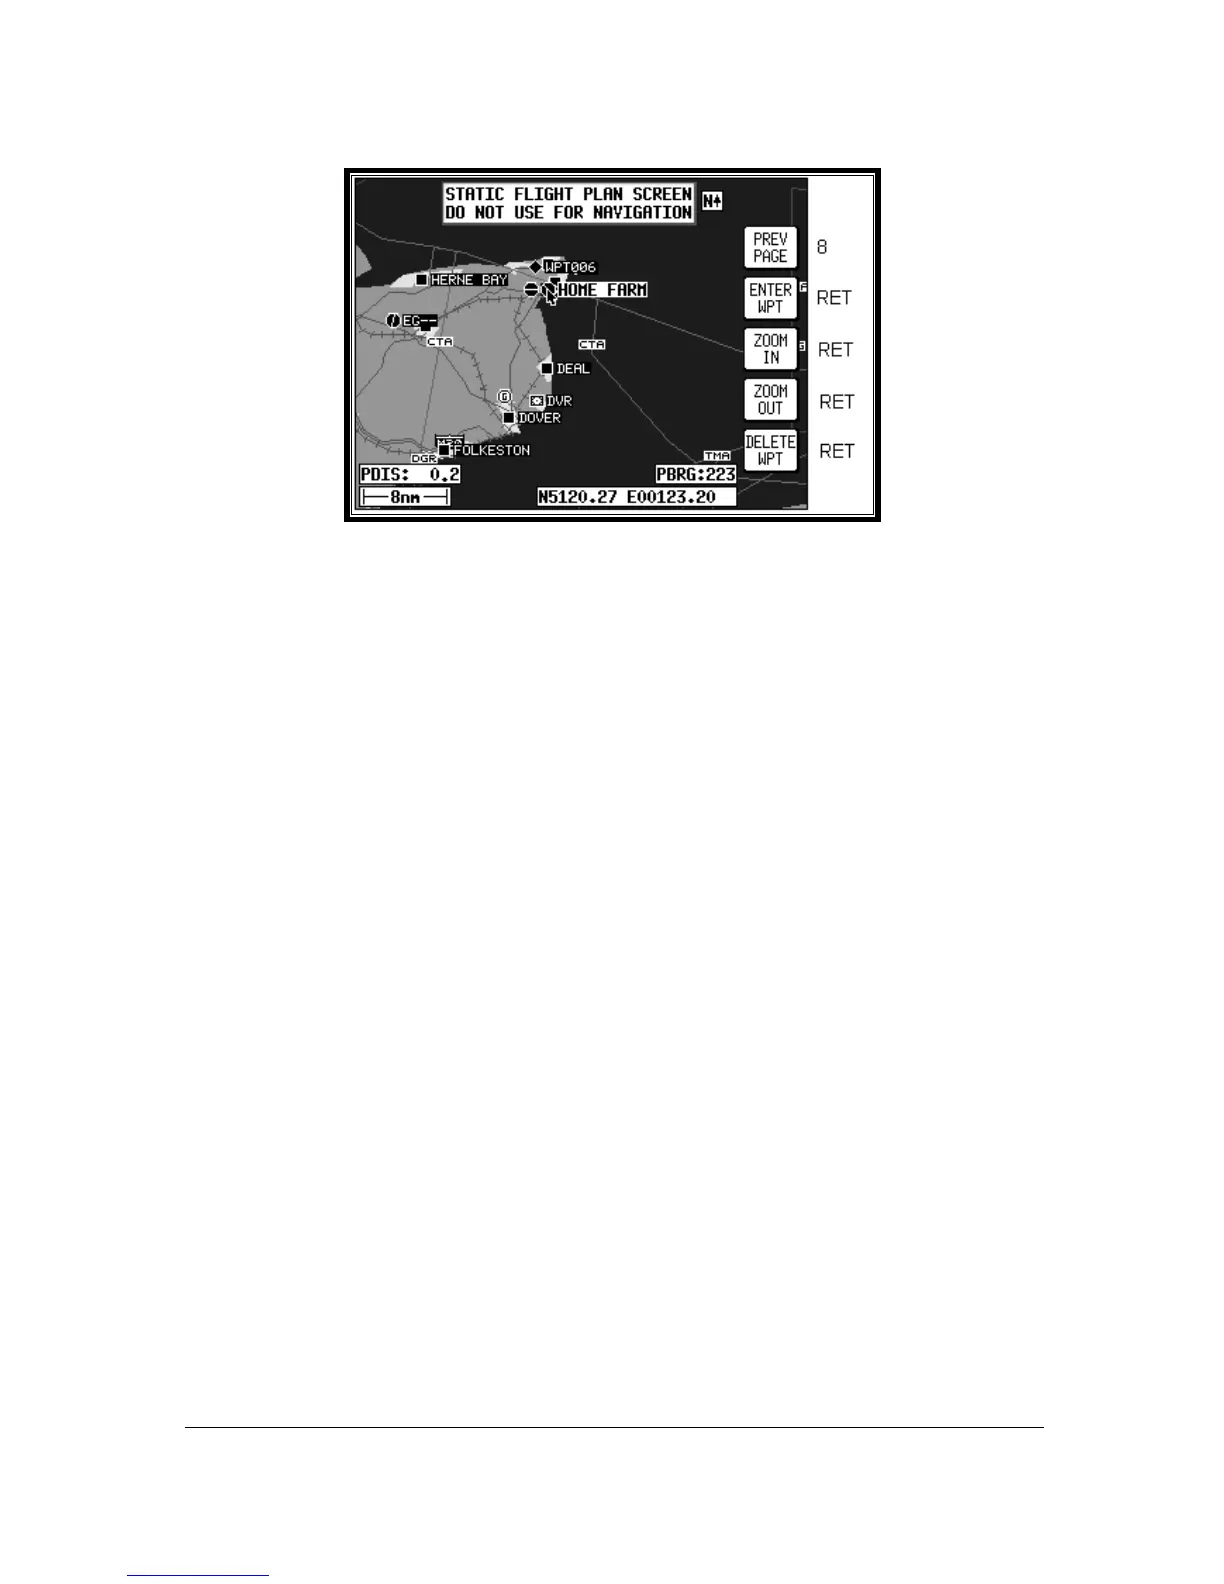
Screen 10: View and Edit User Waypoints on the Map Screen
When this Screen first appears, after pressing VIEW MAP on Screen 8, User Waypoint Viewer
Screen, the selected user waypoint will be centrally positioned. The joystick can be used to move the
pointer. The screen window can be moved around to display other areas of the map by “bumping” the
screen borders left, right, up or down with the pointer. If you need to “bump” the screen over a large
distance you will find it quicker and easier to zoom out first, move across the map as required. Then
zoom back in (In order to make these moves swiftly, not all details of the map are shown on screen
until the joystick is released.).
Distance and bearing boxes below the map show distance and bearing from the selected user
waypoint (or the last user waypoint entered) to the pointer. This feature allows you easily to enter
new user waypoints as a distance and bearing from a previously entered user waypoint.
New user waypoints can be created wherever the pointer is placed, simply by pressing Key 2, ENTER
WPT. Existing user waypoints can be deleted by positioning the pointer directly over them and then
pressing Key 5, DELETE WPT. Should you attempt to delete a user waypoint that is being used in a
stored flight plan, the [PRESENT IN FLGHT PLAN] message box will be displayed and the user
waypoint will NOT be deleted. Pressing Key 5, DELETE WPT, a second time will then delete the user
waypoint. Alternatively if you move the joystick, the [PRESENT IN FPLN] message will be removed
without deleting the user waypoint. Key 1, PREV PAGE returns to the screen entered from, saving any
changes made.
Each new user waypoint graphically created on the map will automatically be given the next available
user waypoint number as a temporary name and the default icon but you can alter the name and icon
later by using Screen 9, Manual User Waypoint Edit Screen.