5-2
2. A check for RAM corruption. If RAM has been lost or corrupted due to a severe ‘glitch’ or loss of
power in the memory battery a RAM clear will be performed on the affected areas and Screen 51,
Ram Lost Warning Screen, will be displayed (Refer to Appendix 01).
3. A check of the internal Lithium battery voltage. If the internal battery voltage is low, Screen 52,
Internal Battery Warning Screen, will be displayed (Refer to Appendix 01).
4. A check to see whether the Automatic Power-On Lock function has been enabled (see Screen 26
for further details). If it is enabled, Screen 54, Power On Security PIN Entry Screen, will be displayed
after 5 seconds (or if any Key is pressed before this). If when switched on it is found that three
unsuccessful attempts have been made to enter the Unlock PIN, Screen 55, Lockout Screen, will be
displayed (Refer to Appendix 01).
5. A check to see if a new memory card has been fitted. This involves comparing the software version
number held in NVM with that of the current memory Card. If a change of card is detected, the
integrity of all flight plans will be checked and if any discrepancies are found Screen 56, Flight Plan
Change Warning Screen, will be displayed (Refer to Appendix 01).
6. If the unit is a Skymap IIIC the GPS receiver circuitry will be tested and if any problems are found, a
NO REPLY message will be indicated in the STATUS field of Screen 3, GPS Status Screen.
If the unit passes all checks 1 to 6 above no warnings will be given
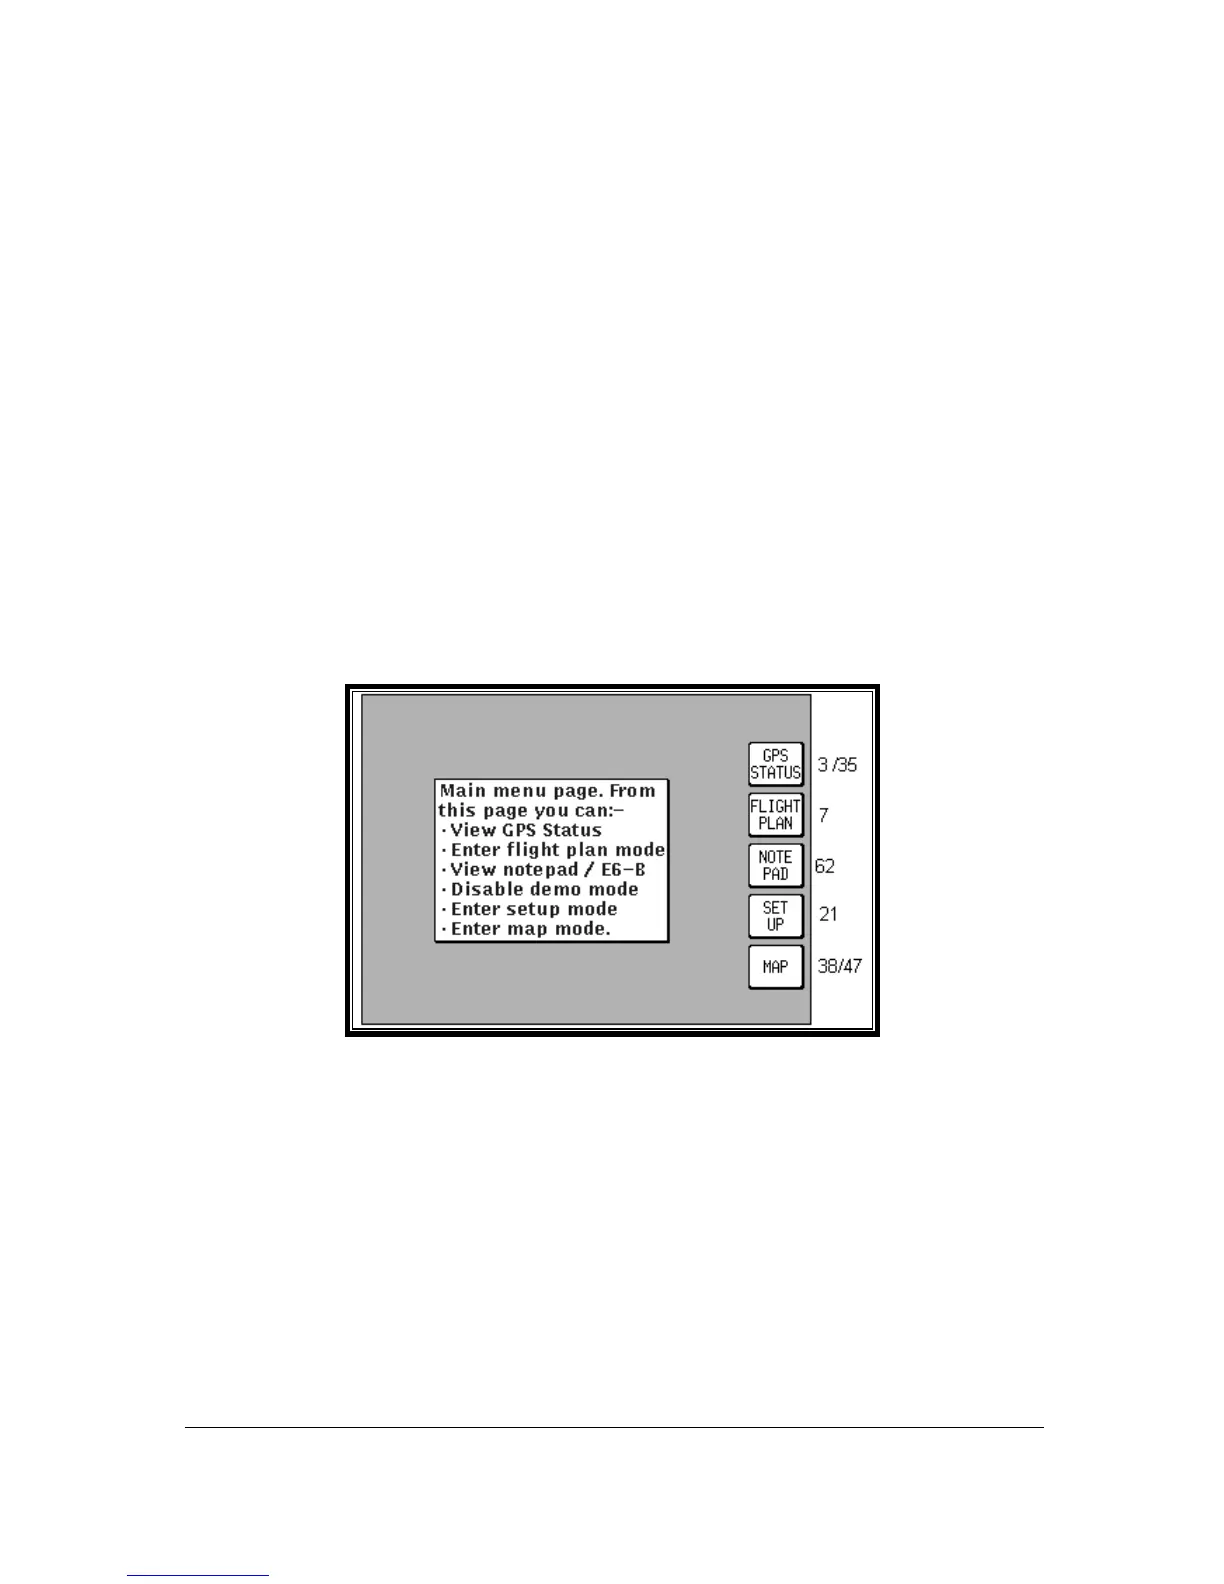
Main Menu Screen
Screen 2: Main Menu Screen
On Skymap IIIC units, Key 1 calls Screen 3, which is the GPS Status Screen. On Tracker IIIC units,
Key 1 is labelled DATA IN/OUT and will cause Screen 35, Data input/output Setup and Test Screen, to
be displayed. Key 2 calls Screen 7, which is the Flight Planning Mode Cover Screen. Key 3 will read
NOTE PAD if DEMO MODE was not selected on Screen 1. Pressing Key 3 when labelled NOTE PAD
will call screen 62, which is the NOTE PAD display screen and will also give access to Screen 57,
which is the E6-B Calculator Cover Screen (Refer to Section on E6-B Calculator). If Demo Mode has
previously been activated, Key 3 will read DEMO OFF. Pressing DEMO OFF will then switch Demo
Mode off and return to Screen 2 with Key 3 reading NOTE PAD. Key 4 calls Screen 21, which is the
Setup Cover Screen. Key 5 calls Screen 38 or 47, which are MAP Mode and MAP Mode with NAV
Information Screens.