5-1
5 TITLE AND HELP SCREENS
To switch the unit on, rotate the On/Off/Brightness control fully clockwise.
Your unit produces a variety of tones and alarms to assist you in correct operation. At this stage only
two types of tone need concern you. These are:
1 short beep sounds when you press a valid Key.
2 short beeps sound when you press a Key that is not assigned.
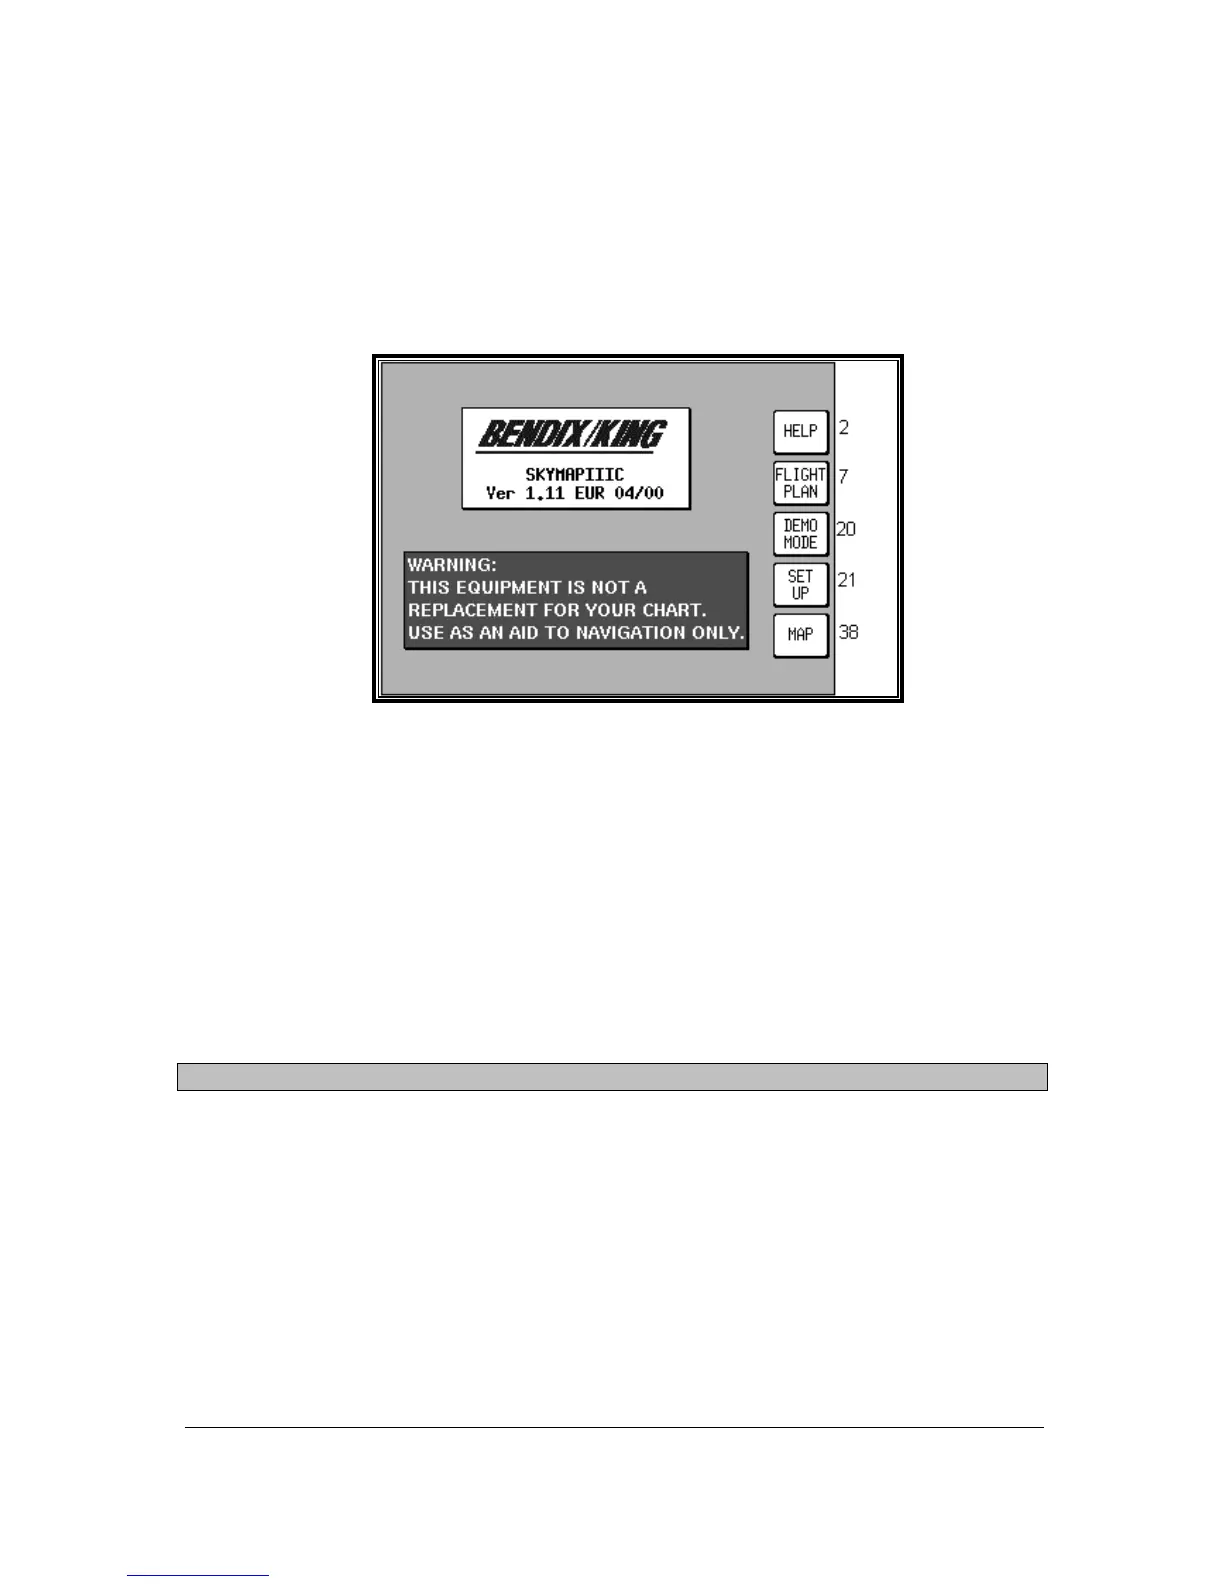
Screen 1: Title Screen
The Title Screen appears each time the unit is switched on, after the Jeppesen
®
database expiry date
has been acknowledged.
Key 1 calls Screen 2, which is the Main Menu Screen.
Key 2 calls Screen 7, which is the Flight Planning Mode Cover Screen.
Key 3 calls Screen 20, which is the Demo Mode Setup Screen. (If, since being switched on, the unit
has received valid fix information from the internal GPS receiver (Skymap IIIC) or from an external
device (Tracker IIIC), Key 3 DEMO MODE will for safety reasons be blanked and disabled.) This is
the only Screen on which Demo Mode can be activated.
Key 4 calls Screen 21, which is the Setup Cover Screen.
Key 5 calls Screen 38, which is the Map Mode Screen.
To switch the unit off, rotate the On/Off/Brightness control fully counter clockwise.
WARNING: Do not force the control knob past its end stops.
Self Test and Initialisation
When the Title Screen is initially displayed, the unit carries out a series of internal check routines
automatically. These are:
1. Verification that the unit has been factory initialised. This consists of a check to see if there is a
special code in NVM. If there is no initialisation code in the NVM a message saying UNIT NOT
INITIALISED will be printed across the centre of the Screen and the unit will be totally disabled. This
is a security feature, safeguarding against theft of the unit and attempted erasure of your PIN from the
NVM. (If your unit is stolen and the NVM is erased or replaced in an attempt to reset the PIN, the thief
will still not be able to use or sell the unit because these special high security factory initialisation
codes will be missing.)