14-9
Auto Power-On Lock
Pressing Key 3, AUTO LOCK, on Screen 26, Pin Change & Power On Lock Enable Screen, allows
you to switch the Auto Power-On Lock security feature ON or OFF. If you ENABLE the Power-On
Lock, the unit will require your PIN to be entered every time you or anyone else switches it on.
Although, as mentioned above, so long as the Power-On Lock has not been activated, you can key in
as many PIN attempts as you wish, once it has been ENABLED however the situation changes
entirely.
If an incorrect PIN is then entered three consecutive times at the switch-on stage, the unit will lock out
and display Screen 55 (see Appendix 01). If this happens to you, in order to re-activate the unit, you
will have to telephone Honeywell or your Bendix/King dealer, armed with the Serial Number of your
unit and the Lock-Out Number, which you can read from the top of Screen 55. The operator at your
dealer or at Honeywell will verify these details and check them against the Honeywell database and
register of stolen units.
Once the operator is satisfied that the unit has not been stolen and that you are the officially
recognised owner, you will be given an Unlock Code Number. This Unlock Number is a 10-digit
number. In order to unlock your unit you must now enter this number correctly into your unit, still using
Screen 55. The digits will replace the question marks as each one is keyed in. The Unlock Number is
regarded by the unit as having been entered as soon as the last digit has been keyed in. Every time
an incorrect Unlock Number is entered, the unit will generate a new LOCK OUT number. This makes
it impossible for a would-be thief to stumble upon the Unlock Number by trial and error. The odds
against a thief guessing the correct Unlock Code Number are 10 million to 1.
If you do ever get into a Lock-Out situation and then re-activate your unit with the Unlock Code
Number received from Honeywell, remember that no matter what PIN you were using before, the PIN
will now have been reset to the default digits of 1234.
Be very careful if you activate the Auto Power On Lock feature. Locking yourself out of the
system can be very inconvenient.
Installation and Diagnostic Screens
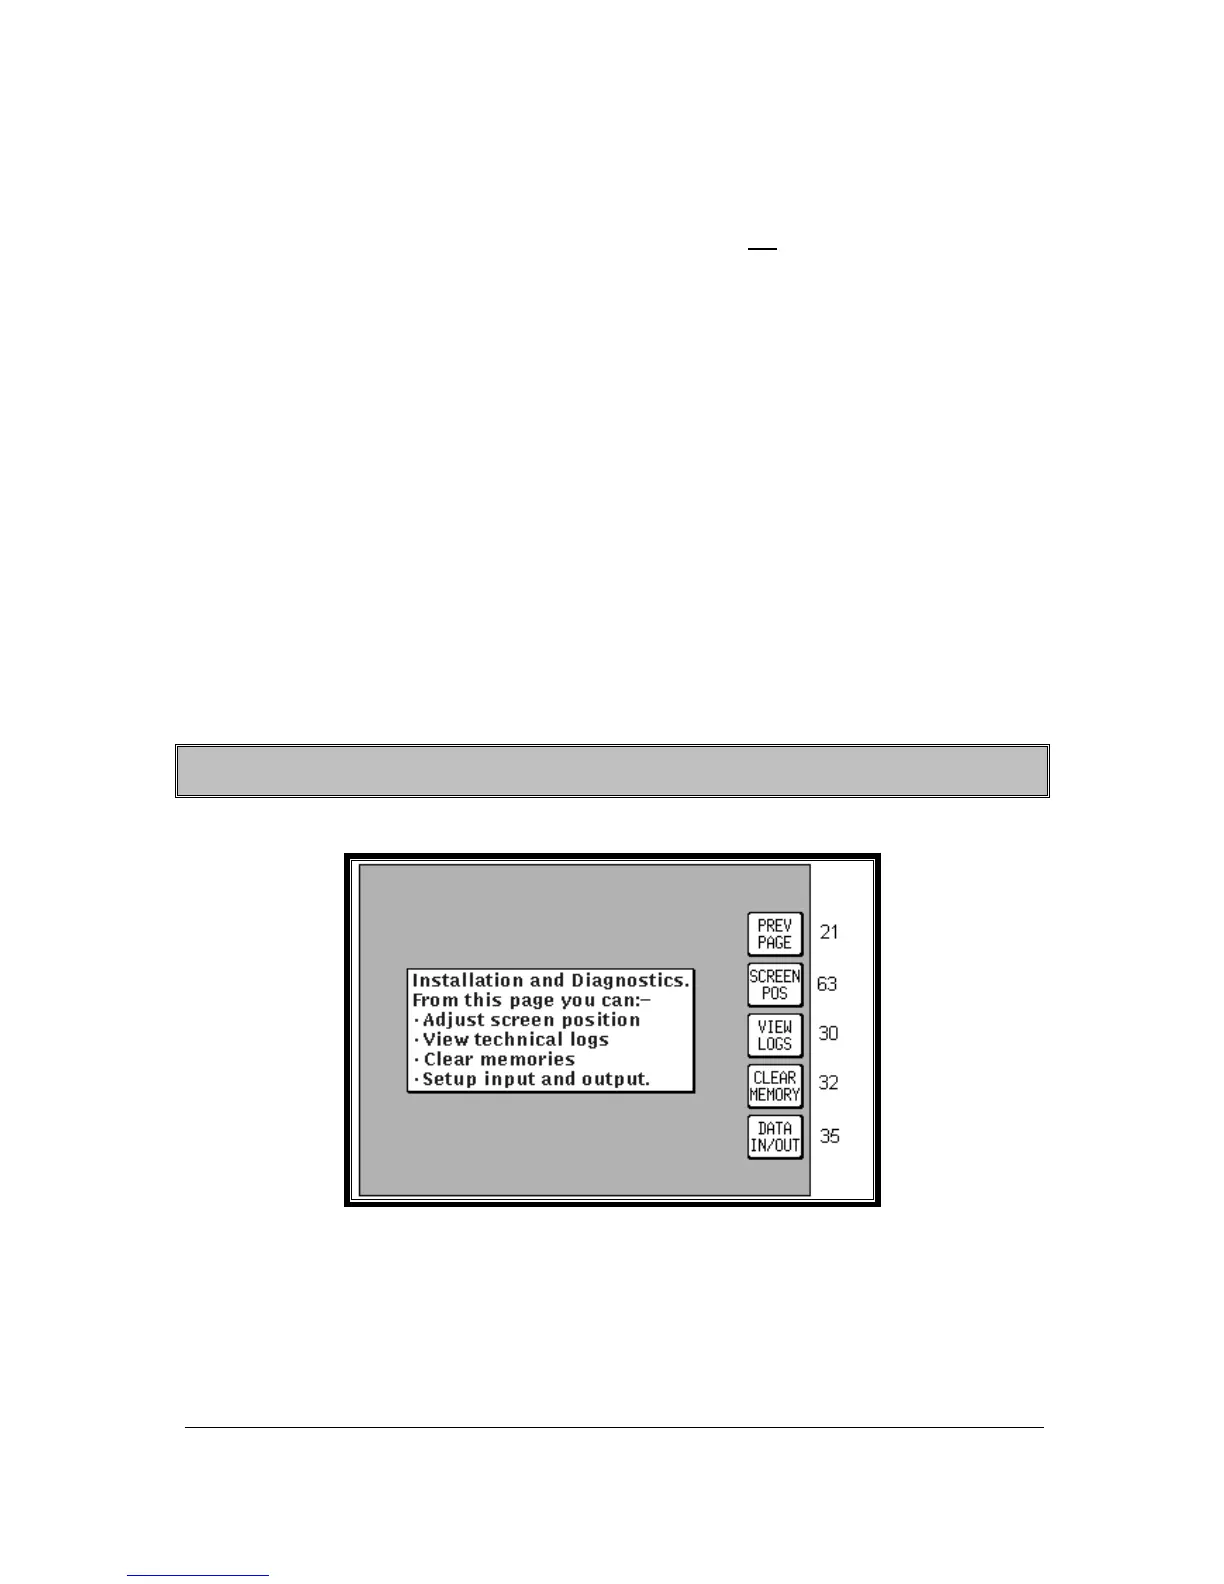
Screen 28: Installation and Diagnostics Cover Screen
This Screen is accessed by pressing Key 4, SETUP, in Main Menu followed by Key 5, INST & DIAGS,
in Screen 21, Setup Cover Screen. Screen 28 gives you access to all installation and test-related
Screens, and allows you to perform diagnostic checks on the data input and output lines.
You can also use this Screen to gain full access to the “time in service” logs and “last flight” log. It is
used, in addition, to enter four different “Memory Clear” routines, which are PIN-protected to prevent
inadvertent erasure to the unit's memory.