9-3
In addition to finding it useful for measuring distances, bearings and ETE's, you can utilise this Screen
for other tasks. If you place the pointer over any data icon and then press Key 4, MORE INFO, Screen
40 (Airport), Screen 40A (Beacon) or Screen 40C (all other data icons) as illustrated below will appear.
These Screens contain additional data and information on the selected item.
If you want to navigate directly to any position, press Key 5 and you will obtain a DIRECT TO, taking
you to wherever the pointer is positioned, even if it is not pointing to a database item (NOTE: In this
case the waypoint will be shown as ‘TEMP WPT’). This is a very useful feature for arbitrary in-flight
diversions. After you have pressed Key 5, DIRECT TO, Screen 47, Map Mode with NAV Info, appears,
with Key 5 now labelled “DIRECT TO OFF”.
Airport Information
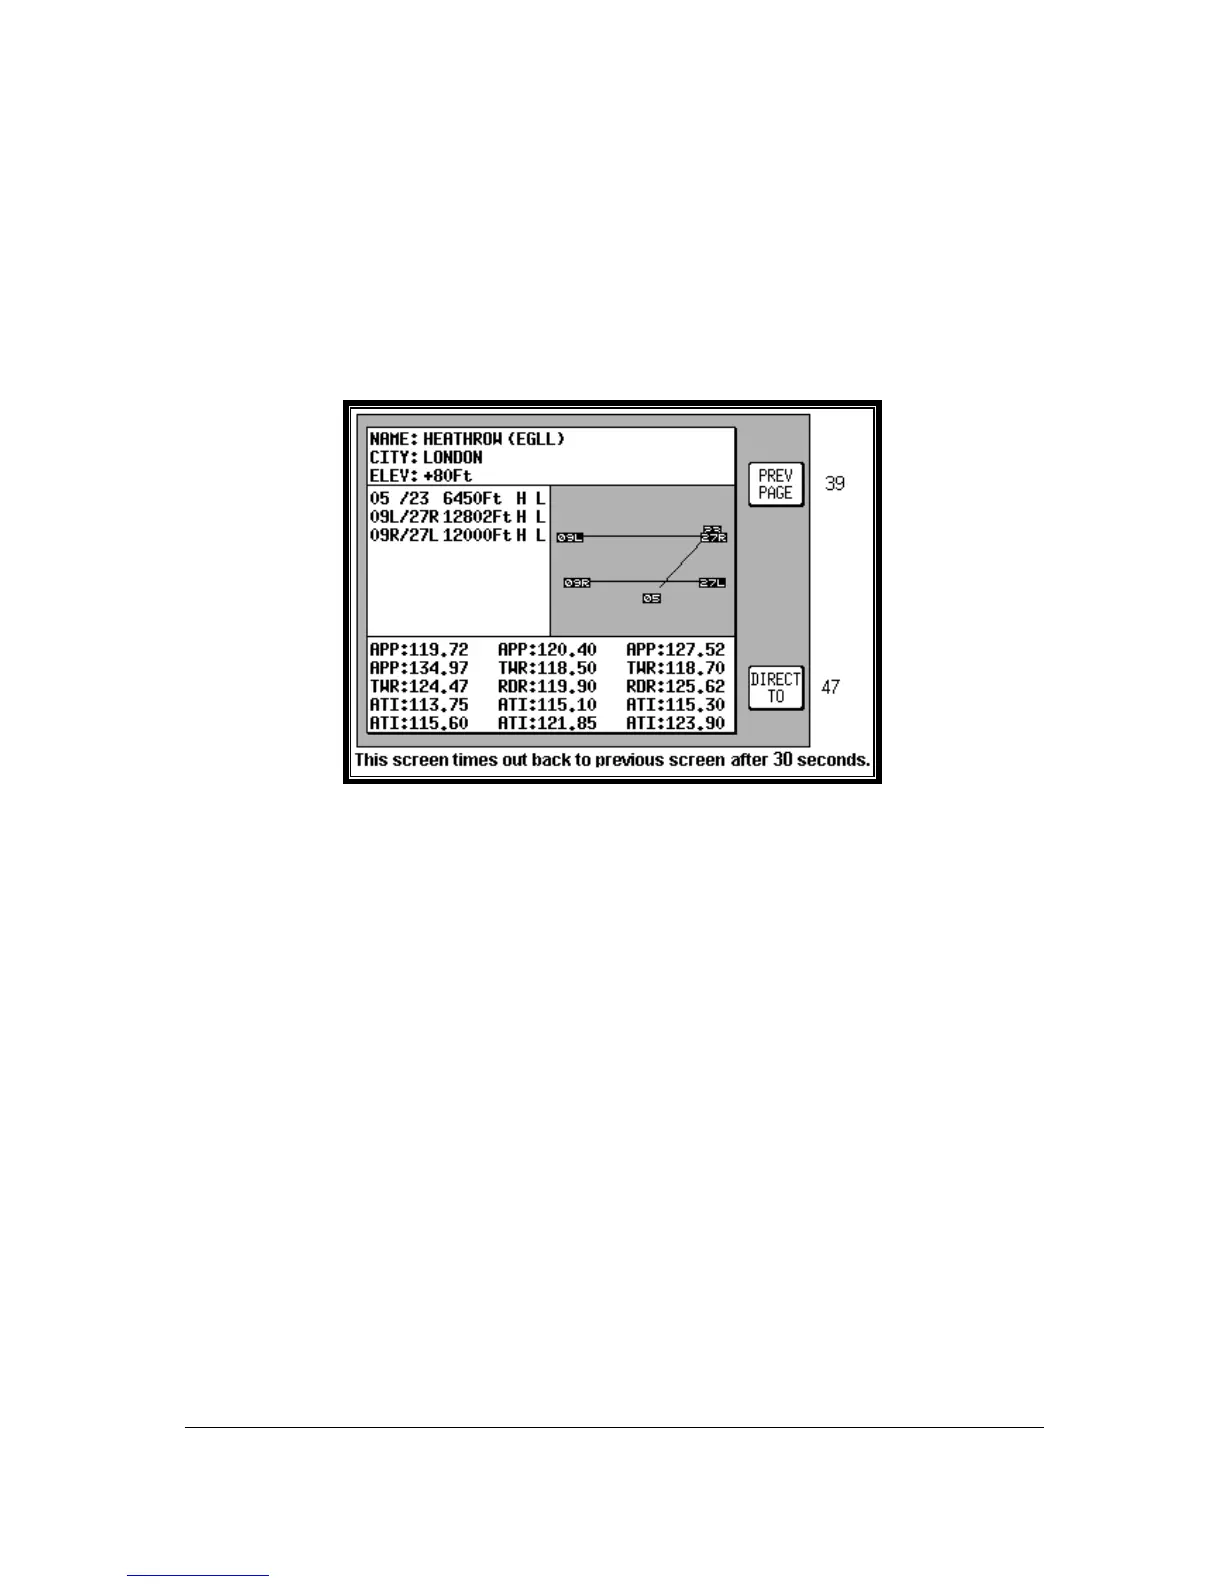
Screen 40: Map Mode Airport Info Screen
As explained above, you can access this Screen from Screen 39 by placing the joystick pointer over
an airport icon and pressing Key 4, MORE INFO. All the information given here is derived from the
built-in Jeppesen database. Runway surfaces are shown as an H for hard and an S for soft. Lighting
is shown as an L for lit and a U for unlit.
To obtain the goto for the chosen airport all you have to do is press Key 5, labelled DIRECT TO. To
return to the Map of Screen 39 you should press Key 1, PREV PAGE. Alternatively, the unit gives you
30 seconds to read what you require from the Info Screen and then automatically returns to Screen
39.
Pressing Key 5, DIRECT TO, in MAP Mode when the joystick is not active, can also access this
Screen. Allowing you to call up the item of interest from the airports database as if you were selecting
it for a DIRECT TO.