55
Editing the performance on a track (Track Editing)
Advanced Use
7. Press PARAMETER [ ] [ ] to move the cursor,
and turn the TIME/VALUE dial to specify the time of
the beginning of the location where you want the data
to be moved.
8. When you are ready to execute the move, press [ENTER].
The display will ask “Are you sure?,” so that you can
confirm the operation.
9. Press [ENTER].
Move Event is executed.
10.Press [EXIT] several times to return to the Play page.
Erasing recorded data
(Track Erase)
Track Erase allows you to erase a specific part of recorded
data. Even if recorded data exists after the specified part, it
will not be moved forward to fill the gap left by the erasure.
Like a normal tape recorder, erasing can be considered
covering unwanted data by recording emptiness.
* Do not leave a portion of less than 1.0 seconds in length after
the erased portion. If a portion that short does remain, it will
end up being silent.
The three types of Track Erase are given below.
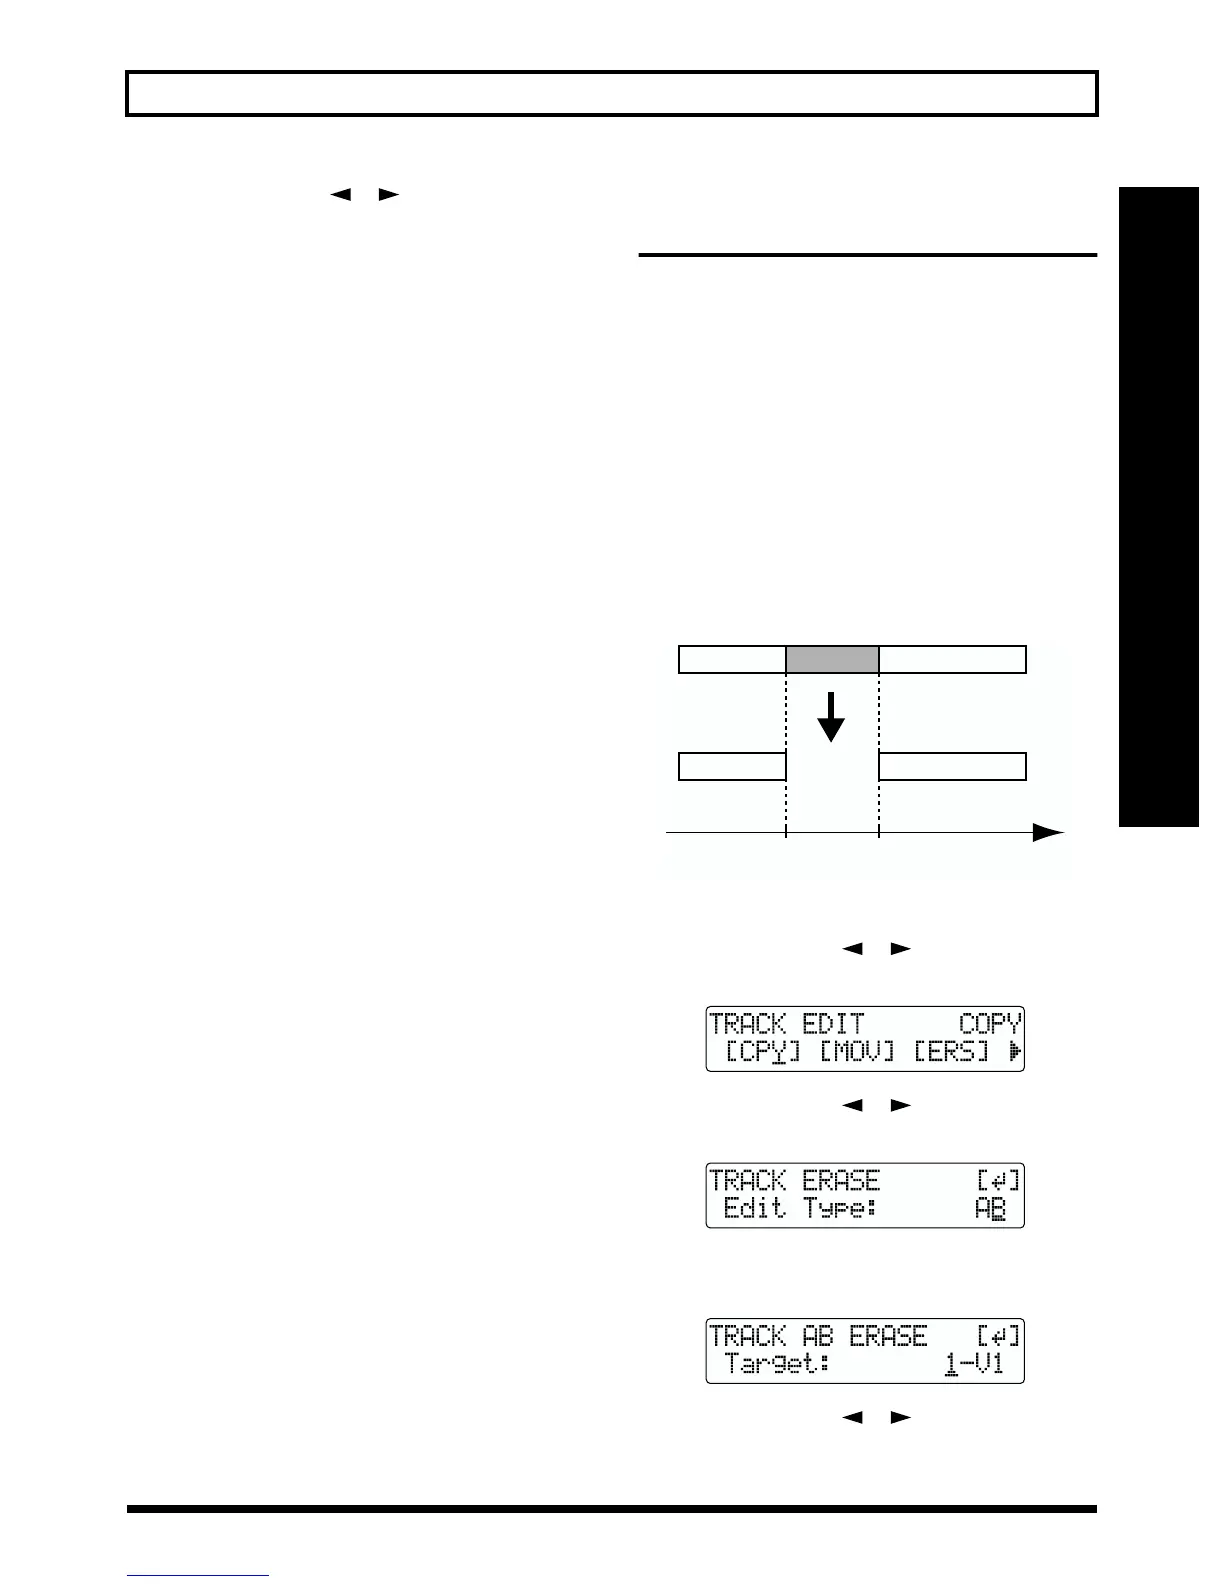
Erasing the repeated portion (AB)
Perform the procedure given below to erase the portion from
the repeat start (A) to the repeat end (B).
fig.R08-19
1. Press [UTILITY].
2. Press PARAMETER [ ] [ ] to move the cursor to
“TRK,” and press [ENTER].
fig.R08-02
3. Press PARAMETER [ ] [ ] to move the cursor to
“ERS,” and press [ENTER].
fig.R08-20
4. Turn the TIME/VALUE dial to select “AB” and press
[ENTER].
fig.R08-21
5. Press PARAMETER [ ] [ ] to move the cursor,
and turn the TIME/VALUE dial to select the track/V-
Track to erase from.
Repeat
Start (A)
Repeat
End (B)
Time