64
Using the Rhythm Guide
6. Set the final step style as “BREAK.”
* In case BREAK is not set, the pattern keeps playing back at the
final step.
7. Press PARAMETER [ ] repeatedly to display
“DRUM KIT.”
fig.R12-06
8. Turn the TIME/VALUE dial to select the drum kit.
Valid Settings: STD1, 2: Standard set
ROOM:
Set with moderate ambience
HEAVY: Suitable Hard rock set
JAZZ: Suitable for Jazz
HIP-HOP: Suitable for dance music
HOUSE: Suitable for dance music
REGGAE: Suitable Reggae kit
808: Basic TR-808 set
* You can only set one drum kit per pattern. You cannot set a
different drum kit for each form.
9. For how to save the pattern you created, continue on to
“Saving the pattern” (see p. 65).
Press [PATTERN ARRANGE] or [EXIT] to return to the
Play screen.
The patterns you create are only temporary. If you
return to the Play screen without saving a pattern, and
press [PATTERN SELECT] to display the Pattern
Selection screen, the pattern is given the name “TMP.” If
you then select another pattern, the data of the pattern
you created will be lost.
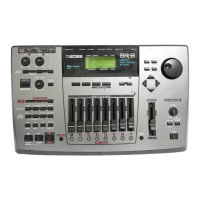
Inserting a step
Perform the procedure below to insert a new step into the
location of the present step.
fig.R12-07
* The parameter value of inserted step will be the same as of the
targeted step.
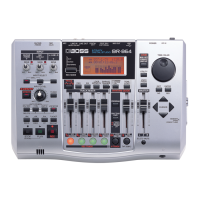
1. Press PARAMETER [ ] repeatedly to move the
cursor to “INS.”
fig.R12-08
2. To insert a step, press [ENTER].
To cancel the operation, press [EXIT].
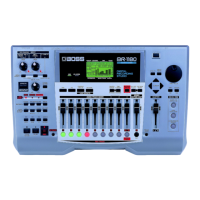
Erasing a step
This erases the content of the currently selected step. The
content of the following steps are brought forward to fill the
erased step.
fig.R12-09
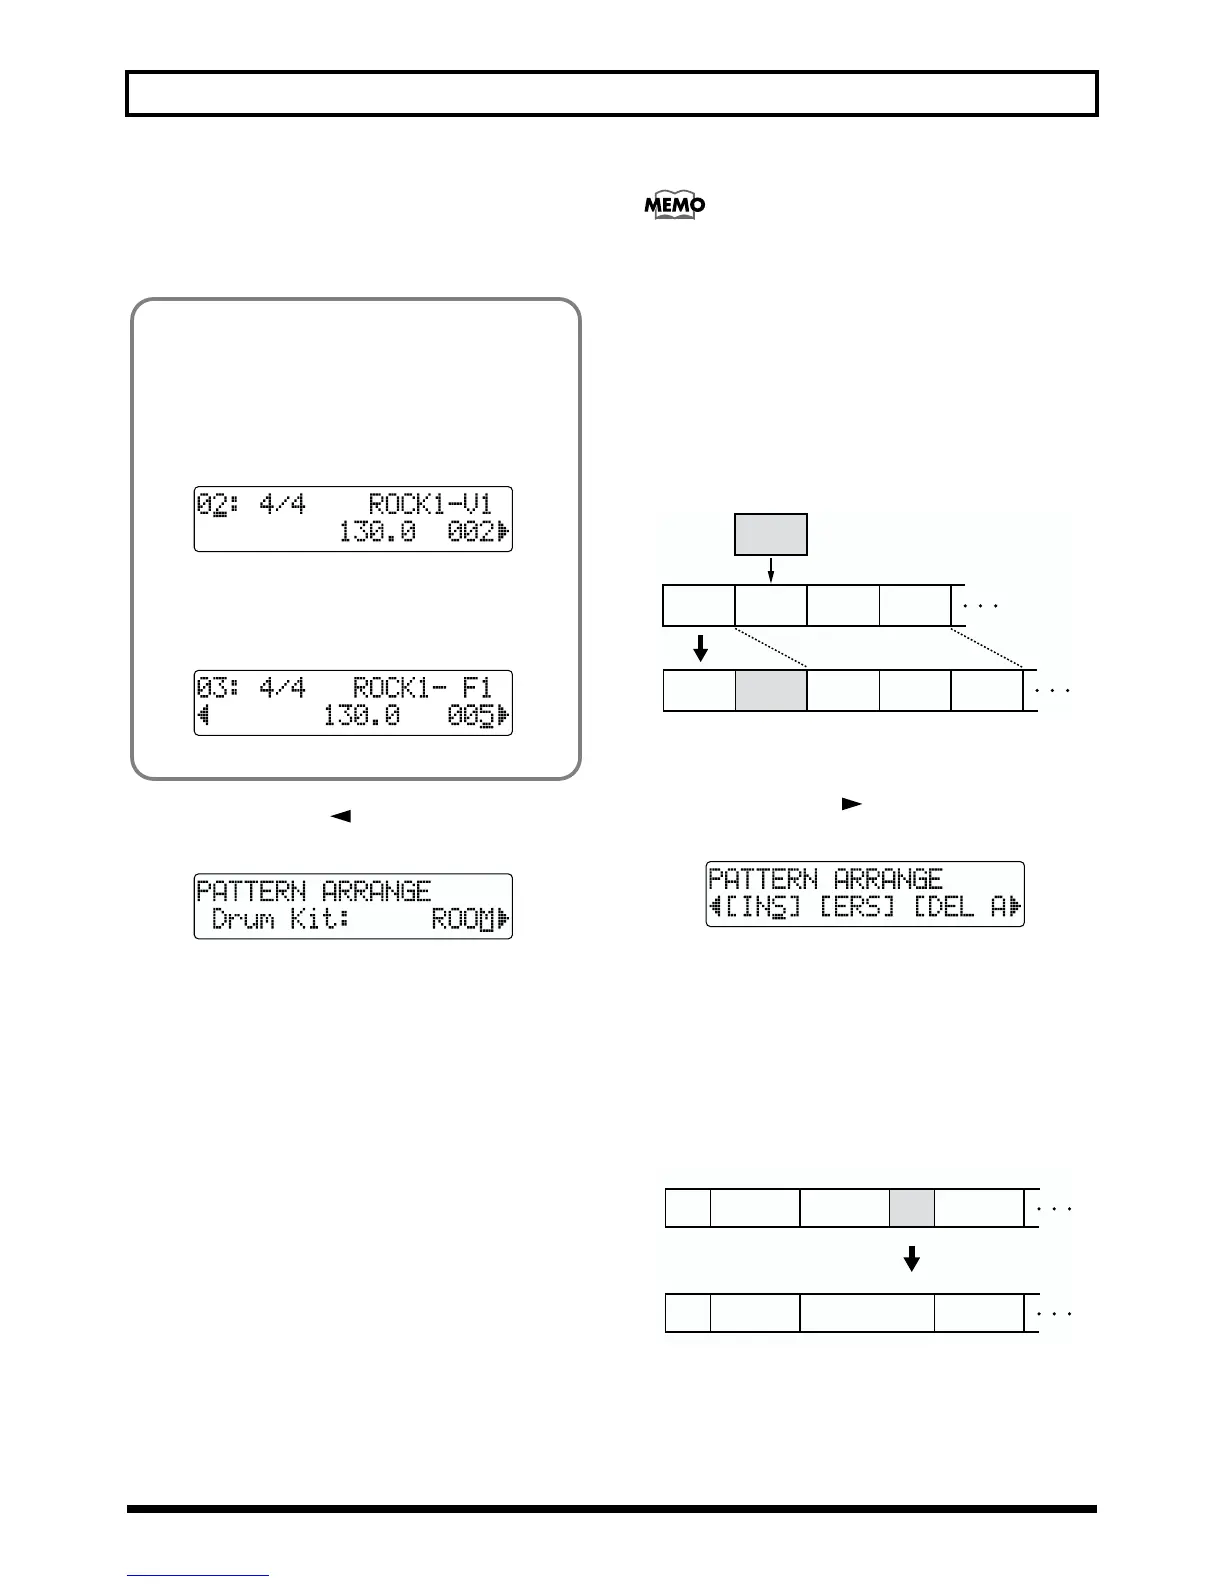
Having the pattern change to another form
in the middle of one form
For example, let’s say you want to insert F1 (consisting of
one measure) at the fourth measure of the four-measure
form V1. Here's how you would accomplish this:
1. Create the step that specifies V1.
fig.R12-04
2. Move to the next step.
3. Specify F1 and change the starting measure setting
to that of one measure earlier.
fig.R12-05
Step 2 Step 4
Step 1
Step 3
Insert
Step 2 Step 5
Step 1
Step 3 Step 4
Erase
Step 1
12 4 67 9
INT
V2 V1 F1
V2
Step 2 Step 3 Step 4
Step 5
Step 1
12 4 7 9
INT
V2
V1
V2
Step 2 Step 3
Step 4