ICEfx™ Cryoablation System
3-1
3 SYSTEM SETUP
Table 3-1 depicts the order and steps of ICEfx™ Cryoablation System setup. This section describes
each step in detail.
Table 3-1. System Setup Flow
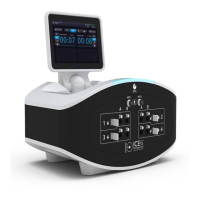
1.
Set-up Console
• Conrm the availability of gas, needles, and
accessories
• Ensure the Console is placed on a at, stable
surface (if not attached to the ICEfx Cart)
• Lock the brakes on the cart
• Plug the power cord into a hospital grade power
outlet.
• Ensure the Vent Valve is closed and the Argon
Shut‑o Valve is ON
• Power the ICEfx Console ON
• Login
2.
Connect Argon
• Attach the safety cable and connect the argon gas
supply line between the Console and argon cylinder
• OPEN the valve on the argon cylinder
• Verify gas pressure is within working limits for the
cryoablation procedure.
3.1 Preparation for Use
Prior to using the ICEfx Console, inspect the Console, power cord, brakes, safety cable, gas supply
line, and the monitor touch screen to ensure they are not damaged.
If any of the components are damaged, contact Galil Medical Customer Service.
CAUTION. If condensation is present on the system, allow the system to dry completely for 12 hours
prior to powering up the system. Powering up the system with condensation could result in permanent
damage to the electrical boards, causing the system to be inoperable.