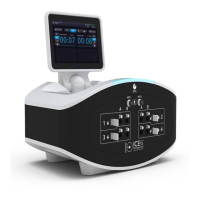
ICEfx™ Cryoablation System
5-1
5 PERFORMING THE CRYOABLATION PROCEDURE
Table 5-1 outlines the steps for testing the cryoablation needles and Multi-Point Thermal Sensors™
(MTS) and performing the cryoablation procedure. This section describes each step in detail.
Table 5-1. Cryoablation Procedure Flow
1.
Needle/MTS
Testing
• Press the START CASE button
• (Optional) Use the Edit Case Information Screen to
enter patient treatment information
• Select and prepare sterile needles and MTS for
testing
• Connect needles to the Needle Connection Panel
and lock channels
NOTE: Only place needles of the same type in a
single channel
• Connect MTS to the MTS ports, if applicable
• Perform Needle Integrity and Functionality Testing
2.
Perform
Cryoablation
Procedure
• Insert needles and MTS into target tissue
• Initiate freeze activity by pressing the Freeze button
to select the freeze intensity, and then pressing the
Start button to start freezing.
• Using image guidance, continuously monitor iceball
formation throughout the procedure
• Initiate thaw activity:
o For CX needles, press the Thaw button to
select the thaw mode, and then press the
Start button to begin thawing.
o For non-CX needles, needle release
from an iceball will only be achievable with
passive thaw.
• Press the Channel button and select Program
Cycles to program freeze-thaw cycles.
3.
End
Procedure
• Remove needles and MTS
• End Procedure (Press the END CASE button on
Procedure Screen)
• View and save report if desired
o Export report to a Galil Medical supplied
USB ash drive