5-4 User Manual
OPTIONAL: If additional testing is required, press the Test button again to repeat the test.
NOTE: For CX needles, if a previously tested needle is moved to a new channel during a
procedure, the ICEfx Cryoablation System will recognize the needle has successfully completed
the Needle Integrity and Functionality Test.
During testing, carefully watch each needle for the following:
Flush: Ensure no bubbles are formed along the needle shaft and tip.
WARNING. A defective cryoablation needle that has a gas leak can
cause a gas embolism in the patient. Never use a defective needle for
a cryoablation procedure. Return defective needles to Galil Medical for
evaluation.
Freeze: Ensure that ice begins to form around the tip of the needle.
WARNING. A needle is defective if there is no ice formation during the
Freeze phase. Do not use a defective needle. Obtain a new needle and
repeat the testing procedure.
Thaw: For CX needles, ensure that the iceball detaches from the tip of the needle
and that no bubbles escape from the needle tip.
For non-CX needles, ensure that no bubbles escape from the needle tip.
A non-CX needle will not actively thaw the needle. Wait for the iceball to
passively thaw and detach from the needle tip.
During the Needle Integrity and Functionality Test, the Gas Indicator for the argon cylinder
provides an estimate of the time remaining before depletion of the cylinder assuming that all
connected needles are operated simultaneously (reference Section 4.3.2).
Upon successful completion of the Needle Integrity and Functionality Test, the remaining control
buttons on the channel become active. The needle(s) are ready for use.
10. When using Multi-Point Thermal Sensors (MTS), prepare the desired number of sensors for
testing. The ICEfx System supports use of two thermal sensors.
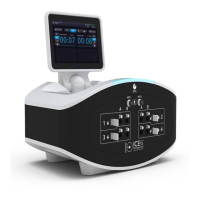
11. Connect each thermal sensor to an MTS connection port by pushing the connector into the port.
Ensure that the rectangular tongue on the MTS connector is aligned with the groove at the top of
the connection port for proper MTS insertion.
12. Conrm MTS functionality by verifying that the connected sensor produces a reasonable
on-screen temperature reading (e.g., close to room temperature) on the Procedure Screen.
CAUTION:
• Do not use an MTS that has failed the thermal sensor functionality testing; erroneous
temperature measurements may be displayed.
• Do not allow the MTS to touch the cryoablation needle during use; erratic temperature
measurements may be displayed.