6
In Paper Size, enter the height and width of the original. Here, enter 43.00 cm in Height and Width.
7
In Non-Printable Area, enter 0.5 for the top and side margins and 2.3 for the bottom margin. Here, measure-
ments are entered in centimeters.
8
Double-click Untitled in the list at left in the Custom Paper Sizes dialog box and enter the paper name—in
this case, 430*430.
9
Click OK to close the Custom Paper Sizes dialog box.
10
In the FPaper Size list, click the size of the original. In this case, click 430*430, the size you registered.
11
If you configured the settings using the Page Attributes dialog box, click OK to close the dialog box, and then
select Print from the application software menu.
12
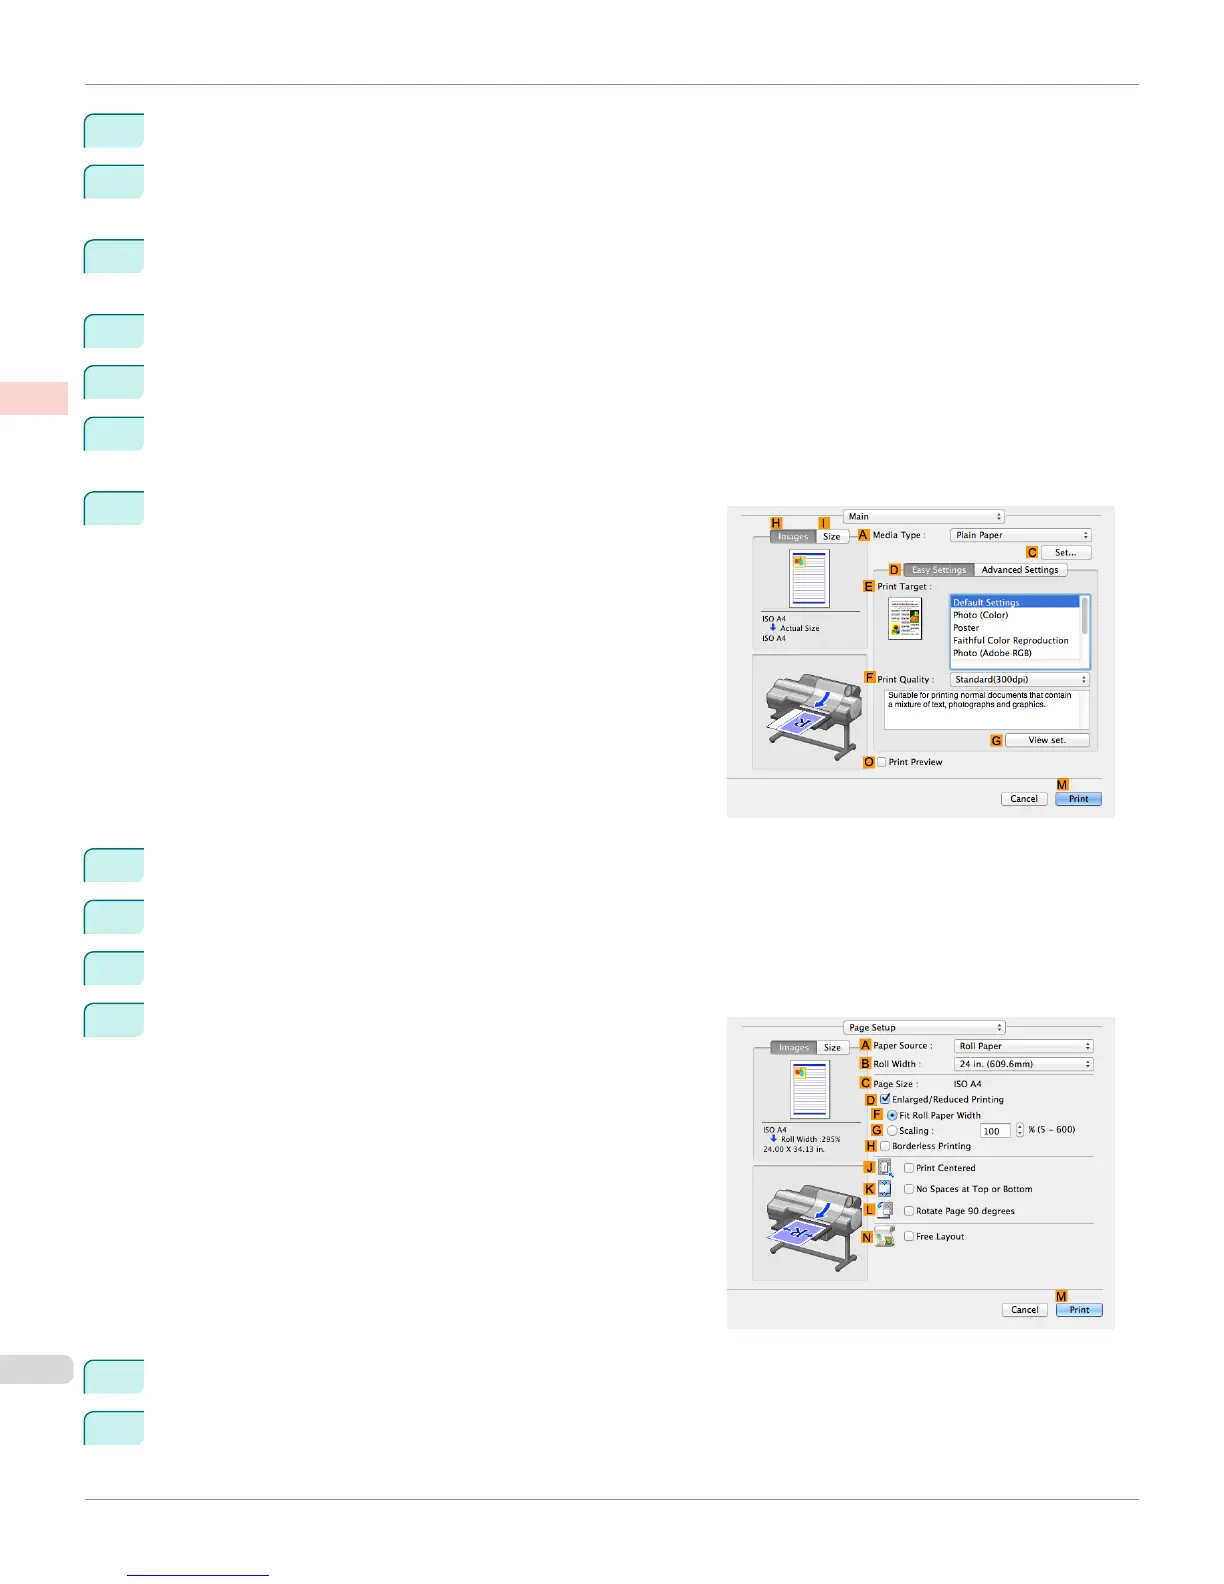
Access the Main pane.
13
In the AMedia Type list, select the type of paper that is loaded.
14
After confirming that DEasy Settings is selected, select from the EPrint Target list.
15
Make your selection in the FPrint Quality list.
16
Access the Page Setup pane.
17
Click Cut Sheet in the APaper Source list.
18
In CPage Size, make sure 430*430 is displayed, as registered in Page Setup.
Printing on Non-Standard Paper Sizes (Mac OS)
iPF6400S
User's Guide
Enhanced Printing Options Printing banners or at other non-standard sizes
110

 Loading...