0F40-055
The installation procedure varies depending on the operating system. See the appropriate procedure according to your
operating system.
Windows Vista, 7, and Server 2008
Windows XP and Server 2003
It is recommended that normally the printer driver be installed using "Easy Installation" on the supplied CD-ROM (CD-
ROM Setup).
You can specify the printer connection settings and install the printer driver using "Easy Installation" as a series of
operations. The e-Manual is also installed simultaneously.
"Easy Installation"
Windows Vista, 7, and Server 2008
1
Make sure that the printer and computer are connected properly, and the printer is turned ON.
"Connecting the Printer and Computer"
2
Turn the computer on, and then log on to Windows as a user with administrative rights.
3
Open the printer folder.
"Basic Operations/Various Information for Windows"
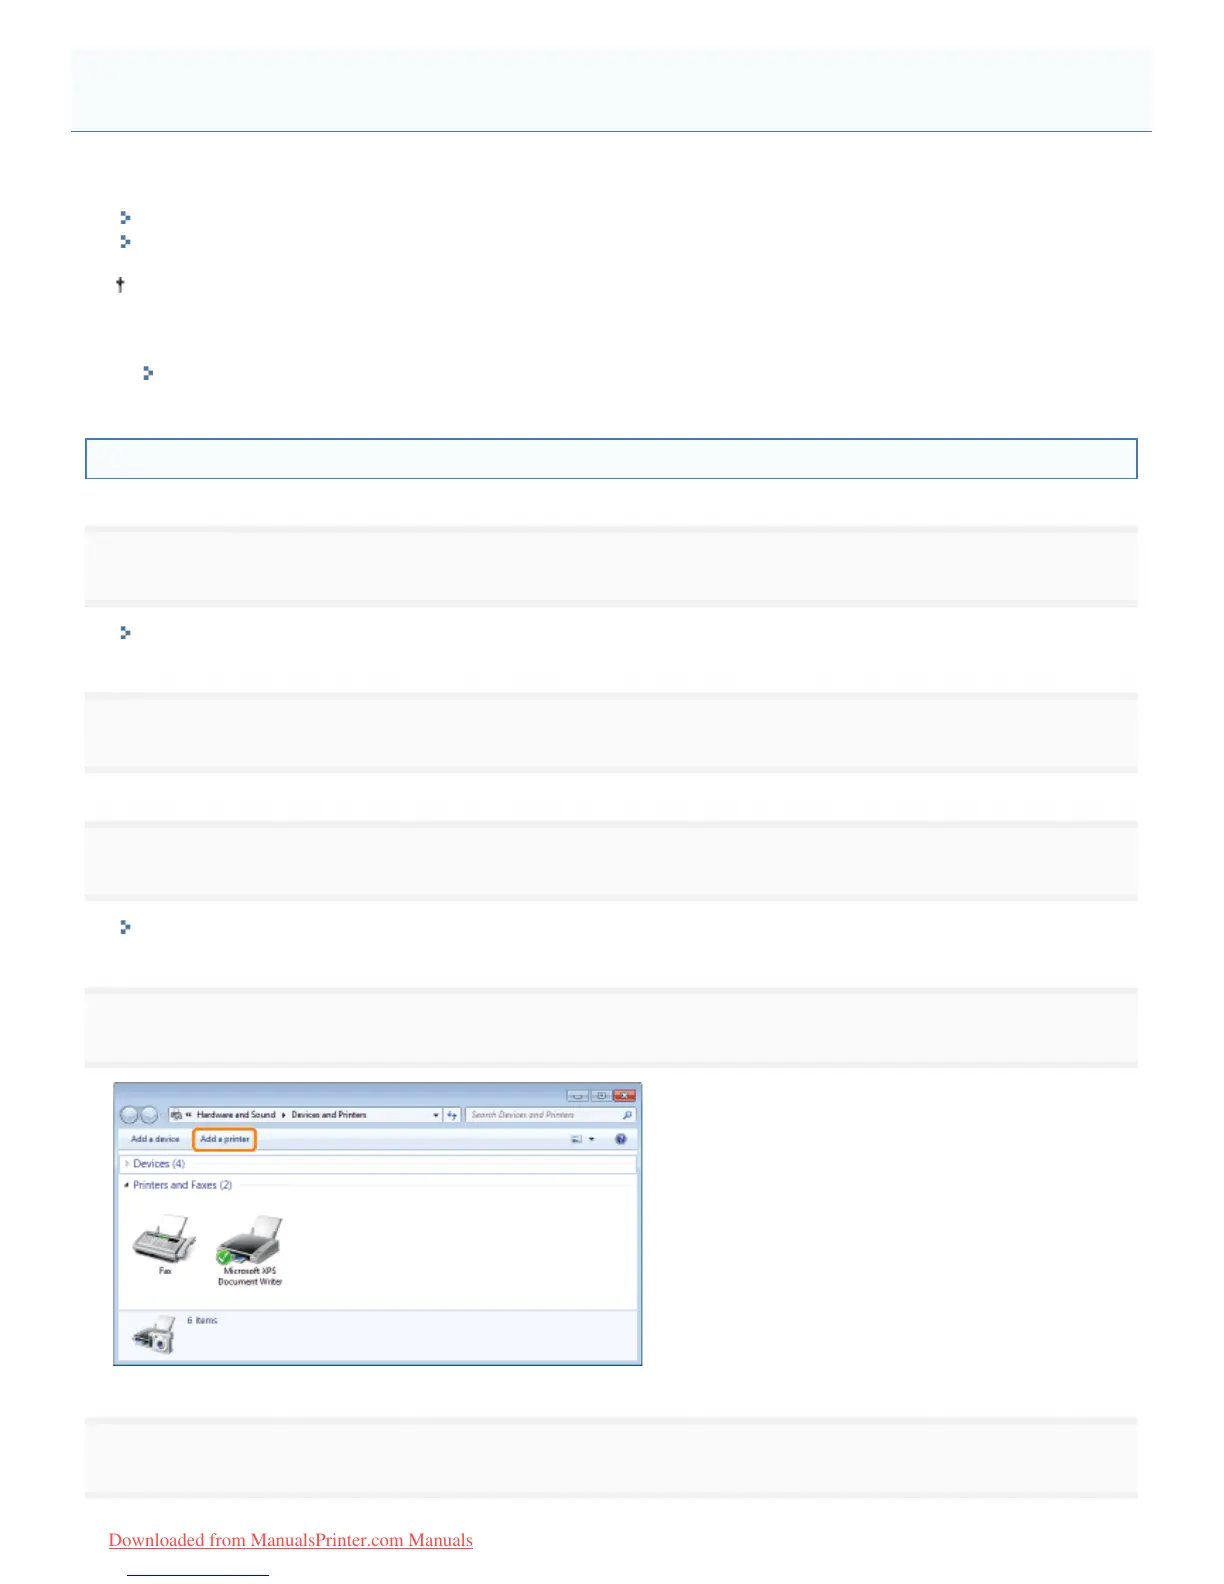
4
Click [Add a printer].
5
Click [Add a local printer].
Setting a Port and Installing the Printer Driver
㻞㻞㻣㻌㻛㻌㻡㻝㻠
Downloaded from ManualsPrinter.com Manuals



 To Next Page