ED 15062-7 • MICROTECH II CHILLER CONTROLLER 14 www.DaikinApplied.com
TyPICal aPPlICaTIon: mInImum InTegraTIon
TyPICal aPPlICaTIon: mInImum InTegraTIon
When you have integrated the unit into your network, you can
monitor and control unit operation from your workstation. At a
minimum, you can:
• Display and monitor data points
• Turn the unit on or off
• Operate the unit safely
Set up the Unit for Network Control
Unit Setup for Centrifugal Chiller MicroTech II Network Control:
1. Disable the chiller. The chiller should not be operating
while performing this setup.
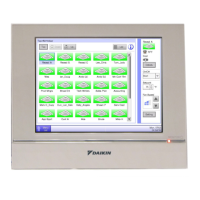
2. At the chiller touch screen interface panel,
a. In the SETPOINTS MODE screen, set the #9
setpoint, to the appropriate BAS Protocol. Use the
Operator Password of “2001.”
b. In the SETPOINTS MODE screen, set the #3
setpoint, Control Source to Local
3. Verify with the chiller/control company technician that the
chiller is operational on BAS.
4. In the SETPOINTS MODE screen, set the #3 setpoint,
Control Source to BAS.
Setup for all Other Chillers MicroTech II
Network Control:
1. Set the Set Unit Setpoint screen 1 initially to Source =
Keypad.
2. Change the Protocol default to the appropriate BAS
Protocol in the applicable menu screen shown in the
table below.
3. Verify with the chiller/control company technician that the
chiller is operational on BAS.
4. Set the Set Unit Setpoint screen 1 to Source = Network.
Model AGZ-A ACZ-A AGZ-B ACZ-B AGS-B AGS-C WGS
WMC,
WSC,
WDC
WGZ/
TGZ
Menu
Screen
9 6 9 7 12 14 15 14 10
Password 2001 2001 2001 2001 8945 8453 8745 2001 2001
NOTE: Models AGZ-A/B, ACZ-A/B, WGZ, and TGZ have one
unit controller, while models AGS-B/C and WGS have
one unit controller and multiple circuit controllers. Unit
settings for AGS-B/C and WGS models are adjusted
on the unit controller.
Display Important Data Points
Typical workstation displays of MicroTech II Unit Controller
attributes include the following signicant data points (page
number of detailed description in parenthesis). Each data
point is identied with a number that also identies it in the
Comprehensive Data Point Tables. These data points are also
boldface in the comprehensive tables. References in the text of
this section also identify these data points with a number and
shading.
Table 1: Signicant Data Points
No. Conguration No. Temperatures No. Setpoints No. Alarms
1
Chiller Status
(page 33)
5
Evaporator
Entering Water
Temperature
(page 61)
9
Cool
Setpoint
(page 58)
11
Current
Alarm
(page 87)
2
Chiller Mode
Setpoint
(page 31)
6
Evaporator
Leaving Water
Temperature
(page 63)
10
Capacity
Limit
Setpoint
(page 25)
12
Clearing
Alarm
(page 97)
3
Actual
Capacity
(page 23)
7
Condenser
Entering Water
Temperature
(page 50)
4
Chiller Enable
(page 27)
8
Condenser
Leaving Water
Temperature
(page 52)
You can display any number of additional data points based on
job requirements or individual preference. See LONWORKS
Variables on page 19 for lists of all LONWORKS Variables
available to the network. See BACnet Standard Objects
on page 15 for list of all BACnet Objects available to the
network. For a more detailed description of all available data
points, see the Detailed Data Point Information on page 21.

 Loading...
