Steps
1. Slide the rear I/O-ports on the system board into the rear I/O-slots on the chassis and align the screw holes on the system
board with the screw holes on the chassis.
2. Replace the 13 (6-32) screws that secure the system board to the chassis.
3. Align and place the bottom-air shroud on the system board.
4. Replace the five (M3) screws to secure the bottom-air shroud to the system board.
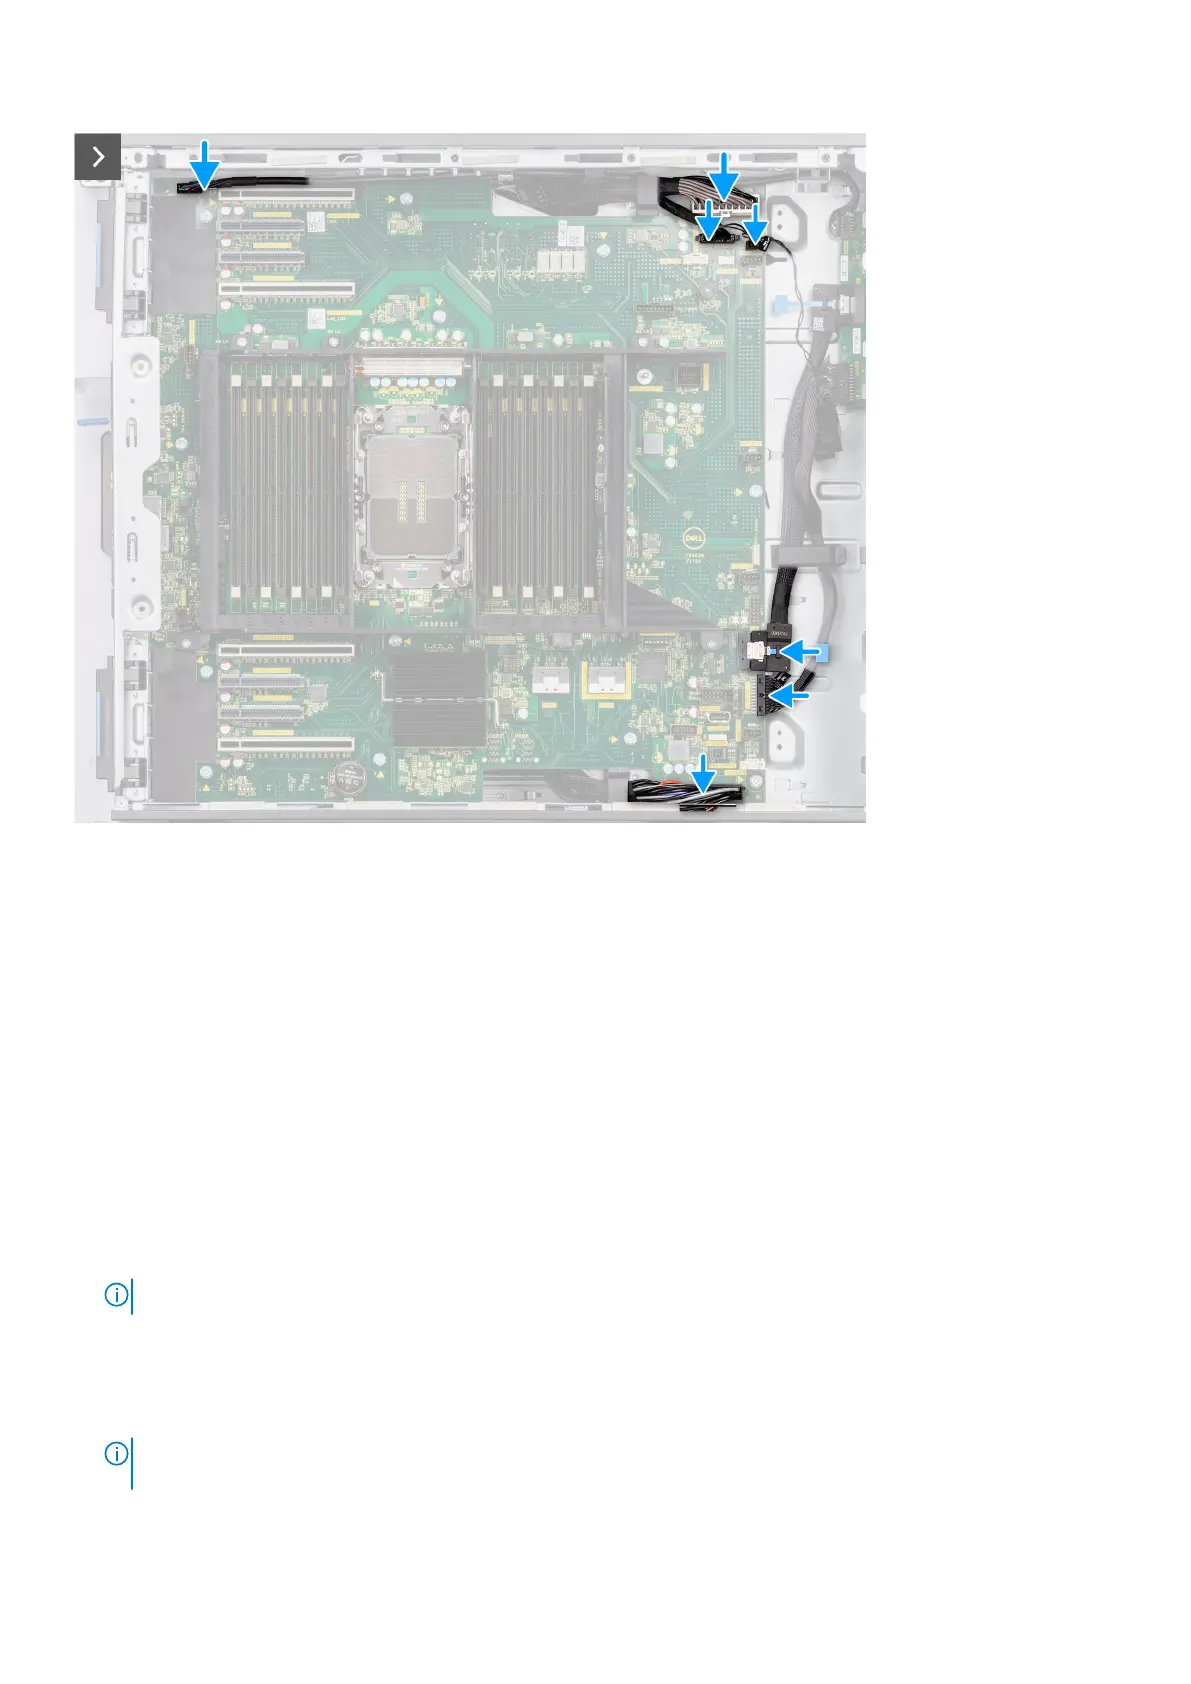
5. Connect all the data cables to the connectors on the bottom side of the system board.
6. Connect all the cables to the connectors on the front side of the system board.
Next steps
1. Install the right-side cover.
2. Install the processor.
3. Install the front-fan assembly and rear-fan assembly.
4. Install the heat-sink assembly.
5. Install the PCIe holder.
6. Install the powered GPU.
NOTE: Install the graphics-card rubber protector to the chassis after replacing the system board.
7. Install the memory module.
8. Install the air shroud.
9. Install the front bezel.
10. Install the left-side cover.
11. Follow the procedure in After working inside your computer.
NOTE:
Your computer’s Service Tag is stored in the system board. You must enter the Service Tag in the BIOS setup
program after you replace the system board.
Removing and installing components 115