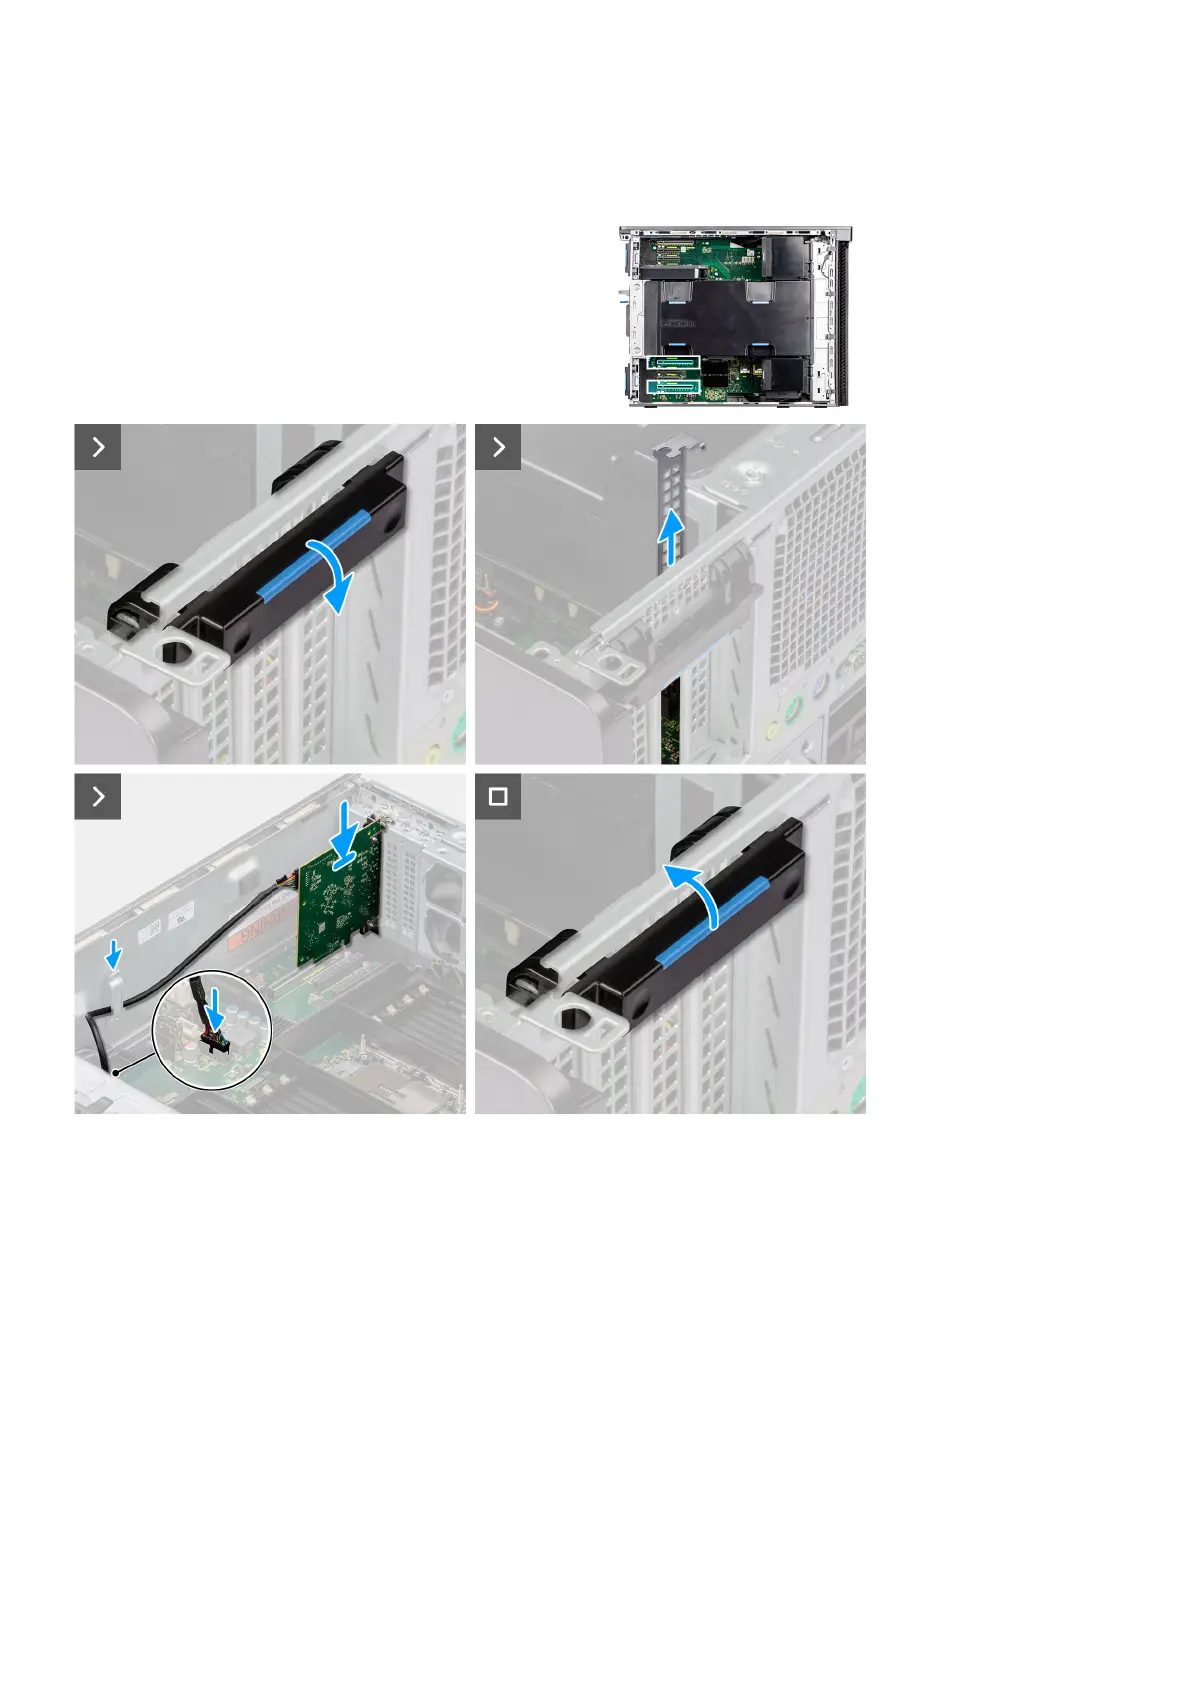
About this task
The following images indicate the location of the Thunderbolt 4 PCIe card and provide a visual representation of the installation
procedure.
Steps
1. Push the PCIe latch to open the PCIe door.
2. Align the Thunderbolt 4 PCIe card with the expansion-card slot on the system board.
3. Using the alignment post, connect the Thunderbolt 4 PCIe card to the connector and press down firmly. Ensure that the
Thunderbolt 4 PCIe card is firmly seated.
4. Route the Thunderbolt 4 PCIe through the routing clip on the chassis.
5. Connect the Thunderbolt 4 PCIe cable to the connector on the system board.
6. Close the PCIe door.
Next steps
1. Install the air shroud.
2. Install the left-side cover.
3. Follow the procedure in After working inside your computer.
Removing and installing components
83