9.4.5 Data Exchange – Implicit Message
When the connection between devices is established, you can use exchange data between devices. This section
provides an overview of how to create a data exchange table.
Download
Data Exchange
Data Exchange
Set up
Data Exchange
Table
Network View
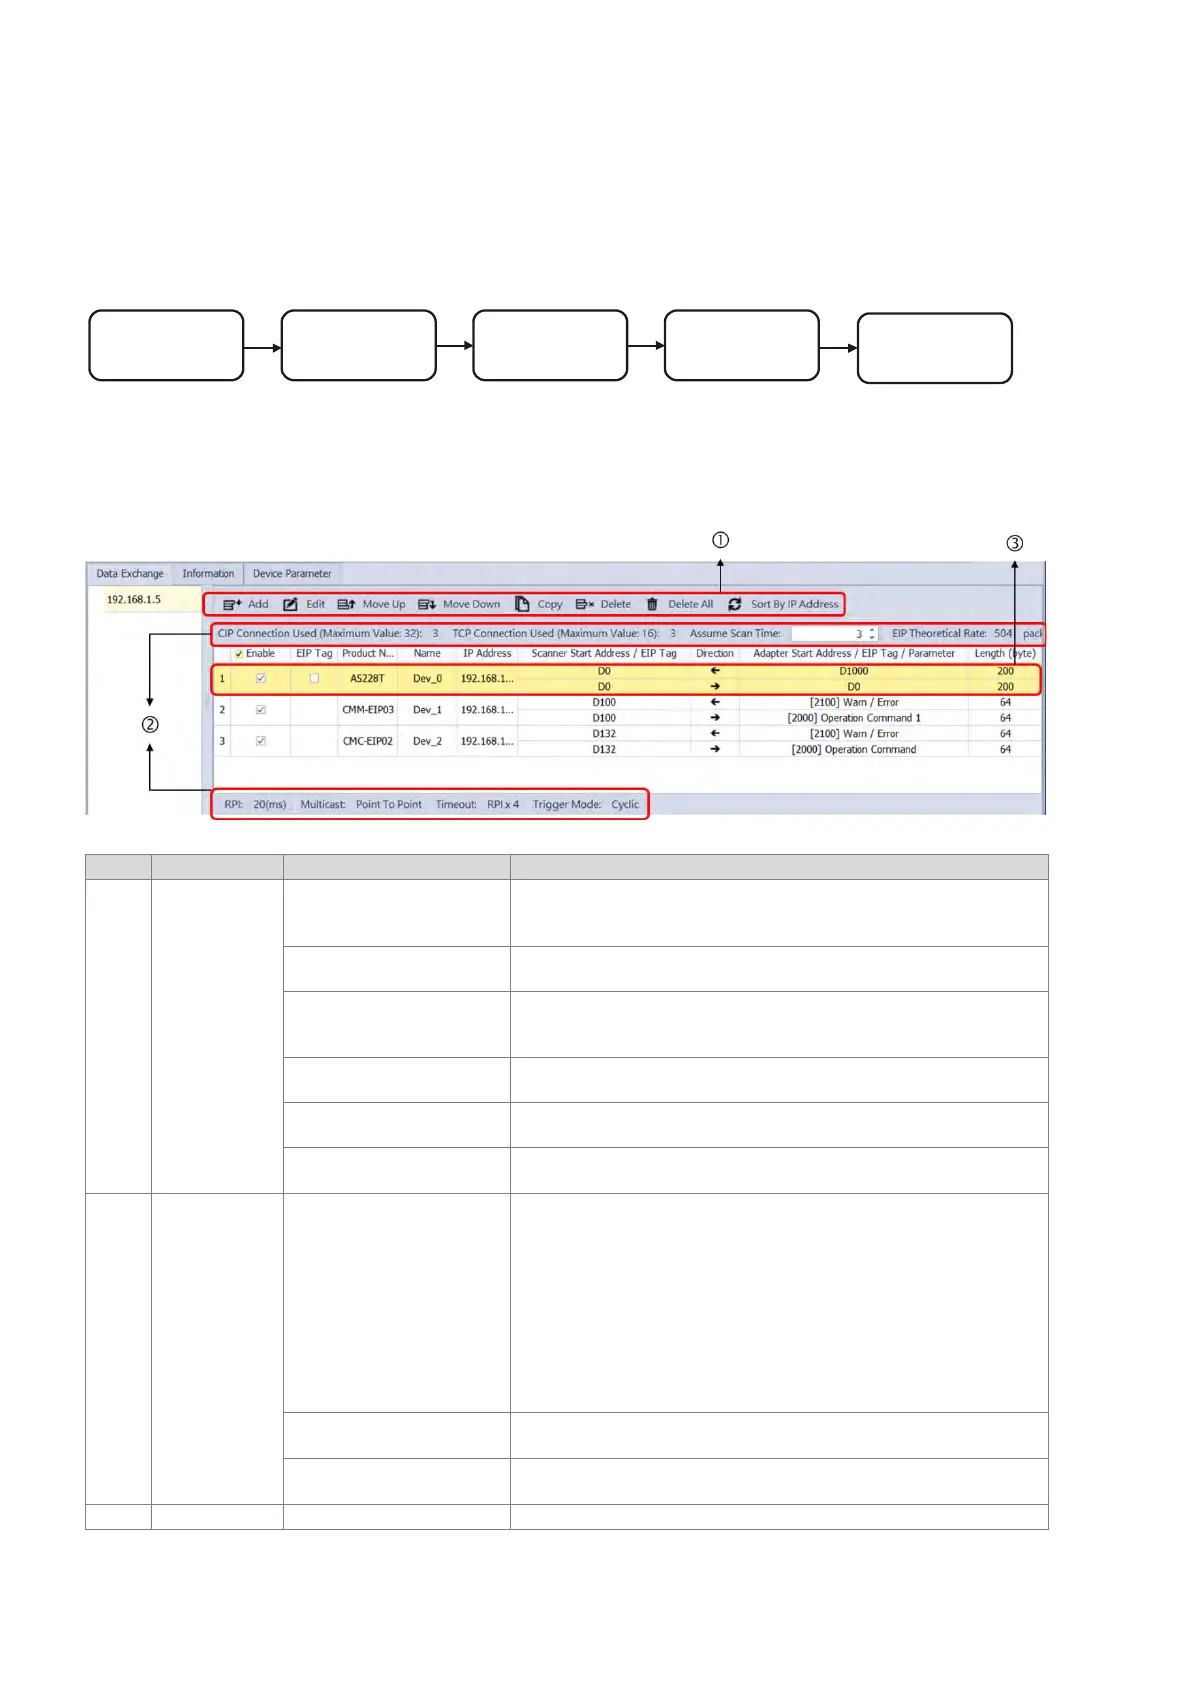
9.4.5.1 Data Exchange page
1.
Data Exchange Table
Tool bar
Add
Use this button to add new item for data exchange. Click the IP
address column of the newly added row to select the IP address
of the to-be-added device.
Edit Use this button to open the data exchange table for editing.
Move Up / Move Down
Use this button to change the order of data exchange. (this order
is
related to the order in SR1020 to SR1083, the EtherNet/IP
connection 1 to 32).
Copy / Delete Use this button to copy or delete the selected row.
Delete All Use this button to delete the whole data exchange table.
Sort By IP Address
Use this button to arrange the order of data exchange by IP
addresses.
Information
bar
Number of connections
CIP Connection Used: the total number of connections for
data exchange
TCP Connection Used:
the total number of connected
devices
Connection for data exchange;
independent EtherNet/IP connection. The number of connections
cannot exceed the maximum number of connections for the
Scanner. For example, AS Series can be connected to up to 16
adapters and the maximum number of connections
exchange is 32.
Communication capacity
Enter the assumed PLC scan time to estimate the network loading
for the data exchange. Refer to section 9.3.2 for more information.
parameters
Display the essential parameters of the selected row.
Enable or disable the data exchange of the connection.
Send Quote Requests to info@automatedpt.com
Call +1(800)985-6929 To Order or Order Online At Deltaacdrives.com
Send Quote Requests to info@automatedpt.com
Call +1(800)985-6929 To Order or Order Online At Deltaacdrives.com
 Loading...