Winder
72 Service Instructions 869-M PREMIUM - 00.0 - 07/2018
Setting the winder filling quantity
The position of the arms (4) on the winder lever (3) determines the filling
quantity:
• Parallel: Automatic winding stop at 0.5 mm below the edge of
the winder
• Closer together: Automatic stop with larger filling quantity
• Further apart from each other: Automatic stop with smaller filling
quantity
4. Turn the screw (2):
• Arms (4) closer together: turn counterclockwise
• Arms (4) further apart from each other: turn clockwise
5. Put the completely filled bobbin onto the winder.
6. Fold the winder lever (3) upwards as far as it will go to the thread.
Setting the winder spacing
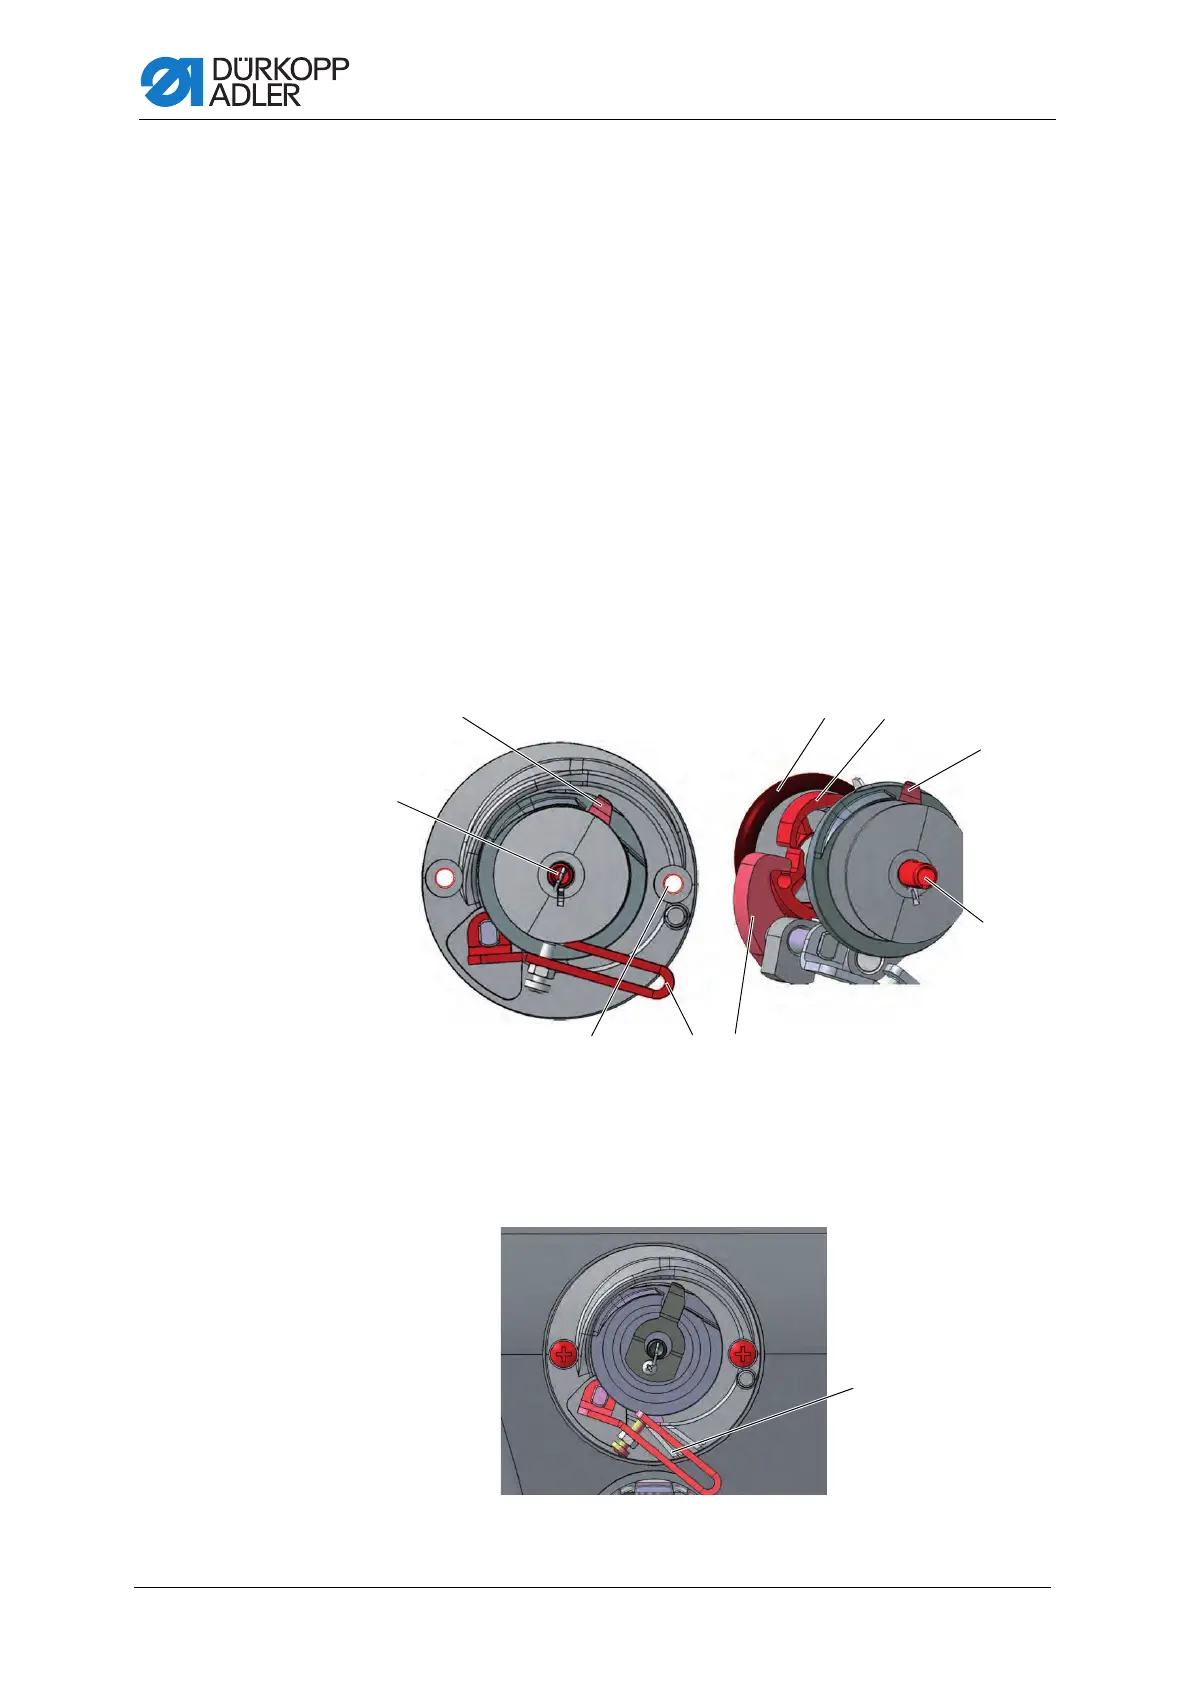
Fig. 56: Setting the winder (2)
Fig. 57: Setting the winder (3)
(3) - Winder lever
(5) - Thread-pulling knife
(6) - Winder spindle
(7) - Right-hand screw hole
(8) - Block
(9) - Locking disk
(10) - Winder wheel
(11) - Marking for XXL hook
 Loading...