G Service Rho 1012/1030
2
1
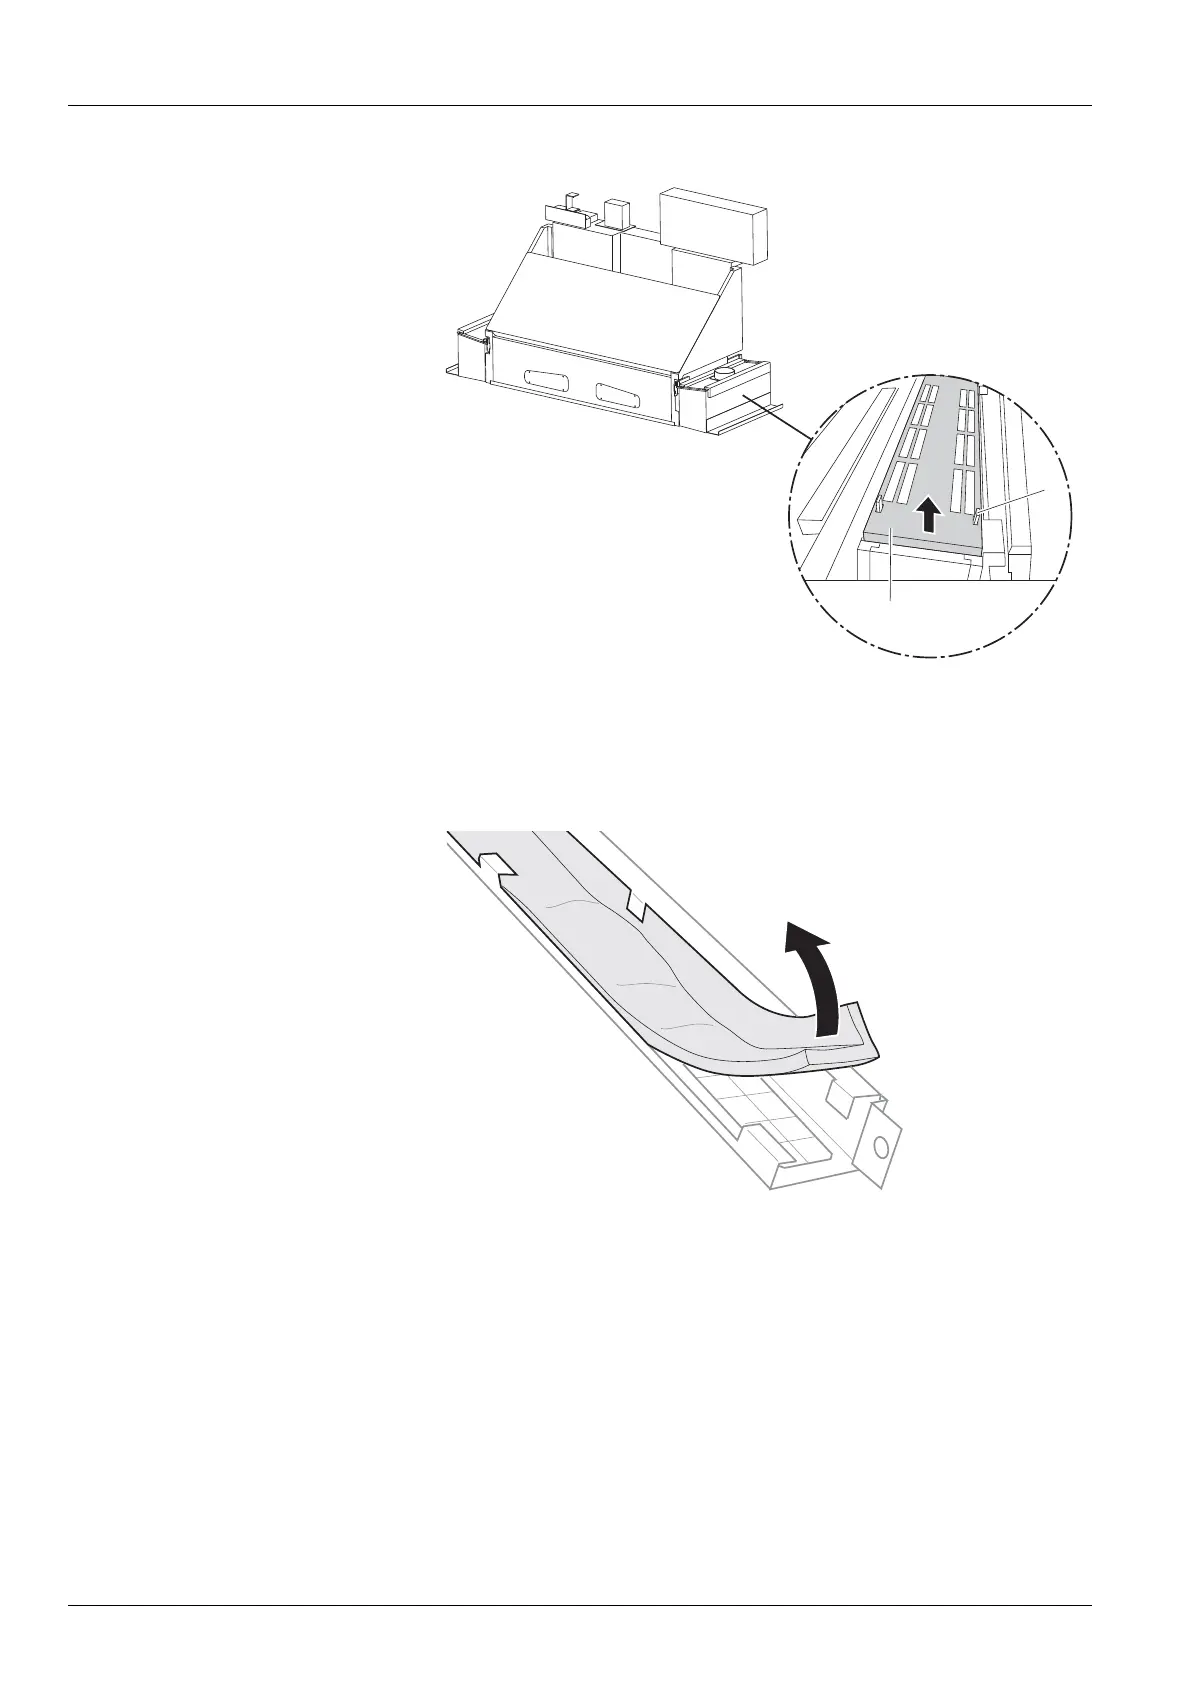
Fig. 80 Removing the air filter
6. Press the retaining brackets (2) slightly apart.
7. Remove mount (1).
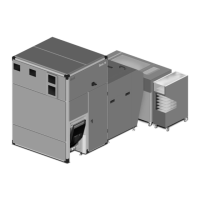
8. Check air filte r for soiling.
Fig. 81 Checking and, if necessary, replacing the air filter
9. If the air filter is black, replace it.
10. To reassemble, reverse the disassembly procedure.
126 / 147 2004 – 2013 © Durst Phototechnik AG – www.durst-online.com , Rho 101 2/103 0, Issued 07/20 13


 To Next Page