DESCRIPTION AND INSTALLATION
2-18 25364 Issue 8 March 2018
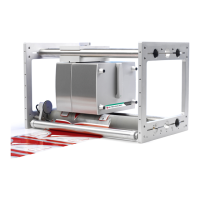
Set Up Communicator II Printer
• Load the cassette with ribbon. Follow the instruction on the cassette
unit for the ribbon path when fitting or replacing the ribbon.
See
“Threading the Ribbon” on page 2-45.
• Check the height of the print head to the print base.
Note: Use the shims to ensure the correct distance between print
head and substrate (0.2 to 2.0mm) for both CM and IM.
• Press the Connect button to establish a connection between the
printer and the Touchscreen
•Go to Settings > Production Line Setup > Line Movement and select
either CM or IM from the Line Movement pull-down menu.
(1) If you select the CM printer type:
(a) To check that the print head is on top of the roller, go to Settings
> Production Line Setup > Print Head.
(b) Set the Head Position so that the print head is on top of the roller.
Note: Some experimentation with this parameter may be required to
obtain the best print quality.
(c) Perform a print run.
(d) Go to Settings > IO Port > Set Up > Start Signal.
(i) At the Start Signal pull-down menu, select Front Edge.
(2) To select the IM printer type:
(a) Go to Settings > Production Line Setup > Line Movement > IM,
then to Print Head > Head Position and set it to 0 to obtain the
maximum print length.
(b) Go to Settings > IO Port > Set Up > Start Signal and select Front
Edge.
(c) Either:
(i) Go to Home Screen > Printer Status and select Test Print
OR
(ii) Make host machine active.