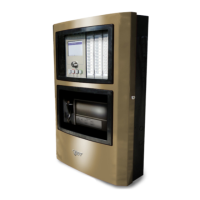
Chapter 5: Installation
EST3X Technical Reference Manual 111
• From the 3-SDU, program a control-display module toggle switch to turn
on the amplifiers and select the auxiliary channel. Label the switch
AUX_INPUT_ADJUST and add the following rule to the rules file:
[AUX_INPUT_SETUP]
SW 'AUX_INPUT_ADJ':
AMPON '*' TO 'Ch_Aux*';
System installation sequence
Follow these basic instructions when installing a panel. Refer to the installation
sheet that came with a component for specific instructions.
Notes
• Make sure the installation location is free from construction dust and debris,
and is not subject to extreme temperature ranges and excess humidity.
• Ensure sufficient floor and wall space, to avoid obstructions during installation
and servicing.
• When installing the cabinet, use fasteners that can support the full weight of
the cabinet, including standby batteries.
• Be sure to tighten the fasteners firmly to prevent the cabinet from vibrating.
• Remove a panel component from its protective antistatic packaging only for
inspection or installation.
• Do not connect standby batteries until initial panel power up (see “Initial
power up” on page 43).
• Install the power supply and any half-footprint modules on the backbox, and
any option cards on the back of the SFS1-CPU before installing the
SFS1-ELEC assembly. Refer to Figure 25 on page 113 for the footprint
locations on the backbox.
Sequence list
Note: Install all control panel components as instructed on the installation sheet
that came with the component.
1. Unpack the equipment and make sure it is not damaged. Be sure to remove
the installation sheets from component accessory bags.
2. Install the CAB6B Backbox at the required location and pull all the required
conductors through the conduit into the backbox.