Chapter 3: Operating instructions
44 EST3X Technical Reference Manual
Once powered up, you need to download a database created in the 3-SDU to the
control panel. You can create a startup version of the database to assign panel
addresses and perform preliminary device verifications. See “Creating an initial
startup database” on page 110.
Notes
• Before applying power to the control panel, make sure the standby batteries
are not connected to the PS10-4B Power Supply.
• The PS10-4B Power Supply should already be installed and mains AC
(primary power) wired to the input terminals (TB1). Refer to the PS10-4B
Power Supply Board Installation Sheet (P/N 3101774) if additional wiring
instructions are required.
• For a network system, download the initial database to each control panel
separately, to establish the correct control panel addresses. After the initial
download, all further downloads can be made from a single panel in the
network.
• For networked systems, you should not connect the network wiring until after
the project has been downloaded to each of the panels and you have cleared
all troubles except for network communication faults.
To power up the control panel for the first time:
1. Apply power to the control panel.
2. Connect the batteries to the battery wiring terminal on the PS10-4B Power
Supply. See “Standby batteries” on page 121.
3. Press the Panel Silence button and the Acknowledge button, if necessary.
4. Download the database as instructed in “Downloading a database”
on page 67.
5. If errors display on the LCD screen, refer to “Runtime errors” on page 146 for
information on resolving them.
6. For a network system, clear any faults between control panels.
7. Verify proper operation. Refer to “Routine maintenance and tests” on
page 151 for Initial and Reacceptance testing.
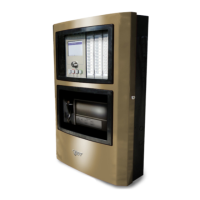
Using the rotary controller
The rotary controller on the EST3X user interface replaces the up, down, and
enter keys found on other user interfaces. Turning the rotary controller allows you
to scroll through event messages on the LCD screen, menus and lists, and